
Transform Your Yard with a Backyard Pond
Backyard pond installation is a rewarding DIY project that can create a tranquil water feature in your outdoor space. If you’re looking to install one yourself, here’s what you need to know:
Quick Installation Guide:
1. Choose location – Find a spot with 4-6 hours of sun daily, away from trees
2. Plan design – Determine size, shape, and depth (minimum 2ft for fish)
3. Gather materials – Liner, underlayment, pump, filter, rocks, plants
4. Dig the pond – Create shelves at different depths
5. Install liner – Add underlayment first, then liner with excess around edges
6. Add equipment – Install pump, filter, and any water features
7. Finish edges – Use rocks to secure and hide liner edges
8. Fill and landscape – Add water, plants, and surrounding features
A backyard pond brings multiple benefits to your outdoor space. It creates a peaceful retreat where you can unwind after a long day, listening to the gentle sounds of moving water. Beyond the aesthetic appeal, ponds attract wildlife like birds, frogs, and dragonflies, creating a mini ecosystem right in your yard.
The good news? You don’t need deep pockets to enjoy a backyard water feature. While professional installations can range from $5,000 to $50,000, a DIY approach can cost as little as $500 if you’re willing to do the digging yourself. Home-center kits start at just $70 for simple setups.
When planning your pond, consider the type that best suits your needs. Wildlife ponds focus on creating natural habitats, while koi ponds require greater depth and filtration. Ornamental ponds emphasize aesthetics with fountains or waterfalls, and preformed shells offer the simplest installation for beginners.
I’m Christopher Deanovic, Operations Leader at Task Masters, where I’ve overseen numerous backyard pond installations throughout Minnesota, creating custom water features that improve outdoor living spaces while ensuring proper drainage and long-term functionality. My hands-on approach combines innovative design with meticulous craftsmanship to deliver pond installations that become the centerpiece of any landscape.

Related content about backyard pond installation:
– landscape design for small yards
– outdoor lighting installations
– creative outdoor play spaces
Types & Costs: Choose Your Ideal Pond
Deciding what kind of water feature to create is the first exciting step in your backyard pond installation journey. Like choosing between chocolate and vanilla ice cream, each pond type has its own flavor and appeal – and the right choice depends entirely on what you’re hoping to achieve.
Wildlife Ponds
Wildlife ponds transform your backyard into a busy nature sanctuary. I’ve seen empty gardens become thriving ecosystems within weeks of installing these natural havens.
These ponds feature gently sloping sides that create a welcome mat for visiting creatures, varying depth zones that cater to different wildlife needs, and native plants that provide both shelter and snacks for your new neighbors.
“Wildlife ponds are one of the single best ways to increase biodiversity in your yard,” says Demi Fortuna of August Moon Designs. “Even small ponds can attract damselflies, dragonflies, frogs, and birds within days of installation.”
The beauty of wildlife ponds? They typically need minimal filtration, as they rely on Mother Nature’s balancing act instead of complicated equipment.
Ornamental Ponds
If you’re looking to create a showstopper that makes neighbors stop in their tracks, an ornamental pond might be your perfect match. These decorative features prioritize beauty with eye-catching fountains or statuary, clean geometric shapes, and architectural stone or paver edging.
Many homeowners improve their ornamental ponds with strategic lighting, creating magical nighttime displays that transform their yards into enchanted evening retreats. These ponds are particularly popular in formal garden designs where they serve as stunning focal points.
Koi Ponds
For those willing to commit to a more involved relationship with their pond, koi ponds offer best rewards. These living jewels of the water garden world require special accommodation: deeper waters (at least 3 feet, but ideally 4+ feet), robust filtration systems, and steeper protective sides.
“Koi can live for 40+ years and grow up to 3 feet long,” notes a pond specialist from the Twin Cities. “They’re an investment that requires proper planning.”
The payoff? Stunning, personalized fish that recognize their owners and can be trained to eat from your hand – living art that brings your water feature to life.
Natural/Ecosystem Ponds
If low maintenance appeals to you, ecosystem ponds might be the perfect solution. These self-sustaining systems mimic nature’s perfect balance with fish, plants, and beneficial bacteria working together in harmony.
Instead of relying on chemicals and constant intervention, ecosystem ponds use biological filtration through strategically placed rock and gravel. Many incorporate waterfalls, which aren’t just beautiful – they’re functional oxygen generators that keep your pond healthy.
Preformed Shell vs. Flexible Liner

| Feature | Preformed Shell | Flexible Liner |
|---|---|---|
| Cost | $70-$500 | $100-$1,000+ |
| Size Options | Limited | Unlimited |
| Shape Flexibility | Fixed | Customizable |
| Installation Ease | Simpler | More complex |
| Durability | 10-15 years | 20-40 years (EPDM) |
| Repair Options | Limited | Easily patched |
| Best For | Beginners, small spaces | Custom designs, larger ponds |
When it comes to liners, EPDM (Ethylene Propylene Diene Monomer) is the uncontested champion of backyard pond installation. These tough-yet-flexible liners withstand everything Minnesota weather can throw at them, remaining flexible even at bone-chilling -40°F temperatures. With a typical 20-year warranty and actual lifespans of 30-40 years, they’re a sound investment. The ideal thickness is 45-mil, offering excellent puncture resistance while still being pliable enough to hug every curve of your custom design.
Cost Factors
Let’s talk dollars and cents – what will your dream pond actually cost? The price tag for a backyard pond installation varies tremendously based on several key factors:
Your pond’s size and depth play a major role in determining cost. A cozy 200-gallon pond (roughly 3×6 ft) might run $500-$1,000 as a DIY project, while expansive water features can easily exceed $50,000.
Material choices significantly impact your budget too. Premium liners, natural stone edging, and top-of-the-line equipment will increase costs but often provide better longevity and appearance.
Additional features like cascading waterfalls, underwater lighting systems, and advanced filtration setups add both beauty and cost to your project.
“A fully equipped, landscaped, fish-filled backyard pond can be installed for around $500 if you do your own digging,” according to our experience at TMI Minnesota. “However, a more typical 176-square-foot pond installed by a professional starts at $5,000.”
Don’t forget to factor in ongoing costs: running a pump for an average pond adds about $260 to your annual electricity bill, plus occasional expenses for filter maintenance and water treatments.
Whether you’re dreaming of a simple meditation pool or a complex ecosystem teeming with colorful koi, understanding these options helps you choose the perfect pond for your space, lifestyle, and budget. At TMI Minnesota, we’re always happy to help you steer these choices to create the water feature that perfectly complements your outdoor living space.
Planning & Site Selection for Backyard Pond Installation
Finding the perfect spot for your backyard pond installation is a bit like real estate – it’s all about location, location, location! Let’s walk through how to choose the ideal setting for your water feature, with considerations that will save you headaches down the road.
Finding the Perfect Location
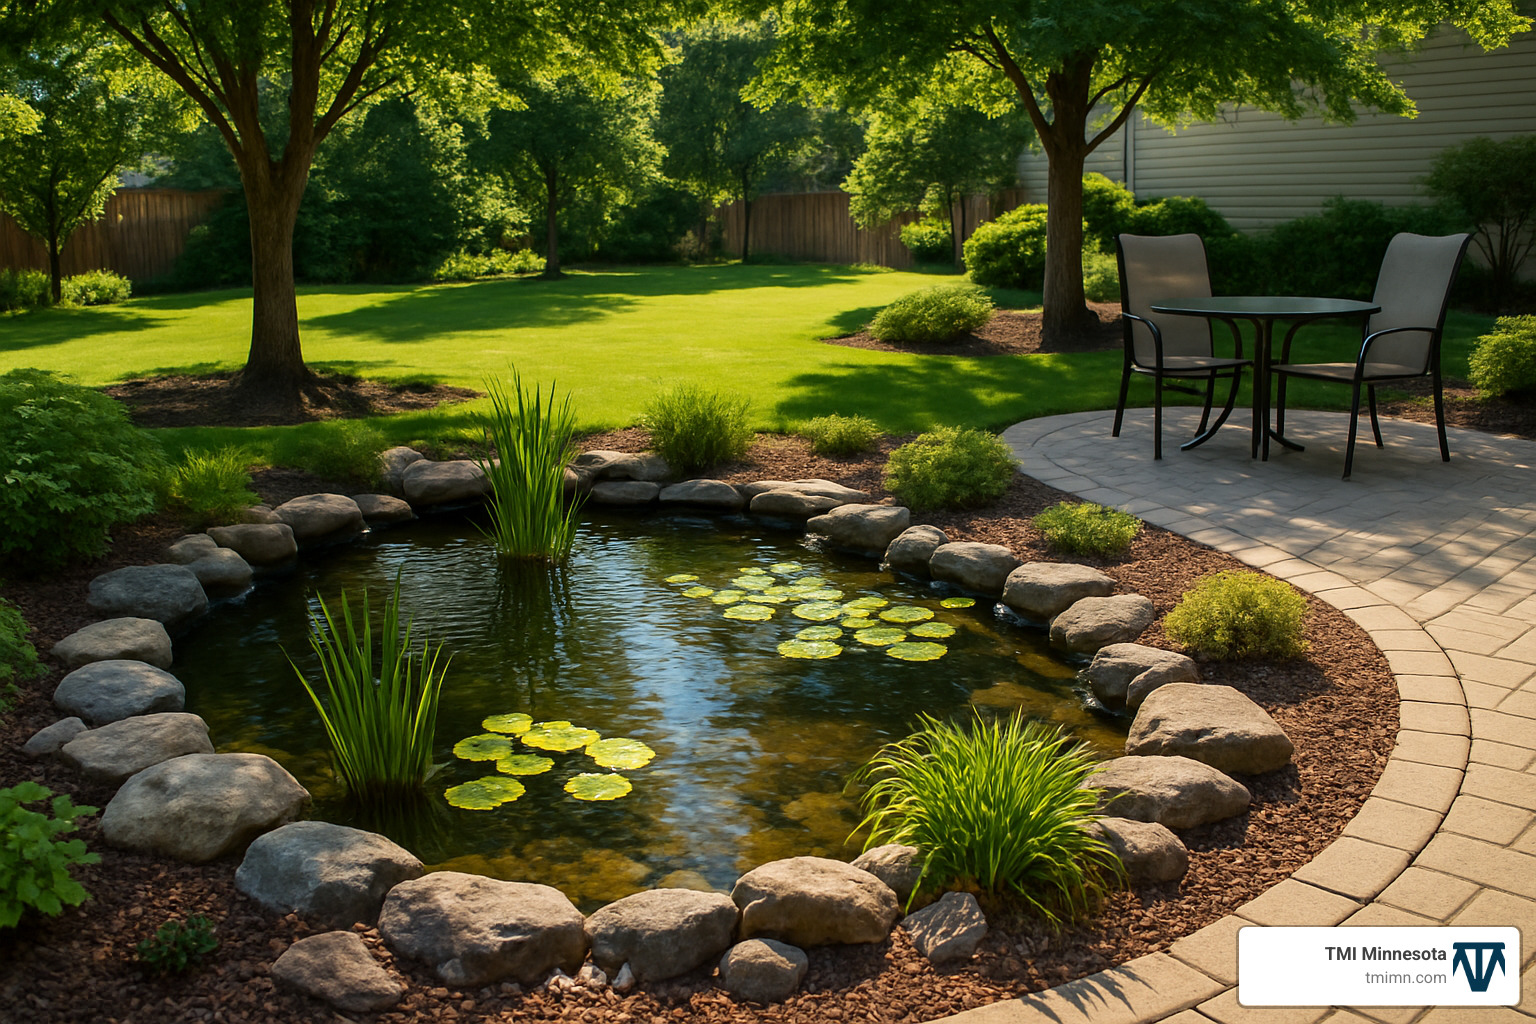
When I’m helping homeowners select a pond site, I always start with the sun-shade balance. Your pond needs about 4-6 hours of sunlight daily, but preferably morning sun with afternoon shade. This sweet spot gives aquatic plants enough light to thrive while preventing the water from overheating and becoming an algae farm.
“I always tell my clients that small ponds actually benefit from partial shade,” a landscape designer from TMI Minnesota told me recently. “When water gets too warm, you’re fighting a constant battle with algae, plus you’ll be topping off the pond more often due to evaporation.”
Position your pond where you can actually enjoy it – within 20 feet of your patio or deck is perfect. You want to hear that soothing water sound while relaxing outdoors! Just make sure to keep it at least 10-25 feet from your home’s foundation to prevent any moisture issues.
Trees are wonderful for shade, but they’re pond troublemakers. Placing your pond directly under trees means you’ll be fishing out leaves, seeds, and twigs constantly. Plus, those sneaky tree roots can eventually puncture your pond liner. A little distance goes a long way!
Safety and Regulatory Considerations
Before you break ground, pick up the phone and dial 811. This free utility-marking service isn’t just helpful—it’s required by law in most areas. Nothing ruins a pond project faster than accidentally hitting a gas line or electrical cable!
Your local building department might have specific requirements for your backyard pond installation. Some neighborhoods have setback requirements from property lines, depth restrictions, or mandatory fencing for ponds deeper than 18 inches. A quick call can prevent expensive corrections later.
If little ones visit your home, safety becomes paramount. Consider incorporating a shallow 18-inch shelf around the pond’s perimeter, installing child-proof fencing, or using a rigid grid just below the water surface. Some pond owners even add motion-activated alarms for extra peace of mind.
Technical Considerations
Water always finds its own way, so proper drainage is crucial. Choose a relatively level spot with good drainage around (but not through) the pond area. Avoid low spots where runoff might wash lawn chemicals or debris into your beautiful water feature.
Here in Minnesota, our harsh winters demand deeper ponds if you’re keeping fish year-round. Dig at least one foot below the frost line—typically meaning a total depth of 3-4 feet in the Twin Cities region. Your finned friends will thank you when January rolls around!
Your soil type influences both excavation difficulty and how your pond edges will hold up. Heavy clay soil makes digging a workout but holds water well. Sandy soil is easier to dig but might require extra reinforcement around the edges to prevent erosion.
Don’t forget about power! Your pump and filtration system need electricity. Install a GFCI (Ground Fault Circuit Interrupter) outlet nearby, with electrical lines buried at least 18 inches deep. This is definitely a job for a qualified electrician—water and electricity demand professional respect.
Design Considerations
The shape of your pond should reflect your overall landscape style. Do you prefer the organic curves of a natural-looking pond, or the clean lines of a formal geometric design? Either way, your pond should feel like it belongs in your existing landscape.
When digging, plan for multiple depth levels that serve different purposes:
– Your upper shelf (8-12 inches deep) provides a home for marginal plants
– A middle shelf (12-18 inches) creates the perfect spot for water lilies
– The deep area (24-48 inches) gives fish room to swim and a safe place to overwinter
As pond expert Demi Fortuna wisely notes, “Rather than slope the sides of a pond right down to the bottom, make a shelf about 18 inches wide and 18 inches below the water’s surface all around the pond’s edge. This shelf serves as a platform for plants and a convenient step for anyone who falls in.”
Think about where you’ll most often view your pond—from your patio, kitchen window, or garden bench—and design accordingly. The most beautiful pond in the world won’t bring you joy if you can only see it from one obscure corner of your yard!
For expert guidance on proper drainage solutions that complement your backyard pond installation, check out our Landscape Irrigation Solutions page.
Step-by-Step Backyard Pond Installation Guide
Now that you’ve planned your pond and selected the perfect location, it’s time to break ground on your backyard pond installation. Follow these detailed steps to create a beautiful water feature that will improve your outdoor space for years to come.
Step 1: Mark and Prepare the Site
Start by creating the outline of your pond using a garden hose or rope to shape your design. Take your time adjusting until you’re completely satisfied—trust me, it’s much easier to change now than later! Once you’re happy with the shape, mark it clearly with spray paint or even flour.
Next, remove all the turf and debris within your outline. I recommend saving that quality topsoil for later landscaping around the pond. Don’t be alarmed if your outline looks enormous at this stage. As one experienced pond installer told me, “Don’t be afraid if it looks really big right now. Once filled and landscaped, the proportions will feel just right.”
Step 2: Excavation
Digging your pond in tiers creates natural planting zones and adds visual interest. Create an upper shelf about 8-12 inches deep for marginal plants, a middle shelf 12-18 inches deep for water lilies, and a deep center area 24-36 inches minimum for fish (though here in Minnesota, aim for 36-48 inches to ensure overwintering).
While digging, periodically check that your pond edges are level using a long, straight board and a level. This simple step makes a huge difference in achieving a professional-looking result. Before moving on, carefully remove any sharp objects like roots, rocks, or debris that could potentially puncture your liner.
Step 3: Install Underlayment and Liner
Begin by spreading a 1-3 inch layer of sand at the bottom of your excavation to create a smooth foundation. This protective base prevents future punctures from below. Next, lay protective underlayment over the entire excavation, including all the shelves you’ve created. This crucial layer acts as insurance against roots and sharp objects that might damage your liner.
Now comes the moment of truth—installing the liner itself. Carefully drape it over the hole, starting from the center and working outward. Allow plenty of excess around the edges (at least 12-24 inches beyond your excavation) to ensure complete coverage.
Work out any major wrinkles, but don’t stress about perfection. Small folds will be hidden by rocks and gravel later. On warm days, let your liner sit in the sun for 15-20 minutes before installation—this makes it more pliable and easier to work with.
Step 4: Begin Filling and Adjust
Add enough water to fill the pond about one-third full. The weight of this water helps the liner naturally conform to the shape of your excavation. As the pond fills, gently pull and adjust the liner to minimize folds and wrinkles. Continue filling until the pond is about two-thirds full before moving to the next steps.

Step 5: Install Equipment
Position your submersible pump at the deepest point of the pond, ideally in a pump basket or on a flat stone to prevent debris intake. Next, set up your biological and mechanical filters according to the manufacturer’s instructions. Connect tubing from the pump to the filter and any water features, taking care to hide it under the liner edge or among rocks for a natural look.
If you’re adding a waterfall or fountain, now’s the time to set these up following the specific instructions for your equipment. These features not only look beautiful but also help with crucial water oxygenation.
Step 6: Edge Finishing
With your pond nearly full, fold the excess liner neatly and secure it with large rocks or pavers. Create a natural-looking edge by placing larger rocks first, then filling gaps with smaller stones. For that professional touch, vary the sizes and arrange them to appear as if nature placed them there.
Use larger stones or decorative elements to conceal filters, tubing, and electrical connections. For waterfall areas or between critical stones, apply black waterfall foam to seal gaps and prevent water loss—this small step can save you lots of headaches down the road.
Step 7: Add Final Touches
Complete filling your pond to within 1-2 inches of the top. If you’re using city water, add a dechlorinator to make it safe for aquatic life, and introduce beneficial bacteria to jumpstart your pond’s ecosystem. Consider adding underwater or perimeter lighting for magical evening enjoyment.
Before proceeding further, monitor the water level for 24-48 hours to ensure there are no leaks. This patience now can save you enormous trouble later.
Step 8: Landscape and Add Life
Now comes the fun part! Add marginal plants on shelves, floating plants on the surface, and submerged oxygenators to create a balanced ecosystem. Landscape the perimeter with complementary plants to create a natural transition to your surrounding yard.
If you’re planning to add fish, wait at least 1-2 weeks after planting to allow the ecosystem to stabilize. When introducing fish, float them in bags on the pond surface for about 30 minutes before release to acclimate them to the water temperature. Consider installing predator deterrents like netting, motion-activated sprinklers, or decoys to protect your finned friends from herons and other predators.
As many first-time pond installers say upon completion: “Great job!! Time you took a break!” Building a pond is physically demanding but immensely rewarding.
Tools & Materials Checklist for Backyard Pond Installation
Before beginning your backyard pond installation, gather everything you’ll need for a smooth process:
Essential Tools:
– Shovel (both flat and pointed)
– Wheelbarrow
– Tape measure
– String or garden hose (for marking)
– Carpenter’s level and 2×4 board
– Utility knife
– Garden rake
– Tamper or plate compactor
– Heavy-duty scissors or box cutter
– Garden gloves
Required Materials:
– EPDM rubber liner (45-mil thickness recommended)
– Protective underlayment
– Sand (for base layer)
– River rocks and gravel (various sizes)
– Pond pump (sized appropriately for your volume)
– Filtration system
– Flexible PVC tubing
– GFCI electrical outlet (installed by licensed electrician)
– Water conditioner/dechlorinator
– Black waterfall foam (for sealing rocks)
– Aquatic plant baskets and media

Depth, Liner & Equipment Specs for Backyard Pond Installation
When it comes to pond depth, follow these guidelines for best results: ornamental ponds without fish need a minimum of 18-24 inches, fish ponds require at least 24-36 inches, and koi ponds should be at least 36-48 inches deep. Here in Minnesota’s harsh climate, aim for 36-48 inches (below the frost line) to ensure winter survival.
“A backyard pond should be at least 3 feet deep to ensure fish survival and prevent freezing in winter,” notes a Twin Cities pond specialist who understands our challenging seasons.
For planting shelves, create an upper marginal shelf 8-12 inches deep and 12-18 inches wide for edge plants, a water lily shelf 12-18 inches deep for those beautiful blooms, and a deep center area 24-48 inches for fish habitat and winter survival.
Calculating the right liner size is simple with this formula: Length = Maximum pond length + (2 × maximum depth) + 2 feet, and Width = Maximum pond width + (2 × maximum depth) + 2 feet. For example, a 6×8 foot pond with a 3-foot depth would need a liner that’s at least 14×16 feet.
For pump sizing, follow the general rule of circulating your entire pond volume once every 1-2 hours. Smaller ponds up to 1,000 gallons should have a flow rate of at least 100 gallons per hour (GPH), while larger ponds between 1,000 and 10,000 gallons need 200 to 300 GPH. To calculate your pond’s approximate volume in gallons: Length (ft) × Width (ft) × Average Depth (ft) × 7.5 = Gallons.
You’ll need to choose from several filter types: mechanical filters (like skimmers, pressure filters, or bead filters) capture debris and particles; biological filters (such as waterfall filters, bog filters, or moving bed filters) harbor beneficial bacteria that break down waste; and optional UV clarifiers kill single-cell algae for clearer water.
Don’t forget additional equipment like aerators (essential for fish health, especially in summer), heaters/de-icers (necessary in Minnesota to maintain an ice-free area in winter), and automatic fill valves to maintain consistent water levels without manual topping off.

Equipment, Finishing Touches & Long-Term Care
The success of your backyard pond installation doesn’t end once the digging is done. In fact, choosing the right equipment, adding those perfect finishing touches, and committing to consistent care will transform your water feature from good to spectacular.
Filtration Systems: The Heart of Your Pond
Think of your filtration system as your pond’s immune system – invisible but absolutely essential. A properly sized system keeps water clear and healthy, letting you enjoy your pond rather than constantly cleaning it.
Skimmers work like your kitchen sink strainer, capturing leaves and debris before they sink and decay. Position yours opposite from waterfalls or returns to create a nice flow across the entire pond surface.
Biological Filters (often called BioFalls) house the true heroes of pond maintenance – beneficial bacteria. These microscopic workhorses break down fish waste and other organic matter, converting harmful ammonia into plant-friendly nitrates.
“Beneficial bacteria are the unsung heroes of pond maintenance,” as one specialist puts it. “They work tirelessly to break down waste and keep your water clear without chemicals.”
For ponds with heavier fish loads, UV Clarifiers can be a game-changer. These devices emit ultraviolet light that damages the DNA of single-cell algae as water passes through, helping prevent that frustrating “pea soup” appearance that can plague ponds in summer.
Water Movement: Beyond Beauty
That gentle splash of water isn’t just soothing to your ears – it’s vital for your pond’s health. Moving water increases oxygen levels, prevents mosquito breeding, and helps maintain even temperatures throughout your pond.
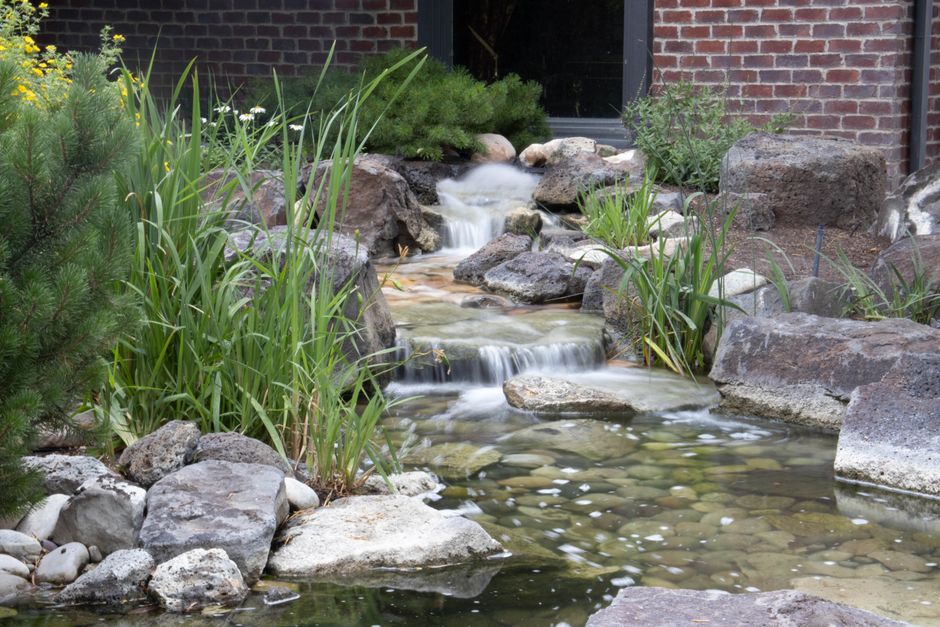
Waterfalls create that relaxing sound we all love while performing the crucial task of aeration. When sizing your waterfall pump, multiply your waterfall width (in inches) by 50 for a gentle trickle, 100 for a moderate flow, or 200 for a dramatic cascade. A 12-inch wide waterfall would need 600-2400 GPH depending on your desired effect.
Fountains offer simpler installation than waterfalls and work wonderfully in smaller ponds. They create beautiful visual displays while efficiently moving and aerating the water.
In Minnesota’s climate, aerators become essential equipment. During summer, they supplement oxygen when warm water can’t hold as much. In winter, they keep a small area ice-free, allowing harmful gases to escape rather than building up under the ice where they could harm hibernating fish.
Lighting: Extending Enjoyment
Your backyard pond installation doesn’t have to disappear after sunset. Modern LED underwater lights use minimal electricity while dramatically changing your water feature after dark. They highlight water movement, illuminate fish, and create a magical atmosphere for evening entertaining.
“A well-lit pond becomes a focal point for evening entertainment,” as many of our TMI Minnesota clients find. “It extends your enjoyment of the feature well into the night.”
For best results, position lights to illuminate waterfalls from behind or below, creating dramatic shadows and sparkles. Avoid pointing lights toward viewing areas to prevent uncomfortable glare for you and your guests.
Edging and Landscaping: The Finishing Touch
The transition between water and land is where many pond installations either shine or fall short. Natural-looking edges make the difference between a pond that looks artificial and one that seems like it’s always been part of your landscape.
Edging Stones should vary in size and placement, just as they would in nature. Larger, flat stones can overhang slightly to provide shade for fish and hiding spots from predators. The key is completely hiding that liner edge while creating a natural-looking transition.
Softscape Elements like ornamental grasses, perennials, and small shrubs help your pond blend seamlessly into your yard. Choose plants that won’t drop excessive leaves or seeds into the water – think hostas, ornamental grasses, and compact evergreens rather than messy trees.
Aquatic Plants: Nature’s Filters
Aquatic plants aren’t just pretty – they’re powerful natural filters that compete with algae for nutrients while providing oxygen and habitat for wildlife.
Marginal Plants like iris, cattails, and rush grow in shallow water around your pond’s edge. They soften the transition between water and land while providing important filtration.
Water Lilies create those iconic floating pads that provide shade for the water (reducing algae growth) and cover for fish. They need 12-18 inches of water depth and plenty of sunshine to thrive and produce their beautiful blooms.
Under the surface, oxygenating plants like anacharis or hornwort work silently to release oxygen and absorb nutrients that would otherwise feed algae. They’re the workhorses of your aquatic garden.
“A balanced pond should have about one-third of its surface covered by plants,” advises a pond specialist. “This provides enough shade and filtration without overcrowding.”
Fish Selection and Care
Fish add movement, color, and life to your pond while serving the practical purpose of controlling mosquito larvae.
Goldfish are perfect for beginners – hardy, affordable, and surprisingly long-lived. They tolerate Minnesota winters well in properly designed ponds and typically grow to about 12 inches over their 10+ year lifespan.
Koi are the living jewels of pond fish but require more space and filtration. These swimming works of art can grow to 3 feet long and live 40+ years with proper care, becoming like pets that recognize their owners at feeding time.
Start with fewer fish than you think you need – they grow quickly and reproduce enthusiastically! The general rule is one inch of fish per square foot of surface area. You can always add more as your pond ecosystem matures.
Ongoing Maintenance for Long-Term Success
Like any living system, your pond needs regular attention to stay healthy and beautiful. The good news? With proper setup, maintenance becomes simple and even enjoyable.
Weekly, take a few minutes to remove debris from your skimmer basket, check that your pump and filter are running properly, and top off water levels if needed. Monthly, test water quality, rinse filter media (in pond water, not chlorinated tap water), and trim any dead plant material.
Seasonal tasks change with the weather. Spring means cleaning out debris and restarting pumps after winter. Summer brings algae management and ensuring adequate aeration. Fall is the time to install protective netting to catch leaves, while winter requires preparing for cold with de-icers or winter circulation systems.
“The electricity to run a pump for a typical 176-square-foot pond costs about $260 a year,” according to industry data. This ongoing cost should be factored into your maintenance budget, though modern energy-efficient pumps can help reduce this expense.
Research from aquatic specialists highlights that proper oxygenation is critical for pond health. According to scientific research on pond oxygenation, “Oxygen is vital for fish respiration, beneficial bacteria function, and the decomposition of organic matter.” Without adequate oxygen, ponds quickly develop problems with algae and fish health.
For more information on creating stunning water features that complement your Minnesota landscape, visit our Backyard Water Features page.
Frequently Asked Questions
How deep should a pond be for fish safety?
For standard goldfish, aim for at least 24 inches deep. Koi require more space, with 36 inches being the minimum and 48+ inches ideal, especially in Minnesota where ponds need to extend below the frost line. Deeper water maintains more stable temperatures and gives fish safe zones from both predators and extreme weather conditions.
What’s the best low-maintenance liner choice?
EPDM rubber liners (45-mil thickness) win the battle for durability and value. They resist UV damage, remain flexible even in Minnesota’s extreme temperature swings, and typically carry a 20-year warranty with an expected lifespan of 30-40 years. While they cost a bit more upfront, they save considerable money and headaches by reducing the need for repairs or early replacement.
Do I need a permit before digging?
Always check with your local building department before breaking ground on your backyard pond installation. Permits are typically required for ponds larger than a certain size (often 100-200 square feet), installations including electrical components, ponds deeper than 18-24 inches (which may require safety fencing), or projects that could affect neighborhood drainage patterns.
And please, always call 811 at least 48 hours before digging to have underground utilities marked. This free service isn’t just helpful—it’s required by law and could save you from a dangerous and expensive mistake.
Conclusion
A successful backyard pond installation transforms your outdoor space into a tranquil retreat that connects you with nature. I’ve seen countless homeowners stand back after completing their ponds, amazed at how a simple water feature can completely change the feel of their yard. Whether you’ve created a wildlife habitat, an ornamental fountain pond, or a home for colorful koi, your efforts will be rewarded as your pond evolves into a living, breathing ecosystem.
There’s something magical about water in the landscape. The gentle sound of a waterfall, the flash of golden fish beneath lily pads, and the zigzagging flight of dragonflies create an experience that engages all your senses. Your pond will likely become the natural gathering place where family conversations happen and where you find yourself drawn to after a long day.
The most beautiful ponds aren’t built in a day – they’re grown over time. Give your pond ecosystem a chance to find its balance. Those beneficial bacteria need time to colonize, plants need seasons to spread their roots, and the entire system requires patience as it settles into harmony. The pond you see in year three will be dramatically more beautiful than the one you just filled.
At TMI Minnesota, we’ve guided countless Twin Cities homeowners through the backyard pond installation process. While many enjoy the satisfaction of DIY pond building, others prefer having experienced hands handle the heavy lifting. Either way, we’re here to help with design advice, professional installation, or maintenance support custom to Minnesota’s unique climate challenges.
Your new pond isn’t just a landscaping project – it’s an investment in your property value and, more importantly, your daily quality of life. There’s a special joy in watching children’s faces as they spot their first tadpole or in enjoying a morning coffee beside water sparkling with sunrise light.
For those looking to complement their water feature with other low-maintenance landscaping options, our ForeverTurf solutions provide beautiful, durable alternatives to traditional lawns that pair perfectly with water features.
Whether you’re just beginning to sketch ideas or you’re ready to break ground, we hope this guide has given you the confidence to dive into the rewarding world of pond ownership. Your backyard oasis awaits!