
Why a Block Paving Path Can Transform Your Outdoor Space
A block paving path is one of the most versatile and durable ways to improve your garden, driveway, or patio. Here’s what makes it an excellent choice for homeowners:
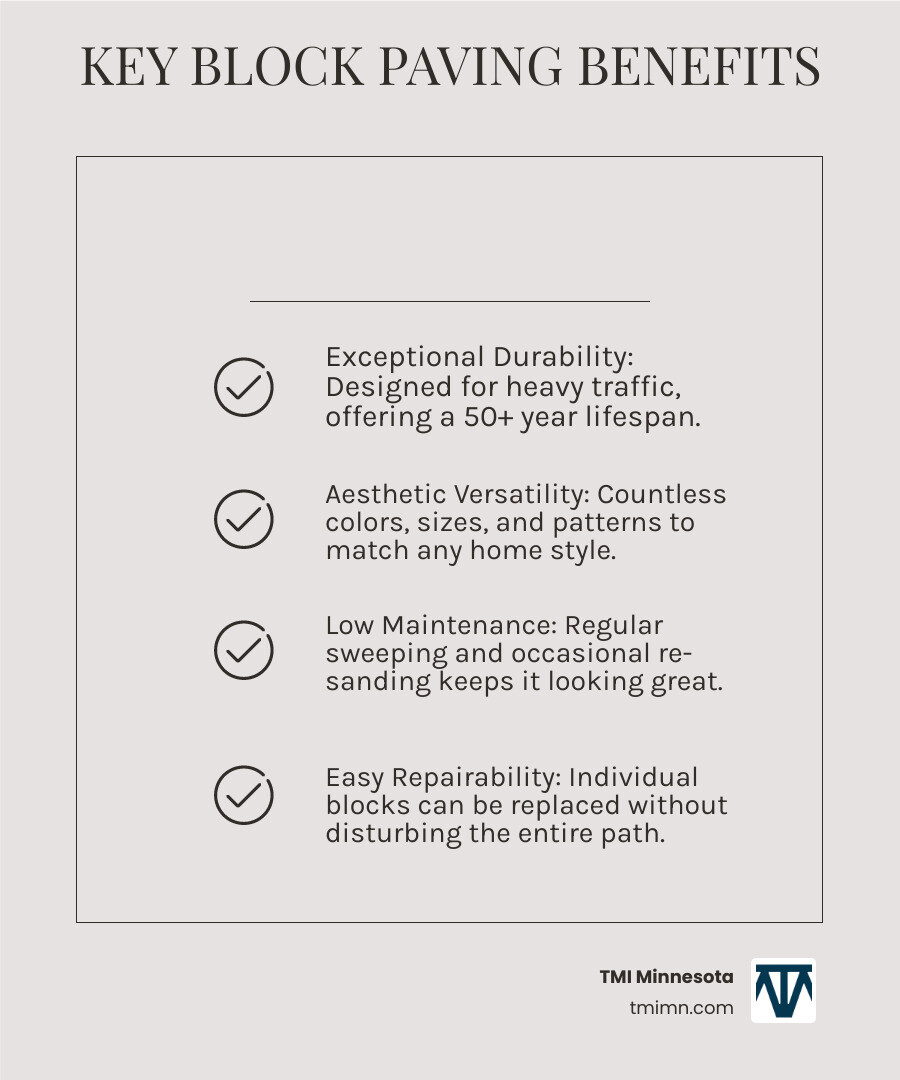
- Exceptional Durability – Designed to handle heavy traffic, from garden strollers to vehicles
- Design Flexibility – Available in countless colors, sizes, and patterns to match any home style
- Easy Repairs – Individual blocks can be replaced without disturbing the entire path
- Low Maintenance – Regular sweeping and occasional re-sanding keeps it looking great
- Adds Value – Improves curb appeal and property value with a professional finish
Think block paving isn’t visually exciting? You might be surprised. While durability is often the main selling point, it’s entirely possible to create a scheme that’s both attractive and functional. With options ranging from classic herringbone patterns to modern geometric designs, block paving offers far more aesthetic versatility than many homeowners realize.
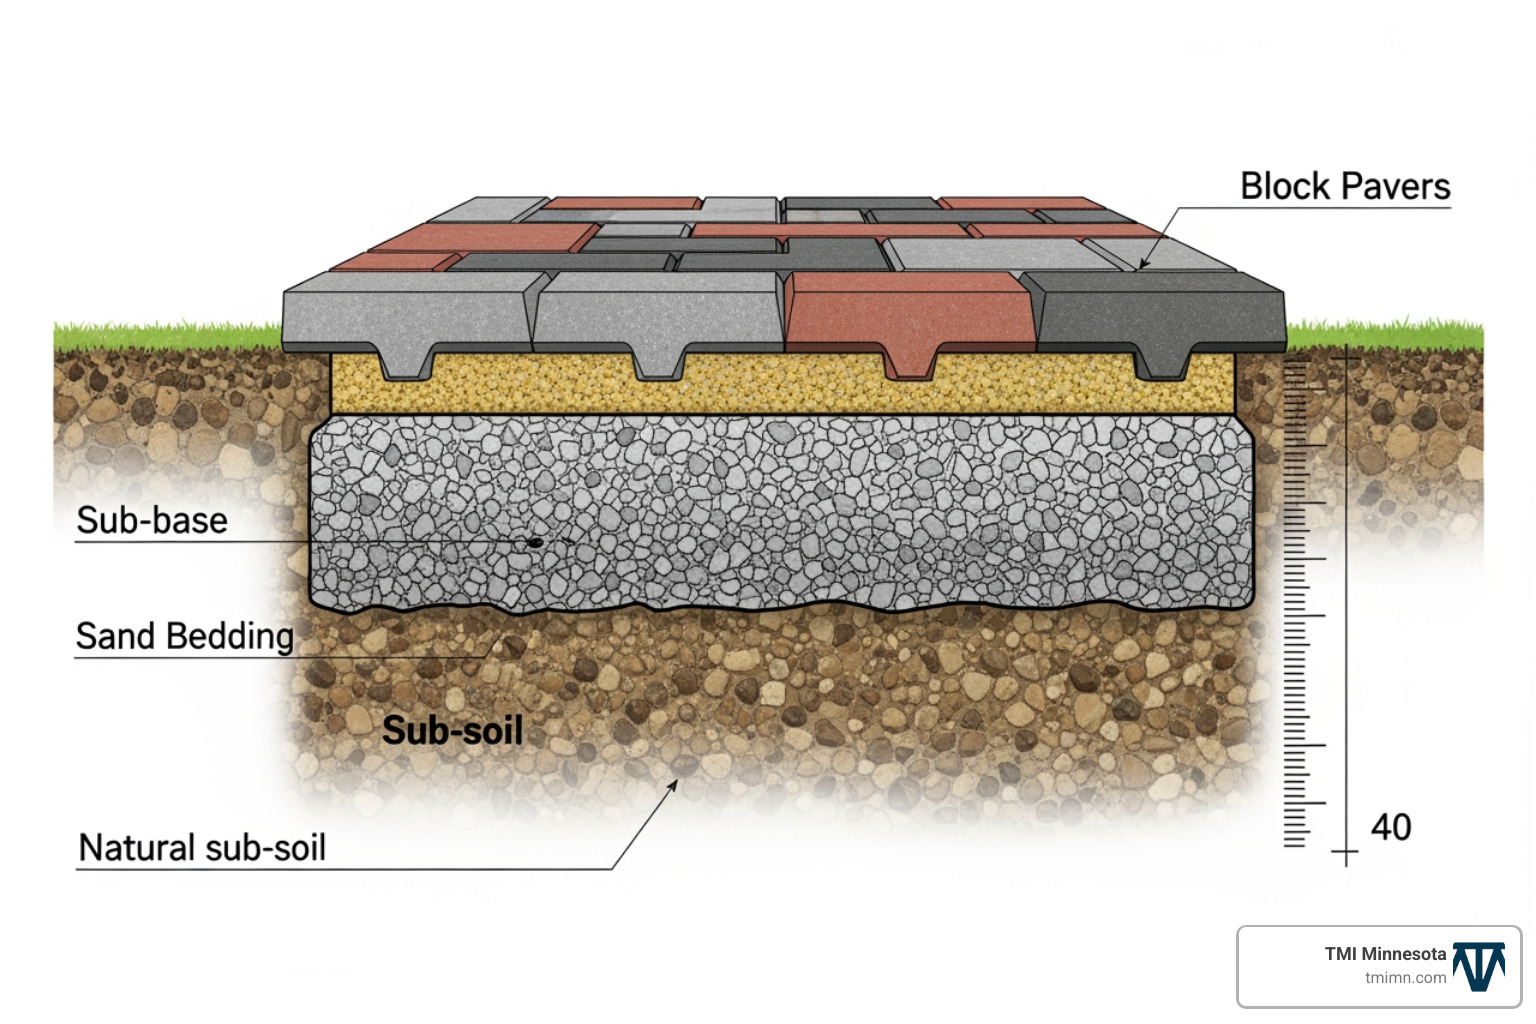
The installation process requires careful planning and proper technique, but the results are worth it. You’ll need to excavate to a minimum depth of 250mm (10 inches), allowing for 150mm of hardcore, 50mm of sand, and 50mm for the paving blocks themselves. The key to success lies in creating a solid foundation with proper drainage—typically a minimum fall of 1:60 (one inch of fall for every 60 inches of length).
At TMI Minnesota, we’ve overseen countless block paving path installations throughout the state, helping homeowners transform their outdoor spaces with expertly crafted hardscapes that blend beauty with long-lasting functionality. Whether you’re looking to create an inviting entrance, a practical garden pathway, or a stunning patio feature, understanding the fundamentals of block paving will set you up for success.
Quick block paving path definitions:
Planning and Designing Your Perfect Path
Before we even think about digging, the first step to a successful block paving path project is careful planning and design. This is where your vision truly comes to life, from choosing the right pattern to calculating the materials needed. We always start with a detailed design sketch to visualize the end result and select materials that complement your home’s unique style. This is also where we consider crucial elements like color blending, ensuring a cohesive and appealing look for your outdoor space.
Choosing the right design can significantly impact the overall aesthetics and functionality of your property. For more inspiration, explore our Garden Pathway Ideas and Driveway Landscaping Designs. If you are new to hardscaping and want a neutral overview of common paving approaches, the Pavement (architecture)) article on Wikipedia is also a useful general reference.
Choosing the Right Pattern for Your Block Paving Path
The pattern you choose for your block paving path isn’t just about looks; it significantly impacts the durability and stability of the surface. We’ve seen how the right pattern can make all the difference, especially in areas with heavier use.
Here are some of the most popular block paving patterns and why they’re favored:
- Herringbone Pattern: This is by far the most popular choice among our customers, and for good reason. Known for its exceptional interlocking strength, the herringbone pattern is ideal for areas that will experience substantial traffic or heavy loads, such as driveways. We often recommend two variations:
- 90-degree Herringbone: This classic approach aligns blocks perpendicular to each other, establishing a right-angled, interlocking pattern. It offers a fantastic balance of durability and a timeless design.
- 45-degree Herringbone: This pattern lays blocks at a 45-degree angle to the enclosing edge, creating a sense of movement and dynamic appeal. While it requires more cuts at the edges, leading to greater paver wastage and potentially influencing project timelines and costs, its visual flair often outweighs the extra effort, especially in large open spaces where it creates a striking effect.
- Stretcher Bond: This is one of the most commonly used patterns for block paving path and patio projects. It involves laying each paver with its longest side parallel to the direction of the path, with bricks offset by half a brick in subsequent rows, similar to a traditional brick wall. Stretcher bond patterns are especially effective for areas requiring less intricate designs and where the aim is to give an illusion of length and continuity. They work wonderfully for narrow paths to visually elongate the area or smaller driveways to make them appear more spacious. However, for driveways, we generally advise against using stretcher bond patterns as they don’t offer the same interlocking strength as herringbone and are less suitable for heavy loads.
- Basketweave Pattern: In this charming pattern, a pair of blocks are laid perpendicular to each other, creating a woven appearance. The basketweave pattern beautifully complements traditional and period properties, adding a touch of classic elegance. It’s relatively simple to lay and can provide a visually interesting surface for patios and paths.
- Circular Patterns: While not a standalone pattern for an entire path, circular block paving can be used to create stunning focal points within a larger paved area or as small patios. These are particularly impactful in gardens, patios, or courtyards, adding a unique design element.
Each pattern offers unique advantages. For instance, the herringbone’s excellent interlock provides a strong and stable surface, while the stretcher bond offers a clean, uniform, and traditional look that is quicker to lay. The basketweave is simple yet visually rich. The choice often comes down to personal preference, the shape and size of the area, and practical considerations like expected traffic. For more ideas on how these patterns can transform your outdoor space, visit our Block Paving Driveway Designs page.
Aesthetic and Practical Considerations
When designing your block paving path, it’s crucial to balance aesthetic appeal with practical considerations. We guide our clients through these choices to ensure their new path not only looks fantastic but also performs exceptionally.
- Matching Home Style: The right pattern should complement your home’s architecture. For instance, a period property might benefit from the traditional charm of a basketweave or a classic 90-degree herringbone, while a modern home could be improved by the dynamic movement of a 45-degree herringbone or a clean stretcher bond with contemporary blocks. We can customize patterns with different colors and block sizes to achieve a truly unique look that aligns with your property’s character. Lighter-colored blocks, for example, can make a smaller space feel larger and less cluttered.
- Creating Borders: Borders are key to defining your block paving path and adding a polished finish. They can be created using contrasting colors, different block sizes, or even by laying the same blocks in a different direction (e.g., a stretcher bond border around a herringbone main pattern). This adds visual interest and helps contain the main pattern.
- Load-Bearing Capacity: Driveways vs. Patios: Block paving is very versatile. While it’s great for patios and pathways, it’s more commonly used for driveways because it’s designed to deal with vehicles and heavier traffic than patio slabs. The choice of pattern directly affects this. Herringbone patterns are superior for driveways due due to their interlocking strength, distributing weight effectively. Stretcher bond, while aesthetically pleasing for paths, is less suitable for heavy vehicle traffic.
- Drainage and Permeability: Proper drainage is paramount for any paved surface, especially in Minnesota where we experience significant freeze-thaw cycles. We design all our block paving path installations with a minimum fall of 1:60 to direct water away from structures. Additionally, we consider permeable block paving options. If you plan to use permeable materials that allow water to drain through, you may not need planning permission for larger areas, which can simplify your project. Explore our Permeable Paver Driveways for more information. For a broader overview of sustainable drainage concepts, you can also review the Permeable paving entry on Wikipedia.
Calculating Materials and Planning Permission
Accurate material calculation is vital to avoid costly delays and wastage. We carefully plan each project to ensure we order the right quantities.
- Measuring the Area: First, measure the length and width of your proposed block paving path to get the total square meterage.
- Calculating Paver Quantity: For the most popular block size (200 x 100mm), you’ll need approximately 50 blocks per square meter. Adjust this based on your chosen block size.
- Wastage Allowance: Always factor in 2-5% extra for wastage. This accounts for cuts needed around edges, curves, and any accidental breakages. More intricate patterns, like the 45-degree herringbone, will typically require more cuts and thus a higher wastage allowance.
- Sub-base Materials: The sub-base is the unsung hero of any durable block paving path. We typically use MOT Type 1 hardcore aggregate. For a driveway, you’ll need approximately 150mm (6 inches) of this material. For a pedestrian path, 100mm (4 inches) is usually sufficient.
- Sand Requirements: You’ll need sharp sand for the bedding layer (approximately 50mm or 2 inches deep) and kiln-dried sand for joint filling.
- Cost Implications: The cost of your block paving path isn’t just about the blocks themselves. Installation complexity, especially with intricate patterns like 45-degree herringbone which demand more cuts and skilled labor, can increase costs. Material wastage also adds to the overall expense. The lowest cost blocks are typically standard rectangular types, while clay pavers can be more expensive. However, often the most significant cost is in the preparation and sub-base construction, which is why we always emphasize getting this right.
- Planning Permission: In some areas, you might need a permit for paving projects, especially for larger areas like front gardens or driveways using traditional, non-permeable materials. However, using materials that allow water to drain through, such as permeable block paving, can sometimes simplify the permitting process. Regulations vary by city and county, so we always advise checking local requirements here in the Twin Cities to ensure your project is compliant.
Step-by-Step Guide to Laying Your Block Paving Path
Laying a block paving path is a rewarding project that, with proper technique, will provide years of enjoyment. Here’s how we approach it to ensure a long-lasting and beautiful result. For a more general overview of hardscape projects, check out our How to Install Hardscape Ultimate Guide and for driveways, our Paver Driveway Installation guide. If you want a neutral primer on how pavers are used in different settings around the world, the Paver) article on Wikipedia is a helpful background resource.
Before we start, safety first! Always wear appropriate safety protection throughout the entire process, including sturdy gloves, safety glasses, and hearing protection, especially when using power tools like compactors or block cutters.
Tools and Materials You’ll Need:
- Shovel, spade, rake, broom
- String line and pegs
- Spirit level and tape measure
- Rubber mallet
- Wheelbarrow
- Compacting tool (vibrating plate compactor or wacker plate)
- Block splitter or stone saw (for cutting blocks)
- Cement mixer (if mixing concrete for edge restraints)
- Aggregate sub-base material (e.g., crushed stone)
- Geotextile membrane
- Sharp sand (for bedding)
- Kiln-dried sand (for jointing)
- Block paving stones
- Edging blocks or kerbs
- Cement and ballast (for concrete mix)
Step 1: Excavation and Site Preparation
This initial phase is critical for the long-term stability of your block paving path.
- Marking the Area: Use string lines and pegs to accurately mark out the perimeter of your proposed path. Double-check your measurements against your design sketch.
- Excavation Depth: We need to remove existing material to a minimum depth of 250mm (10 inches). This depth allows for the subsequent layers: 150mm (6 inches) of hardcore, 50mm (2 inches) of sand, and 50mm (2 inches) for your block paving.
- Damp Proof Course (DPC) Level: If your path is adjacent to a building, the finished paving level must be at least 150mm (two brick courses) below the building’s DPC. This is crucial to prevent moisture issues in the structure.
- Establishing a Fall for Drainage: Proper drainage is non-negotiable. We’ll establish a minimum fall of 1:60 (approximately 1 inch of fall for every 60 inches of length, or 25mm fall in 1500mm). This ensures water runs off the path and away from your home. If your land naturally slopes, we’ll work with that; if not, we’ll create the necessary gradient.
- Geotextile Membrane: Once excavated, we lay a geotextile membrane over the exposed subsoil. This permeable fabric prevents the subsoil from mixing with the hardcore layer, maintaining the integrity of your sub-base while still allowing water to drain through.
Step 2: Installing Edging and the Sub-Base
A firm edge is vital for any block paving path to prevent the blocks from spreading and shifting over time.
- Edge Restraints: The edges of any paving are the most vulnerable, so we secure the entire perimeter with a firm edge restraint. This can be dedicated edging blocks, kerbs, or even the paving blocks themselves laid in concrete.
- Concrete Foundation for Edges: We prepare a concrete foundation (typically a mix of 1 part cement to 6 parts ballast) for the edge restraints. They are bedded onto this concrete and often “haunched” (supported with concrete on both sides) to ensure they are rock-solid and won’t move. We use a spirit level to ensure they are perfectly flat and at the correct height, taking into account the fall for drainage.
- Aggregate Sub-base: Once the edges are set, we begin laying the sub-base using a quality aggregate material. This material, typically crushed granite, limestone, or basalt, forms the structural foundation.
- Layered Compaction: The sub-base should be at least 100mm thick after compaction for a path, and 150mm for a driveway. We lay the hardcore in layers, typically no more than 75-100mm at a time, and compact each layer thoroughly using a vibrating plate compactor. This process is repeated until the desired depth and compaction are achieved. Proper compaction is key to preventing future sinking or unevenness.
Step 3: The Sand Bed and Laying the Blocks
This is where your block paving path truly begins to take shape!
- Screeding Sharp Sand: We spread a 50mm (2 inches) layer of damp sharp sand over the compacted sub-base. Using screeding rails (like gas pipes or metal bars, as timber can be flexible and inaccurate), we then “screed” the sand, pulling a straight edge across the rails to create a perfectly level and consistent bed. This layer should be 10-15mm proud of the final desired level before compaction, and 3-5mm proud of the screed line.
- Laying Pavers from a Corner/Straight Edge: We always start laying the blocks from a fixed point, such as a corner or a straight edge (like against the house or an existing patio), working our way outwards. This helps maintain straight lines and ensures the pattern remains consistent.
- Maintaining Pattern Alignment: As we lay the blocks, we continuously check the pattern alignment with string lines. We gently tap each block into place with a rubber mallet, ensuring a snug fit.
- Using Blocks from Multiple Packs: To ensure a consistent color blend across your entire block paving path, we select blocks from at least three different packs at a time. This helps to minimize any natural color variations that might exist between batches.
- Cutting Blocks for Edges: For any gaps around the edges, curves, or obstacles, we use a block splitter or a stone saw to cut blocks to size. We try to avoid making cut pieces less than a third of their original size, as smaller pieces can be less stable.
Step 4: Jointing, Compaction, and Finishing
The final steps bring everything together, ensuring a robust and attractive block paving path.
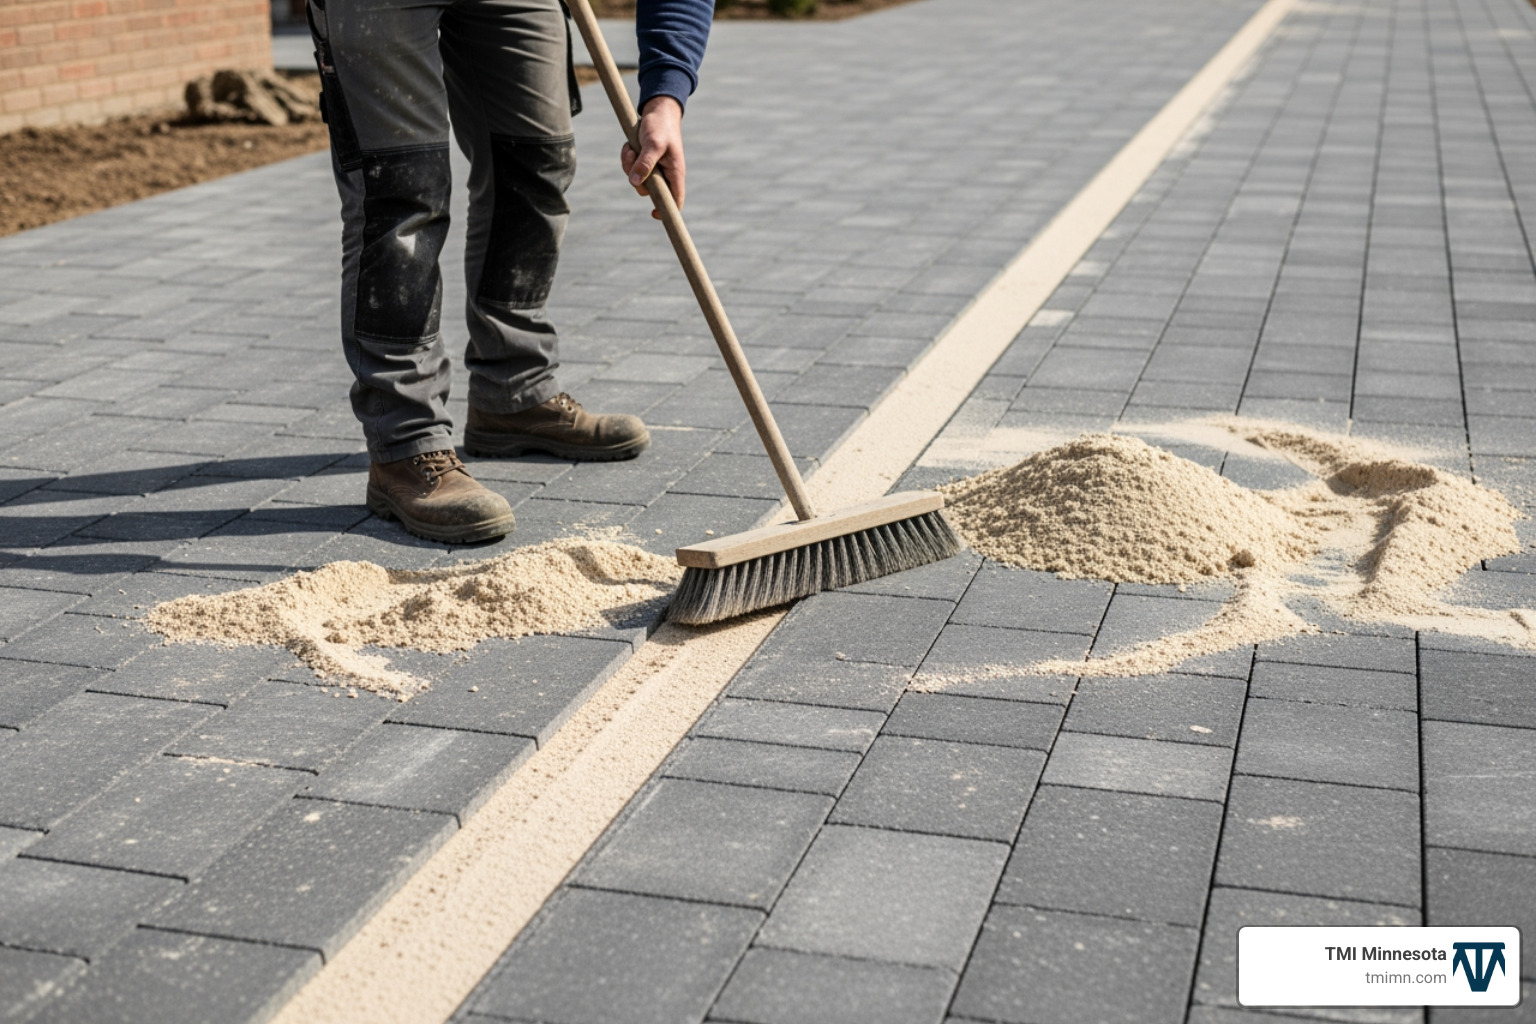
- Kiln-Dried Sand: Once all the blocks are laid, we sweep the entire surface thoroughly to remove any debris. Then, we apply kiln-dried sand generously over the paved area. This fine, dry sand is crucial for filling the joints between the blocks.
- Joint Filling and Compaction: We sweep the kiln-dried sand across the entire surface, ensuring it falls deep into every joint. After the initial sweep, we use the vibrating plate compactor to go over the entire path. This compacts the blocks firmly into the sand bed and helps the kiln-dried sand settle deeper into the joints.
- Final Compaction with a Wacker Plate: We repeat the process of sweeping more kiln-dried sand and compacting with the wacker plate multiple times. Continue adding sand and compacting until all the joints are completely full and the blocks are firmly interlocked. This step is essential for the structural integrity of your block paving path.
- Sealing the Surface: To further improve durability and aesthetics, we recommend sealing your block paving path once it’s laid. A proprietary sealer helps to maintain the color, suppresses weed growth, and helps prevent staining from things like oil, which is particularly useful for driveways.
Durability, Cost, and Long-Term Care
Investing in a block paving path is a long-term decision for your property. Understanding the factors that influence its durability, cost, and maintenance requirements will help you protect your investment. The initial Hardscape Installation Cost can vary, but the longevity and aesthetic appeal often make it a worthwhile choice.
How Pattern Choice Affects Stability and Cost
As we discussed, the pattern isn’t just cosmetic; it’s fundamental to the structural integrity and cost of your block paving path.
- Interlocking Strength of Herringbone: The herringbone pattern, both 45 and 90 degrees, provides superior interlock, making it inherently stronger and more stable under heavy loads. This translates to greater durability and less chance of movement or sinking over time, especially crucial for driveways.
- Simplicity of Stretcher Bond: While the stretcher bond is easier and quicker to lay, reducing labor costs, its lack of robust interlock makes it less suitable for high-traffic areas.
- Material Cuts and Wastage: More complex patterns, such as the 45-degree herringbone or intricate circular designs, require more cuts to fit the blocks, leading to higher material wastage (up to 5% or more). These cuts also increase labor time and the need for specialized cutting tools, impacting the overall cost. Simple patterns like the stretcher bond or 90-degree herringbone typically result in less wastage and quicker installation.
- Labor Time: Installation complexity directly correlates with labor time. Patterns that require precise alignment, numerous cuts, or blending of multiple colors will naturally take longer to install, increasing labor costs.
Maintaining Your New Block Paving Path
Maintaining your block paving path is relatively straightforward, ensuring it remains beautiful and functional for years.
- Regular Sweeping: Simple, regular sweeping is often all that’s needed to keep your path looking tidy and prevent debris from accumulating in the joints.
- Weed and Moss Prevention: Despite careful installation, weeds and moss can occasionally sprout in the joints. Regular weeding (manual or with a weed killer) and occasional re-sanding are key. Sealing the surface also helps suppress weed growth.
- Cleaning Oil Stains: For driveways, oil stains can be a concern. Prompt cleaning is best. For detailed guidance on tackling these, refer to our guide on How to Remove Oil From Block Paving Driveway.
- Re-sanding Joints: Over time, the kiln-dried sand in the joints can be washed away or settle. We recommend periodically sweeping fresh kiln-dried sand into the joints, especially after pressure washing, to maintain the interlock and stability of the blocks.
- Pressure Washing Advice: While pressure washing can effectively clean your block paving path, it should be done carefully. High pressure can dislodge jointing sand, so always re-sand after pressure washing. Avoid directing the jet too close to the surface or at an angle that forces sand out of the joints.
Frequently Asked Questions about Block Paving
What is the strongest block paving pattern?
The herringbone pattern (both 45 and 90 degrees) is considered the strongest due to the superior interlocking of the blocks, making it ideal for areas with heavy traffic like driveways. This interlocking mechanism distributes weight across a larger area, preventing individual blocks from shifting under pressure.
How deep should the sub-base be for a garden path?
For a pedestrian garden path, a well-compacted sub-base of at least 100mm (4 inches) is typically sufficient. For driveways, this should be increased to at least 150mm (6 inches) to accommodate the heavier loads from vehicles. The sub-base is crucial for providing a stable, load-bearing foundation.
Can you lay block paving directly on soil?
No, absolutely not. Block paving must be laid on a properly prepared foundation. This foundation consists of a compacted aggregate sub-base (e.g., crushed stone) to provide structural support, followed by a screeded sand bedding layer to create a perfectly level surface for the blocks. Laying directly on soil will inevitably lead to uneven settling, instability, and a quickly deteriorating path.
Transform Your Garden with a Professional Touch
A well-designed and expertly installed block paving path does more than just provide a surface to walk on; it transforms your outdoor living space, enhancing its beauty and functionality. From defining garden areas to creating inviting entrances, the possibilities are endless. We believe it’s a rewarding project for any homeowner, whether you tackle it yourself or bring in the professionals.
At TMI Minnesota, we specialize in changing outdoor spaces with unique designs, offering hardscape and softscape installations that lift yard living. We use leading-edge products and proven techniques to ensure your block paving path is not only stunning but also built to last through Minnesota’s changing seasons.
Ready to pave your way to a perfect outdoor space? Explore our professional block paving and hardscape design services and let us help you create the path of your dreams!