
Why Concrete Driveway Borders Transform Your Home’s First Impression
Concrete driveway borders are permanent edging solutions that define your driveway, prevent erosion, control weeds, and improve curb appeal. They are an excellent choice for homeowners for several reasons:
Key Benefits:
- Durability – Last decades with minimal maintenance
- Cost-effective – $3-6 per square foot vs. $10-20 for stone alternatives
- Versatility – Available in stamped, colored, and exposed aggregate finishes
- Functionality – Prevents mulch spillage and grass encroachment
- Property value – Increases home value through improved aesthetics
Popular Types:
- Poured concrete curbing – Continuous seamless edge
- Pre-cast concrete blocks – Easy DIY installation
- Decorative stamped borders – Mimics brick, stone, or wood patterns
A well-designed concrete border can increase property value by improving its aesthetic appeal. The visual impact is immediate, creating clean lines that guide the eye and integrate your driveway into your home’s overall design.
I’m Christopher Deanovic, Operations Leader at TMI Minnesota. I’ve helped countless homeowners transform their outdoor spaces with expertly crafted concrete driveway borders and hardscape solutions. My experience has shown me how the right border can completely lift a home’s entrance appeal.
Why Choose Concrete for Your Driveway Border?
When it comes to driveway edging, concrete driveway borders consistently deliver the best value. After years of helping Twin Cities homeowners, I can tell you why concrete is the winning choice.
Durability
Your driveway border faces heavy cars, Minnesota’s brutal freeze-thaw cycles, and summer heat. Concrete handles it all. Built to last for decades, it’s the same strong material used in bridges. When properly installed, a concrete border is a permanent part of your landscape that won’t shift or crumble. Borders installed 20+ years ago can still look sharp, proving their longevity.
Low Maintenance
Concrete borders are practically maintenance-free. A quick rinse with a garden hose or pressure washer is usually all that’s needed. There’s no weeding between pavers, re-setting shifted stones, or replacing rotted wood. They maintain their clean lines with almost zero effort from you.
Increased Property Value
Curb appeal directly translates to property value. A well-defined driveway with clean concrete borders signals a well-maintained home. Research shows decorative concrete can boost property value through improved aesthetics. It’s a detail potential buyers notice, showing an investment in quality. For more ideas, see our Curbside Appeal Landscaping services.
Erosion Control
Heavy rains and snowmelt can wash away soil along driveway edges. Concrete driveway borders act as a dam, directing water runoff appropriately. This protects your lawn and prevents the messy, eroded look that can lead to drainage problems.
Weed Barrier
Tired of grass and weeds creeping onto your driveway? A concrete border creates a solid barrier, stopping their spread. This eliminates the need for constant hand-weeding or trimming along the driveway edge, leaving a clean, defined line.
How Concrete Stacks Up Against Other Options
Here’s how concrete compares to other popular choices:
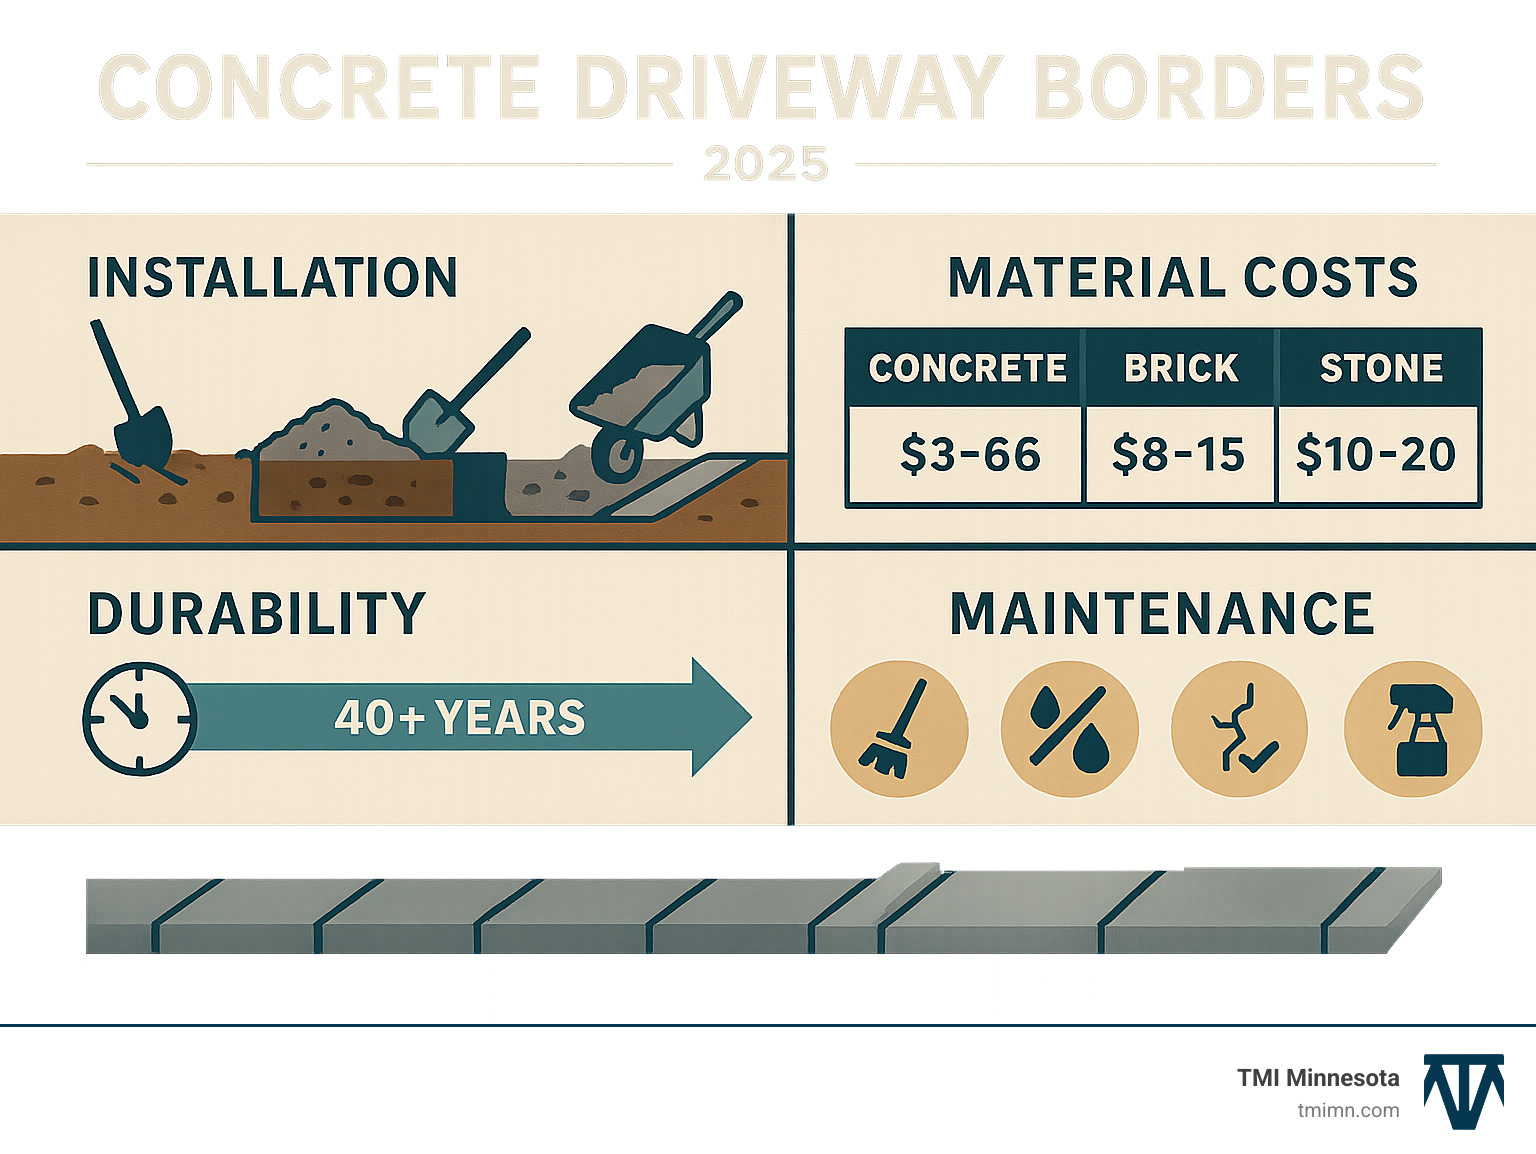
| Material | Cost Per Square Foot | Durability | Maintenance |
|---|---|---|---|
| Concrete | $3 to $6 | Extremely Durable (Decades) | Very Low (Hose/Pressure Wash) |
| Brick | $3 to $10 | Durable (Can shift over time) | Moderate (Weeding between bricks, repair) |
| Stone | $10 to $20 | Highly Durable (Very long-lasting) | Low (Can shift, occasional re-setting) |
As you can see, concrete hits the sweet spot of reasonable upfront cost with exceptional long-term value. It’s the practical choice that doesn’t sacrifice quality or appearance.
Exploring Types of Concrete Driveway Borders
Today’s concrete driveway borders can be customized to complement any home style. Think of choosing your border type like selecting the perfect frame for a photo; the right choice improves everything around it.
Poured Concrete Curbing
Poured concrete curbing offers a seamless, continuous look. Wet concrete is shaped on-site using specialized equipment, often “extruding” it like a ribbon. The main advantage is the lack of joints, which reduces weed growth and shifting. This method provides great flexibility for curves and custom shapes.
Pre-cast Concrete Blocks
Pre-cast concrete blocks are a DIY-friendly option. These units are made off-site and come in various shapes and sizes, some mimicking brick or stone. Their modular nature is forgiving for beginners, and a damaged piece can be replaced individually. While not seamless, they can create interesting patterns.
Customization
Concrete is a blank canvas for customization. Color can be mixed in for rich earth tones or bold statements. Texture can range from rough and natural to smooth and contemporary. The shape and profile can be sharp and architectural or gently rounded. At TMI Minnesota, we help guide these choices through our Hardscape Design Services.
Decorative Finishes for Concrete Driveway Borders
Decorative finishes take your concrete driveway borders from functional to fabulous.
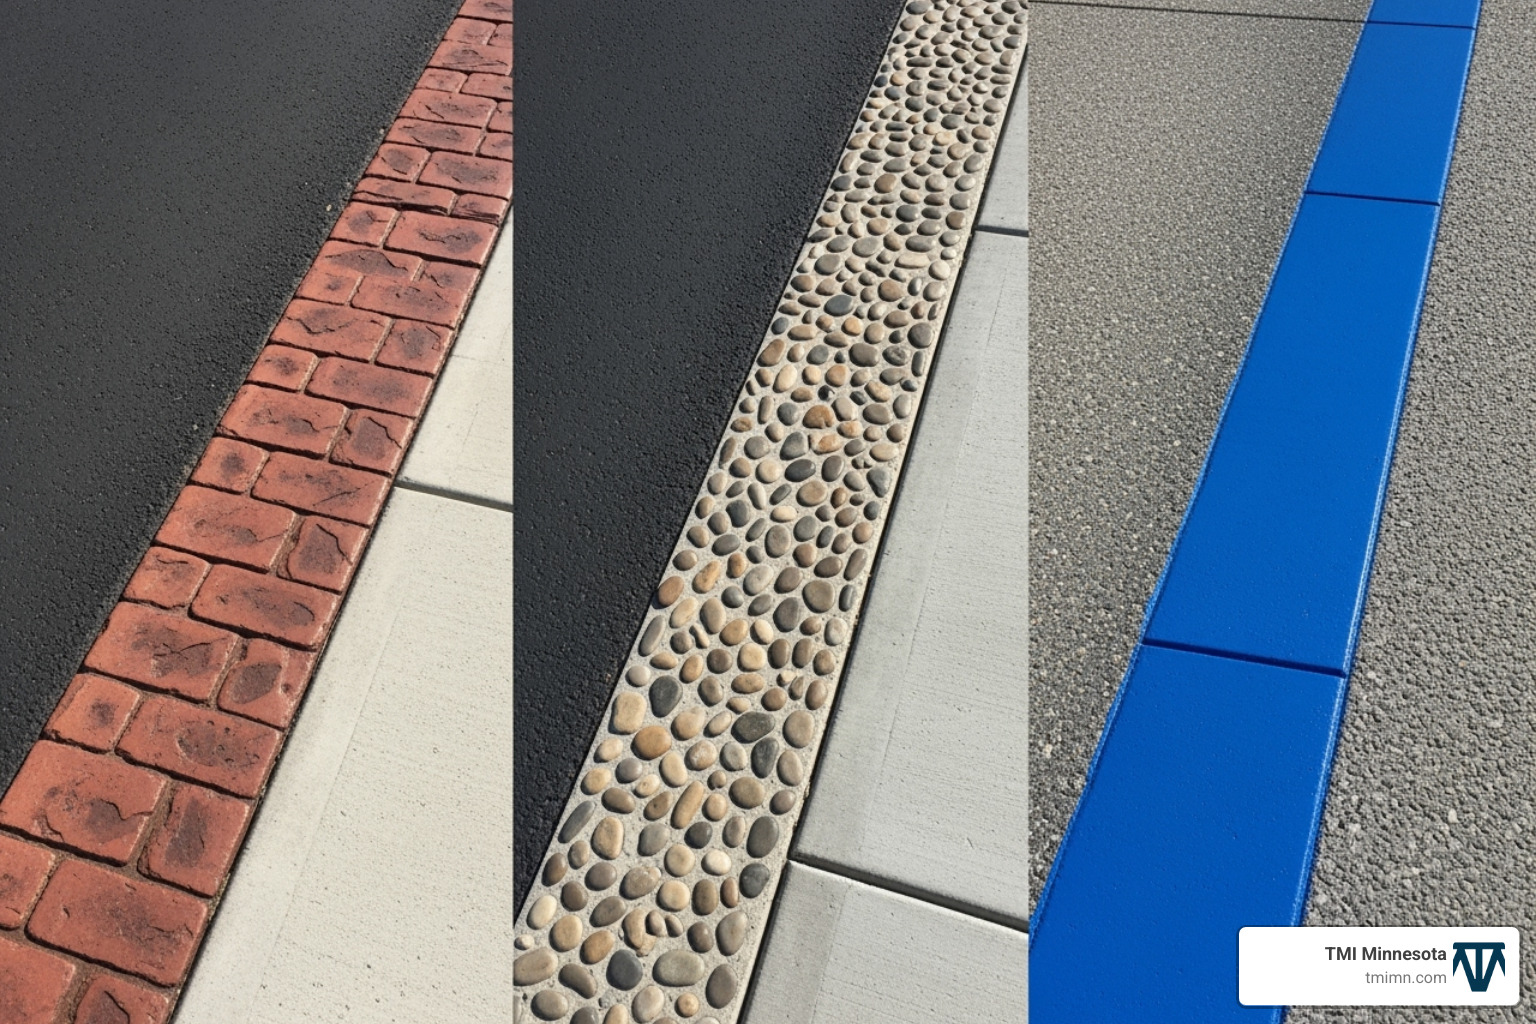
Stamped Concrete
Stamped concrete uses large stamps to press patterns into workable concrete, mimicking materials like natural stone, brick, or wood planks without the associated maintenance issues like rot or termites.
Exposed Aggregate
For a natural texture, exposed aggregate reveals the stones and pebbles in the concrete mix by washing away the top layer of cement. This finish provides excellent traction and comes in various looks depending on the aggregate used.
Colored Concrete
Colored concrete involves mixing pigment throughout the concrete, ensuring the color is consistent and won’t chip or fade like paint. The possibilities range from natural earth tones to bold, contrasting colors.
Broom Finish
A broom finish is a classic technique that creates subtle parallel lines by dragging a special broom over wet concrete. It adds gentle texture and improves safety by reducing slipperiness, offering an understated elegance.
For more creative ideas, check out Add Design to Concrete Borders, Edging, Curbs and Gutters for professional inspiration.
Modern Design Trends
Modern concrete driveway borders are becoming integral parts of sophisticated outdoor design:
- Integrated lighting: LED strips embedded in the concrete improve safety and create stunning nighttime effects.
- Contrasting textures: Pairing smooth and rough finishes like polished concrete and exposed aggregate adds visual interest.
- Minimalist lines: Clean, sharp, and precise borders create a modern, uncluttered look.
- Naturalistic integration: Blending hardscape with softscape, such as incorporating grass strips or plants, for a more organic transition.
We specialize in these concepts through our Modern Outdoor Designs services.
How to Install Concrete Driveway Borders: A DIY Guide
Installing concrete driveway borders is a rewarding DIY project. With careful planning and effort, you can achieve professional results.

First, gather your tools: a shovel, rake, string line, level, wheelbarrow, and a concrete mixer. You’ll also need concrete mix, forming lumber, stakes, a mallet, float, trowel, edger, and joint tool. Most importantly, wear your safety gear: safety glasses, gloves, and sturdy boots are essential as wet concrete is caustic.
Project Planning
Good planning prevents headaches. First, design your border—straight, curved, or a combination. Sketch it out to visualize the result. Next, measure the linear feet to calculate the materials needed. A typical project might use 100-250 square feet of concrete. Before digging, call 811 to have underground utilities marked—it’s free and required by law. Finally, check the weather forecast for a few clear days with moderate temperatures (50-70°F).
Step 1: Preparation and Excavation
This foundation work is critical for long-lasting concrete driveway borders.
Mark the layout with stakes and a string line for precision. A garden hose can be a useful guide for curves. Dig a trench about 6-8 inches deep and slightly wider than your border, keeping the bottom level. Ensure proper drainage by creating a slight slope away from the driveway and consider adding a gravel base in wet soil. Finally, compact the base with a hand tamper to prevent settling. For professional guidance on base preparation, see our Driveway Paving Solutions.
Step 2: Setting Forms and Mixing Concrete
This step creates the mold that will shape your borders.
Build forms using 2x4s for straight lines or flexible plastic forms for curves. Secure them with stakes every 2-3 feet. Set the forms to the exact height of your finished border, as this is your final guide. Add reinforcement like rebar in freeze-thaw climates to prevent cracking. When calculating your concrete mix, follow bag instructions carefully; a slightly dry mix is stronger than a wet one. An electric mixer provides the most consistent results. These principles also apply to other projects, as detailed on our How to Install Hardscape Pavers page.
Step 3: Pouring and Finishing Your Concrete Driveway Borders
This is when your planning and preparation come together.
Pour the concrete methodically, filling the forms completely and eliminating air pockets. Level and smooth the surface by pulling a straight screed board across the forms, then use a float to create a smooth finish. After surface water disappears, use an edger for rounded edges and a groover to create control joints every 3-4 feet. This is when you apply your chosen finish, like a broom texture or stamping. The curing process is critical. Remove forms after about a day, then keep the concrete moist for a week by misting it or covering it with plastic. Avoid walking on it during this time. Your new concrete driveway borders will reward your careful work with decades of beauty.
Maintenance and Long-Term Care
Your concrete driveway borders are low-maintenance, but a little attention will extend their life significantly. These simple tasks take just minutes but add years to your investment.
Regular Cleaning
Keeping concrete driveway borders clean is easy. A good rain often does the job, but a garden hose can rinse away accumulated dirt and leaves. For stubborn spots, use a stiff brush. A pressure washer also works, but use a gentle setting on decorative finishes. A quick monthly rinse prevents buildup and keeps borders looking sharp.
Sealing Concrete
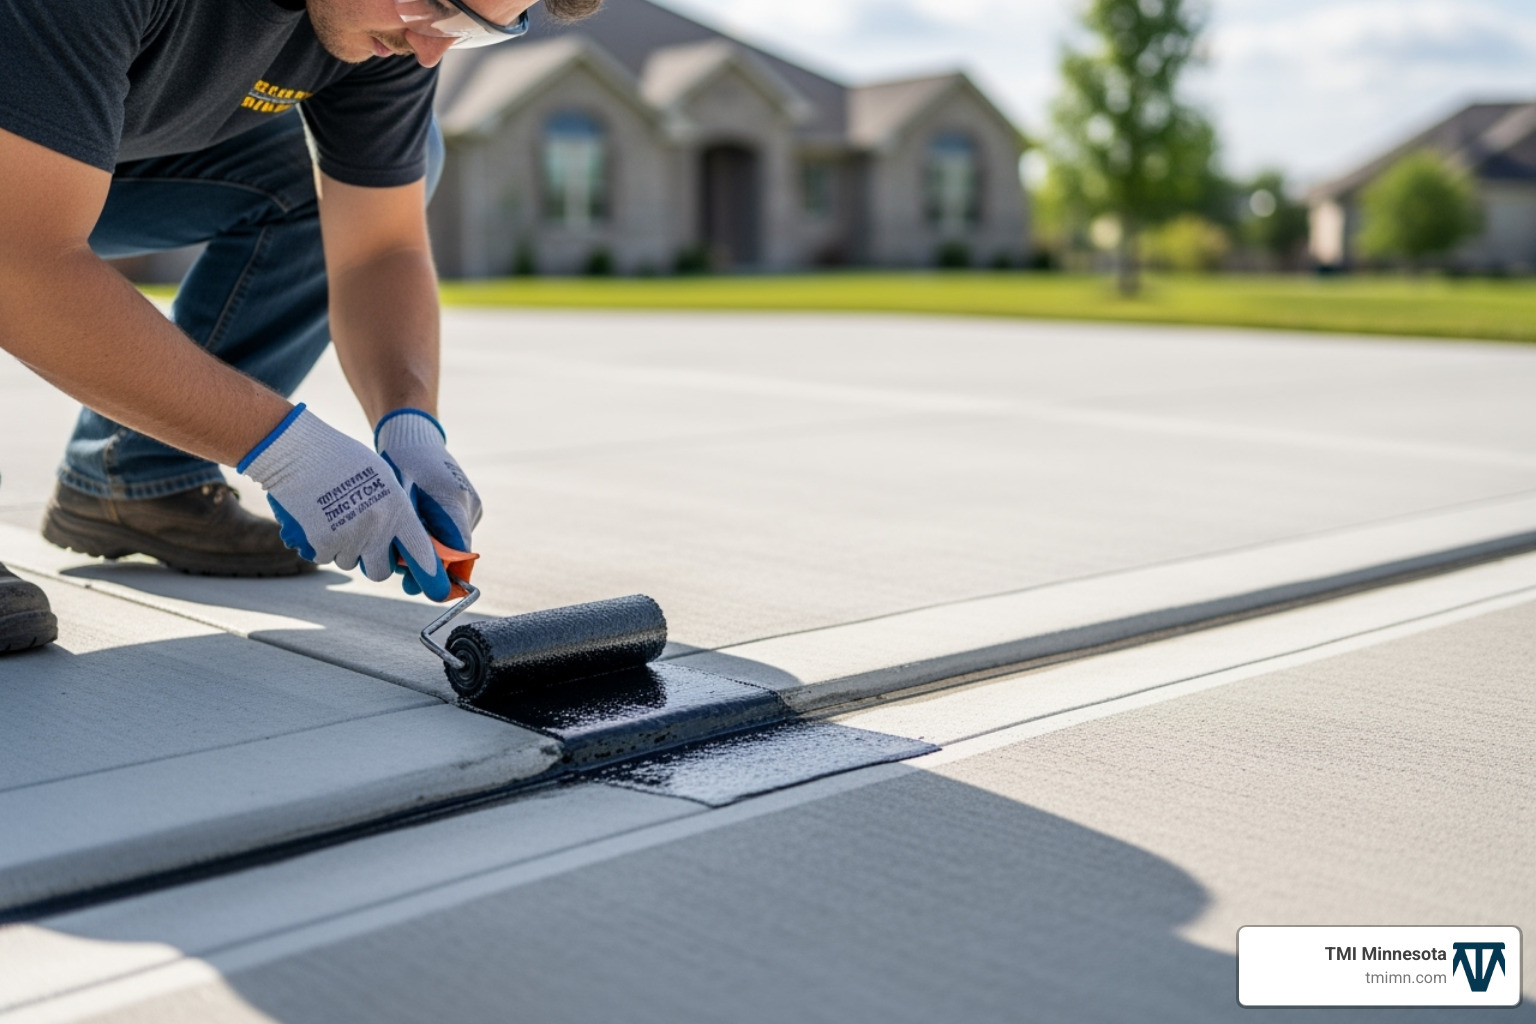
In a climate like Minnesota’s, sealing your concrete borders protects them from moisture, stains, and de-icing salts. A quality sealer makes the concrete less porous. Clean the surface, let it dry, and apply the sealer according to instructions. Reseal every 2-5 years to preserve the appearance and integrity of the concrete.
Crack Repair
Minor hairline cracks can happen due to ground movement or temperature swings. They are usually cosmetic and easy to fix. Use a concrete crack filler from a hardware store. Clean the crack, apply the filler, and smooth it out. Act fast—addressing small cracks prevents them from worsening, especially when water can freeze and expand inside them.
Stain Removal
Tackle stains from oil, rust, or leaves as soon as possible. Use a concrete degreaser for oil and grease, a specialized remover for rust, and a mild bleach solution for organic stains. Always test cleaning products on an inconspicuous spot first. For more tips, see 5 Tips for Your Driveway Project.
Frequently Asked Questions about Concrete Borders
Here are answers to the most common questions about concrete driveway borders to help you make the best decision for your home.
How much do concrete driveway borders cost?
Budget is a key concern, and concrete driveway borders offer excellent value.
- DIY Savings: You can save on labor costs by doing it yourself. Material costs for concrete are typically $3 to $6 per square foot.
- Material Costs: Standard gray concrete is most economical. Decorative finishes like stamping or color will add to the cost but also the aesthetic value.
- Project Size: A typical residential project uses 100-250 square feet of concrete.
- Complexity Factors: Intricate curves or steep slopes will increase costs.
Concrete’s durability and low maintenance provide long-term savings. For a personalized estimate, see our Hardscape Installation Cost guide.
Can I install a concrete border on an existing asphalt or paver driveway?
Yes, installing concrete driveway borders on existing asphalt or paver driveways is a great way to upgrade without a full replacement.
- Cut a Clean Edge: Use a concrete saw to create a precise line on an asphalt driveway. For pavers, you may need to remove the existing border.
- Ensure a Solid Base: Dig a proper trench alongside the existing driveway and compact the base to prevent shifting.
- Bonding New to Old: While borders are self-supporting, rebar dowels or epoxy can create a stronger connection to the existing surface if needed.
How long do concrete borders last?
Properly installed concrete driveway borders can last for decades—20, 30, or even 50+ years.
- Proper Installation: A solid base, correct mixing, and proper curing are essential for longevity.
- Maintenance Impact: Regular cleaning and sealing every few years can add many years to your border’s life.
- Weather Resistance: Concrete is engineered to withstand freeze-thaw cycles, summer heat, and UV exposure without warping or deteriorating.
It’s a one-time investment that provides lasting value and curb appeal.
A Finishing Touch That Lasts a Lifetime
As we’ve seen, concrete driveway borders are a top choice for homeowners seeking a lasting impression. They outperform other materials in durability and cost-effectiveness, and decorative finishes can turn a simple border into a design statement. Whether you choose poured curbing or pre-cast blocks, you’re making an investment that’s both functional—preventing erosion and weeds—and architectural, framing your property beautifully.
This is a lasting investment due to concrete’s resilience. With minimal maintenance, your borders will look great for decades. The improved curb appeal is immediate, creating clean, defined lines that make a home look polished and well-maintained. Your driveway gains a finished, intentional look that creates a welcoming entrance.
For homeowners seeking a professional touch for their outdoor projects, TMI Minnesota offers expert Driveway Landscaping Designs and installation services. We understand that every home is unique, and we’re passionate about creating outdoor spaces that reflect your personal style while standing the test of time. Let us help you take your home’s entrance from ordinary to extraordinary – because the right finishing touch really can last a lifetime.