
Why Fake Grass DIY Is the Smart Choice for Homeowners
Fake grass DIY projects are changing backyards across the country, offering homeowners a way to achieve a lush, green lawn without the endless cycle of mowing, watering, and fertilizing. Here’s what you need to know to get started:
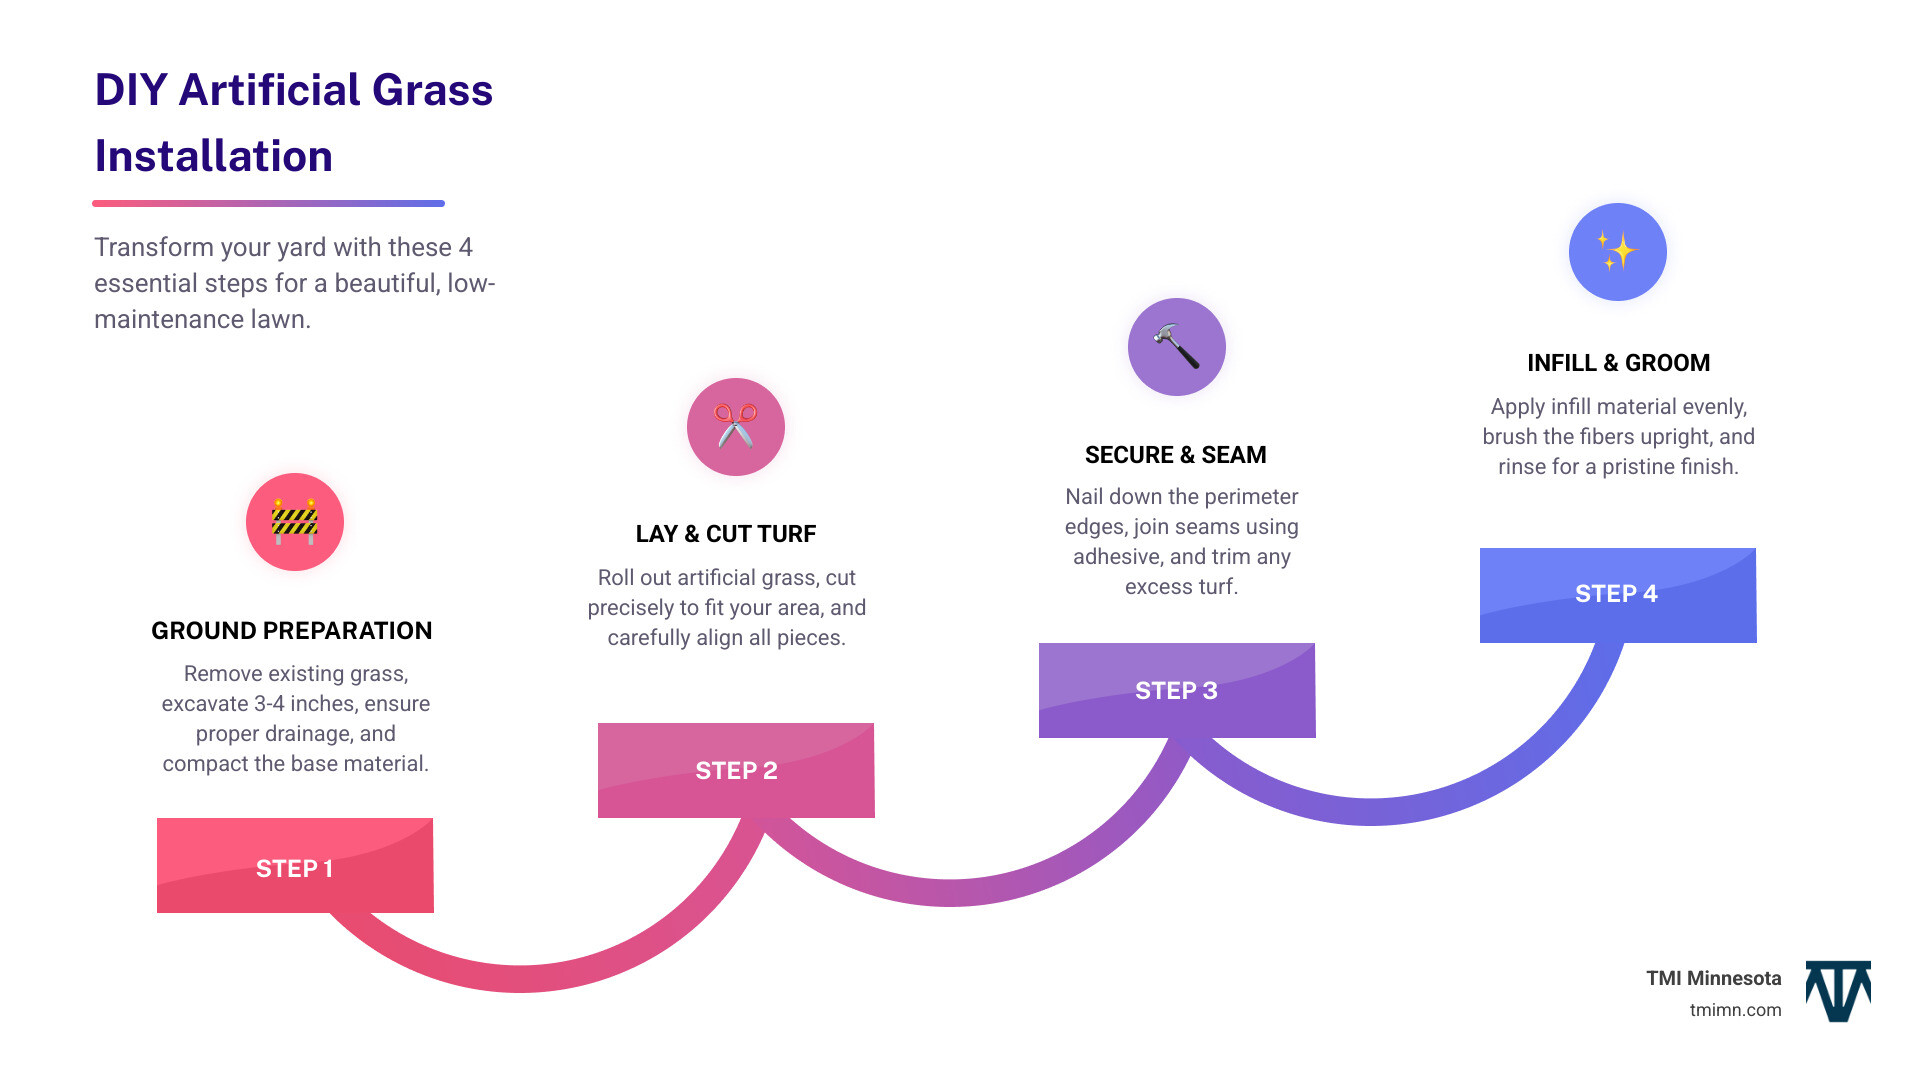
The Essential Steps for DIY Artificial Grass Installation:
- Prepare the Ground – Remove existing grass, excavate 3-4 inches of soil, and create proper drainage
- Build a Stable Base – Add 2-3 inches of compacted gravel and a thin layer of leveling sand
- Install the Turf – Roll out your artificial grass, cut to fit, and seam pieces together
- Secure and Finish – Nail down edges, apply infill material, and brush fibers upright
The appeal is clear: DIY installation can save you up to 50% compared to professional installation, with projects that would cost around $11,000 professionally coming in around $4,000 when you do it yourself. You’ll also eliminate up to 70% of your water consumption and say goodbye to weekend lawn maintenance forever.
The process is surprisingly straightforward. Most homeowners can complete a small to medium-sized yard over a weekend, especially with some hired help for the heavy excavation work. The key is proper preparation—getting your base layer right ensures your artificial lawn will look great and drain properly for years to come.
As Christopher Deanovic, Operations Leader at Task Masters, I’ve overseen countless landscape changes throughout Minnesota. My hands-on experience with both residential and commercial installations, including many fake grass DIY projects, has shown me that motivated homeowners can achieve professional-quality results with the right guidance.
Fake grass diy word roundup:
Planning Your Project: Tools, Materials, and Choosing Your Turf
Starting on a fake grass DIY project is an exciting endeavor that offers immense satisfaction and significant savings. A DIY approach gives you control and can cut costs by up to 50%. For a 700 sq ft area, a professional installation might run you around $11,000, but a DIY approach could be as low as $4,000, making it a compelling option for many homeowners in the Twin Cities.
Before we dive in, it’s crucial to assess your project’s scope. Is it a small pet run, a cozy patio area, or an entire backyard change? Understanding the size and complexity will help us budget effectively and gather the right resources. Proper planning prevents poor performance! For a deeper dive into financial aspects, explore our guide on Artificial Lawn Cost.
Safety is paramount during any home improvement project. Always wear safety glasses and work gloves. Before digging, you must call 811 to ensure you don’t accidentally strike any underground utility lines.
Essential Tools for the Job
Having the right tools makes all the difference for a smooth fake grass DIY installation. We’ll need a mix of common household items and a few specialized pieces of equipment.
Here’s a breakdown of what we’ll need:
Basic Tools:
- Utility Knife: For precise turf cutting.
- Hammer: For securing landscape nails.
- Yard Rake & Shovel: For clearing debris and spreading base materials.
- Wheelbarrow: To transport heavy materials like gravel and sand.
- Tape Measure & Marking Paint: For accurate measurements and layout.
- Garden Hose: For rinsing and settling infill.
- Wide Shop Broom or Stiff-bristled Broom: For spreading infill and grooming.
- Sod-cutting knife: If removing existing sod.
Specialty Tools (consider renting for larger projects):
- Plate Compactor or Heavy-duty Roller: Crucial for compacting the base for stability and drainage.
- Hand Tamper: For compacting smaller areas or edges.
- Drop Spreader: For even application of infill material.
- Power Broom: To brush infill into the turf and fluff up the fibers.
- Long Pile Carpet Cutter / Carpet Knife: For making clean, precise cuts on the turf backing.
Gathering Your Materials
Just like a chef needs the right ingredients, we need the correct materials for a successful fake grass DIY installation.
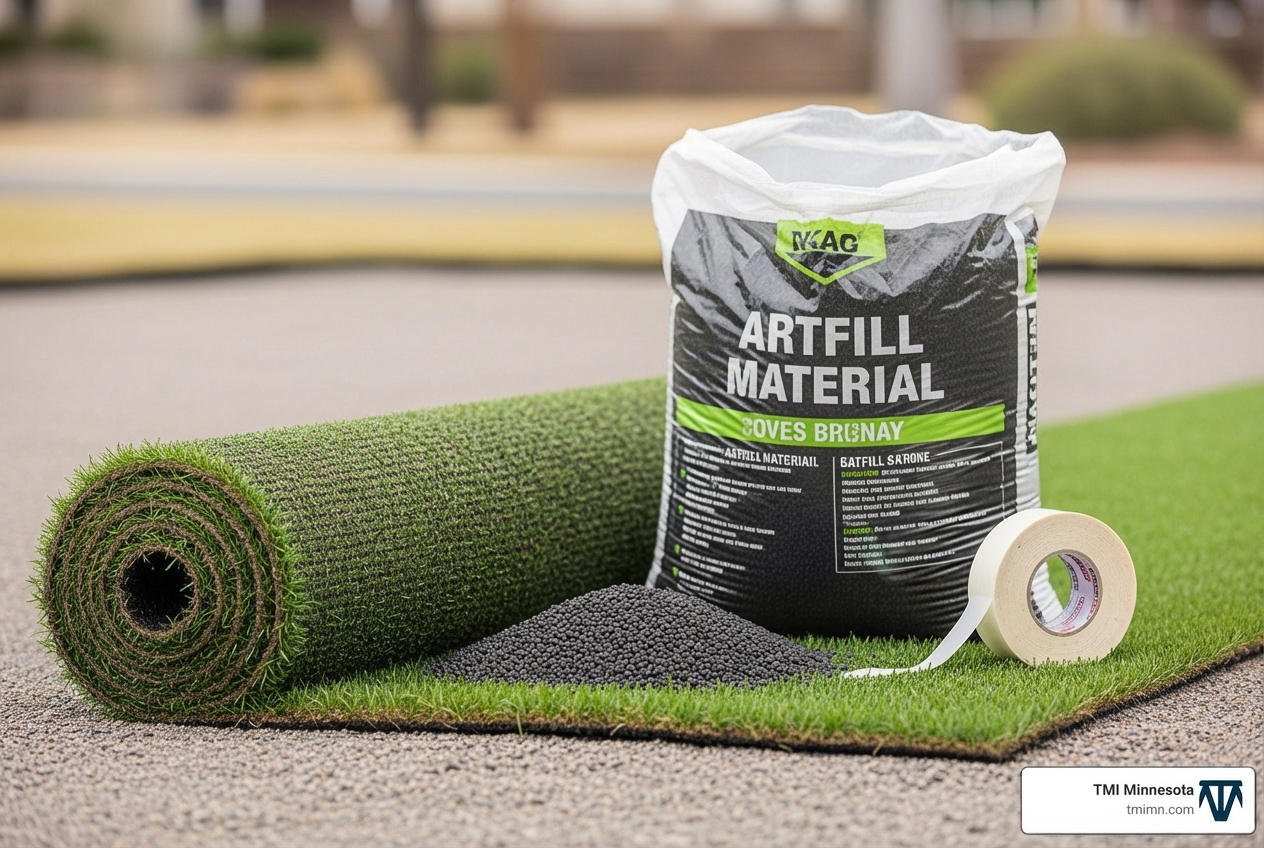
Here’s our shopping list:
- Artificial Turf: Measure your area carefully, adding extra for cuts and trimming. Rolls are typically 12 or 15 feet wide.
- Base Aggregate: A 2-4 inch layer of crushed stone, gravel, or Class 2 Road Base forms the foundation for drainage and stability.
- Leveling Sand: A thin layer (about 1 inch) of sharp sand or paver sand helps create a perfectly smooth and level surface.
- Weed Barrier Fabric: Prevents weeds while allowing drainage. Note for pet owners: Consider skipping this for pet turf, as it can trap odors. We’ll discuss this further in the pet section.
- Seaming Tape & Adhesive: For joining multiple pieces of turf seamlessly. We recommend a high-quality landscaping adhesive designed for artificial grass, like Alliance Gator Block Bond XP, to ensure a strong, durable bond.
- Galvanized Nails or U-Pins: 5-6 inch galvanized nails are commonly used to secure the perimeter and seams. For pet turf, manufacturers sometimes recommend staples and a frame for added security against digging.
- Infill: Essential for weighing down the turf, helping the blades stand upright, and providing cushioning. Silica sand is common, while Zeolite is excellent for pet areas due to its odor-neutralizing properties.
How to Choose the Right Artificial Grass
Selecting the perfect artificial grass is like choosing the right carpet for your home – it needs to match your lifestyle and aesthetic preferences. Here’s what we consider when guiding our Twin Cities clients:
- Pile Height: The length of the grass blades. Longer piles (1.5-2.5 inches) look lush, while shorter piles (0.5-1.5 inches) are more durable for high-traffic areas.
- Face Weight: The weight of grass fibers per square yard (excluding backing). Higher face weight means a denser, more luxurious, and durable turf.
- Density: How closely packed the grass blades are. A higher density contributes to a fuller, more realistic appearance and better resilience against matting.
- Turf Material:
- Polyethylene: The most common material, offering a great balance of softness, realistic looks, and durability.
- Polypropylene: Durable and low-maintenance but can be susceptible to UV fading. Often used for thatch layers.
- Nylon: The strongest and most durable option, with a high melting point, but can be less soft and more expensive. Some may find nylon to be the best artificial grass for their needs, while others might prefer polyethylene.
- Backing Type & Drainage Holes: The backing material is crucial for drainage and longevity. We look for porous or hole-punched backing that allows water to flow through easily. For pool areas, flow-through backing is especially important.
- Thatch Layer: This is a layer of shorter, synthetic yellow and brown blades at the base of the turf, designed to mimic the natural thatch of real grass. It adds realism and helps support the longer blades.
- Specialized Turf:
- For Kids: If little ones will be playing, consider turf designed for playgrounds, often denser and paired with a foam padding underlayment for added safety and cushioning. Most artificial grass is non-toxic, made from pet-friendly, kid-friendly nylon or plastic materials. You can find more information on Safe Turf For Kids.
- For Pets: Pet-friendly turf typically has shorter, stiffer blades for durability, improved drainage, and antimicrobial properties to help with odor control. Zeolite infill is a game-changer here!
For a comprehensive overview of your options, check out the Artificial Grass Buying Guide.
The Ultimate Fake Grass DIY Installation Guide
Now for the main event! Installing your own artificial grass is a rewarding project, often completed over a weekend. We’ll guide you through each step, ensuring you have the knowledge for a successful ForeverTurf Installation. Don’t forget those safety glasses and work gloves!
Step 1: Ground Preparation and Base Installation
This is the most critical step. A well-prepared base ensures proper drainage, prevents unevenness, and is key to the longevity of your lawn.
- Call 811 First! Before any digging, always contact 811 to have underground utility lines marked. This prevents dangerous and costly accidents.
- Clear the Area: Remove all existing natural grass, weeds, roots, rocks, and debris. For existing sod, a sod-cutting knife can make this job much easier.
- Excavate: Excavate the existing soil to a depth of 3-4 inches to create space for the base layers. Some projects may require a different depth for specific drainage needs.
- Grade for Drainage: A slight slope (1-2%) away from structures is key to encourage water runoff and prevent pooling, especially in the Twin Cities. For more detailed insights, consult our Artificial Grass Drainage Solutions Guide.
- Install Edging (Optional but Recommended): For a clean, defined border, install bender board (plastic or composite), treated wood, or aluminum/steel edging around the perimeter. This provides a stable edge for securing the turf.
- Lay Weed Barrier Fabric (Conditional): If not installing pet turf, lay down your weed barrier fabric, overlapping edges by at least 6 inches. Secure it with 6-inch galvanized nails or landscape anchors. For pet turf, some experts advise skipping this step to avoid trapping bacteria and odors.
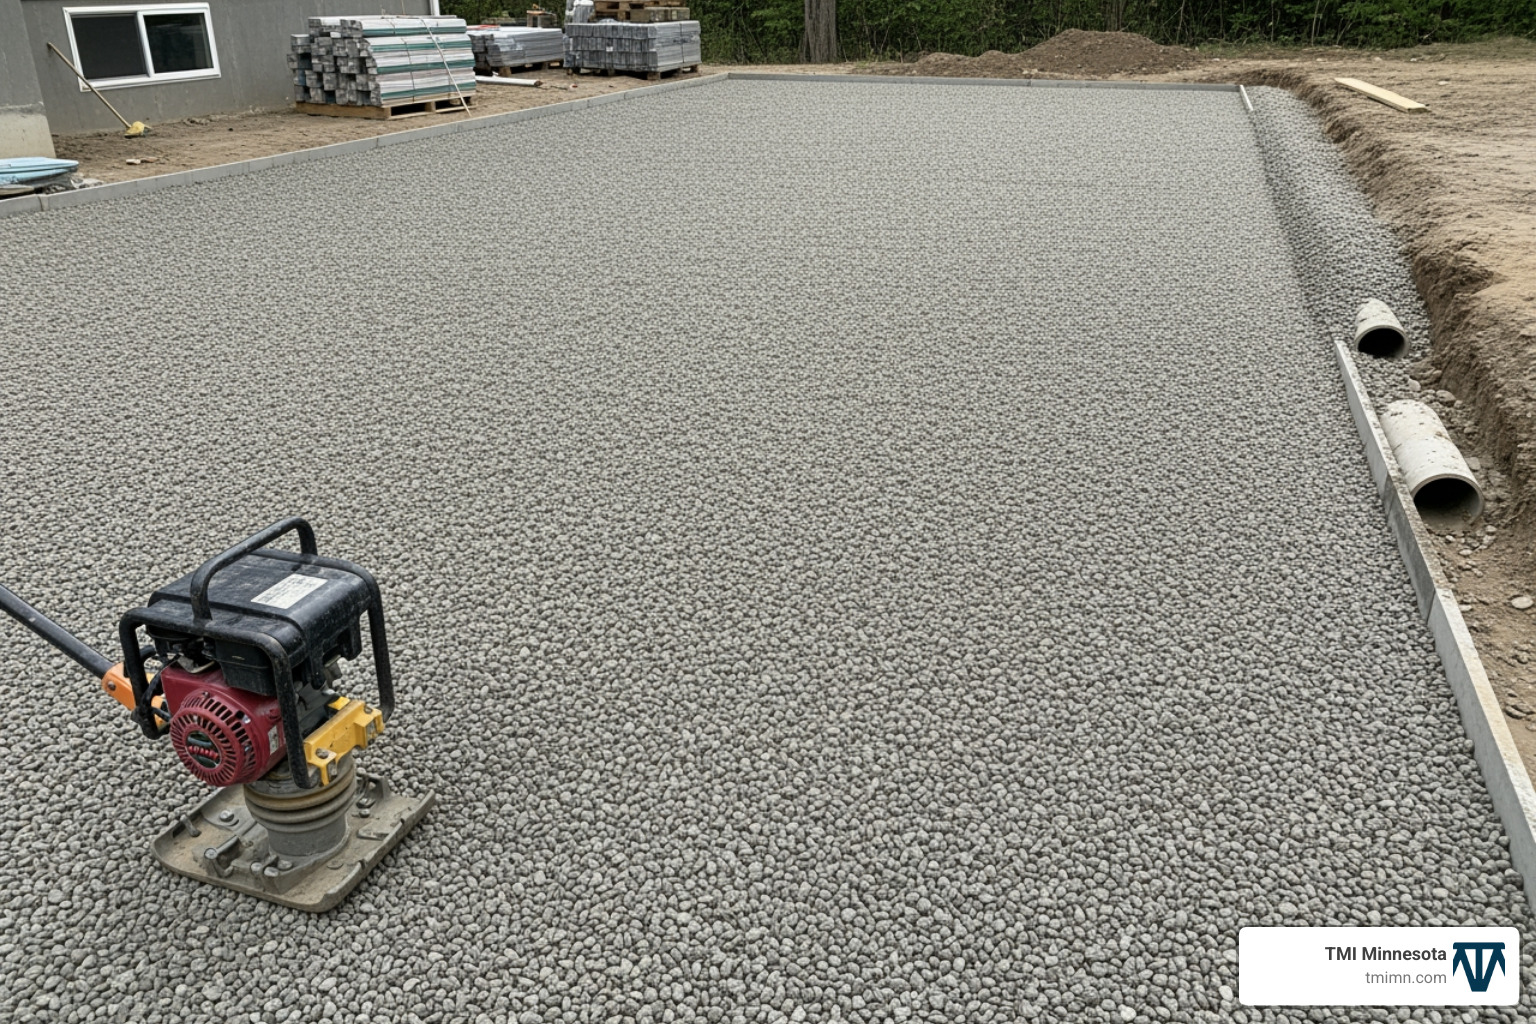
- Apply Aggregate Base Layer: Spread 2-4 inches of your chosen aggregate (crushed stone, Class 2 Road Base, or decomposed granite). Ensure it’s evenly distributed.
- Compaction is Key: Using a plate compactor or heavy-duty roller, thoroughly compact the aggregate base. We’ll repeat this process 2-3 times, adding water between layers to aid compaction, until the base is firm and stable. This prevents settling and unevenness.
- Add Leveling Sand: Spread a 1-inch (or 10-15mm) layer of sharp sand or paver sand over the compacted aggregate. Rake it smooth and level it perfectly. This fine layer ensures a flawless surface for your turf.
Step 2: Cutting, Seaming, and Securing Your Turf
With our base perfectly prepared, it’s time to bring in the green!
- Acclimation: Unroll your turf and lay it in the sun for at least 30 minutes. This allows the material to relax, reducing wrinkles and making it easier to work with.
- Pile Direction: This is a crucial detail for a uniform look. All pieces of turf must be laid with the grass blades (the “pile”) facing the same direction. Typically, you want the blades to lean towards your primary viewing area (e.g., your house) for the most natural appearance.
- Rough Cut and Position: Carefully unroll the turf over your prepared base, avoiding dragging it, which can disturb the base. Position it roughly where it will go, leaving excess around the edges.
- Cutting from the Back: To make precise cuts and create invisible seams, always cut the turf from the back side. A utility knife or a specialized carpet knife works best. Trim any “selvedge” (the non-grass edge) from the factory rolls to ensure a clean seam.
- Seaming Best Practices: If your project requires multiple pieces of turf, careful seaming is essential.
- Align the edges of the two turf pieces perfectly, ensuring the stitch lines match.
- Fold back the edges of both pieces.
- Lay a strip of seaming tape (rough side up) centered under the seam line.
- Apply your artificial grass adhesive (like Alliance Gator Block Bond XP) in a zig-zag pattern or a continuous bead along the seaming tape.
- Carefully fold one turf edge back over the adhesive, pressing firmly. Then, gently fold the second piece over, ensuring the blades are held upright and out of the adhesive.
- Walk along the seam to ensure good contact. You can also use the “zipper” or “S” method, an advanced technique for even tighter seams.
- Secure with Nails:
- Perimeter: Around the entire edge of your installation, secure the turf with 5-6 inch galvanized nails, spaced every 3-6 inches. For pet turf, we might space them closer, every 2 inches, especially if a perimeter frame isn’t used.
- Seams: Along the seams, place nails every 3-4 inches to prevent lifting.
- Throughout the Surface (for pet turf): For added protection against pets digging or pulling, some recommend nailing every 2 feet throughout the surface.
- Hide Nail Heads: Gently pull back the grass blades before hammering the nail, then push the blades back over the nail head to hide it. Be careful not to over-hammer, which can create dips.
Step 3: Applying Infill and Final Grooming
The infill is the unsung hero of your artificial lawn, and the final grooming brings it all to life.
- Infill Purpose: Infill serves several vital roles:
- Weighs down the turf to prevent shifting.
- Supports blades to prevent matting and maintain a natural look.
- Provides cushioning underfoot.
- Protects the backing from UV rays.
- Controls odors (with specialized pet infills).
- Infill Types:
- Silica Sand: The most common and cost-effective infill. We use round silica sand, typically 1-3 lbs per sq ft.
- Zeolite: A fantastic choice for pet turf. It absorbs and neutralizes pet urine odors, making your pet area much more pleasant. Typically 2-3 bags are used for every 300 sq ft.
- Antibacterial Sand: Another excellent option for pet turf, helping to prevent bacterial growth.
- Application with Drop Spreader: The easiest way to ensure even distribution is with a drop spreader. Fill it with your chosen infill and walk across the turf, applying 1-3 lbs per square foot, depending on your turf and usage. You can also use a flat tool or shovel for smaller areas, but be careful to apply evenly.
- Brushing in the Infill: Once the infill is spread, use a power broom, a stiff-bristled broom, or a push broom to work the infill down into the base of the turf fibers. Brush against the grain of the grass blades to help them stand upright and ensure the infill settles properly.
- Final Rinse: Give your newly installed fake grass DIY lawn a good rinse with a garden hose. This helps settle the infill and washes away any dust or debris from the installation process, leaving your lawn looking fresh and vibrant.
DIY vs. Pro: Costs, Challenges, and Benefits
Deciding between a fake grass DIY project and hiring a pro depends on your project’s complexity, comfort with physical labor, and budget. While we at TMI Minnesota offer expert artificial grass installation, we also empower homeowners to take on their own projects. For larger or intricate designs, professional help is a great choice, but for many, the DIY route is a rewarding path.
Cost Considerations and Savings
The financial benefits of a fake grass DIY installation are significant. As we mentioned, homeowners can save up to 50% compared to professional installation. Let’s look at some estimated cost comparisons for a typical 500 sq ft lawn in the Twin Cities:
| Item | DIY Estimated Cost (500 sq ft) | Professional Estimated Cost (500 sq ft) |
|---|---|---|
| Artificial Turf | $1,250 – $3,275 | Included in overall quote |
| Base Materials | $250 – $500 | Included in overall quote |
| Infill, Tape, Adhesive | $150 – $300 | Included in overall quote |
| Tool Rental (Compactor) | $50 – $100 | Included in overall quote |
| Labor | Your time! ($0) | $2,500 – $7,500 |
| Total Estimated Cost | $1,700 – $4,175 | $5,000 – $7,500 |
Note: These are estimates. Actual costs may vary based on turf quality, material prices, and local labor rates.
Beyond installation, the long-term savings are impressive. Artificial turf reduces water use by up to 70%, lowering water bills. You’ll also eliminate costs for mowing, fertilizing, and pest control. These Artificial Grass Benefits contribute to a fantastic return on investment over the 10-15 year lifespan of quality artificial grass.
Common Mistakes to Avoid in Your Fake Grass DIY Project
We’ve seen it all, and we want to help you avoid common pitfalls that can turn your exciting fake grass DIY project into a headache.
- Improper Base Preparation: This is the number one mistake. A soft, uneven, or poorly drained base will lead to a lumpy, unstable lawn with drainage issues. Spend the time to excavate, compact, and level correctly.
- Poor Drainage: Not grading the ground with a slight slope or choosing turf without adequate drainage can lead to standing water, mold, and unpleasant odors.
- Visible Seams: If you don’t trim the factory edges (selvedge) or align the turf pieces correctly, your seams will be glaringly obvious. Take your time, cut from the back, and use plenty of adhesive.
- Mismatched Pile Direction: Laying turf pieces with the blades facing different directions will result in an inconsistent, unnatural look. Always ensure all rolls are laid in the same direction.
- Lifting Edges: Skimping on nails around the perimeter or along seams can cause the turf to lift, creating trip hazards and an unprofessional finish.
- Skimping on Infill: Insufficient infill means your turf blades will mat down, look flat, and wear out faster. It’s essential for the turf’s longevity and appearance.
- Inaccurate Measurements: Measure twice, cut once! Ordering too little turf means delays, and ordering too much means wasted money.
Special Applications: Pools, Pavers, and Pets
Fake grass DIY isn’t just for general lawns; it’s incredibly versatile. However, different applications require specific considerations.
- Pool Areas: Installing artificial grass around pools is a fantastic idea for a mud-free, low-maintenance zone.
- Improved Drainage: Crucial here! We recommend turf with maximum flow-through backing and potentially drainage tiles underneath to handle splashes and heavy rain. A slight slope away from the pool is non-negotiable.
- UV Resistance: Poolside turf will get a lot of sun, so choose a UV-resistant product to prevent fading.
- Cooling Infill: Consider infills like HydroChill, which can help keep the turf surface cooler, especially on hot Minnesota days.
- Pavers: Integrating artificial grass with pavers creates a modern, low-maintenance aesthetic.
- Base Consistency: Ensure the base for both the pavers and the turf is consistent and compacted properly to avoid uneven settling.
- Edging: Use a strong edge restraint for both the pavers and the turf to keep everything in place. For inspiration, explore our options for Pavers And Fake Grass.
- Pet Turf: Our furry friends love artificial grass, but their needs are unique.
- Odor Control: This is paramount. We recommend Zeolite infill, which absorbs ammonia from pet urine. Antibacterial infill is also a great choice.
- Superior Drainage: Look for turf with excellent drainage to quickly flush away liquids. Products like DrainCore or AirDrain underlayments create a void for ventilation and water movement.
- Durability: Choose a turf with shorter, denser blades that can withstand vigorous play and resist staining.
- No Weed Barrier (for some): As mentioned, for pet turf, some experts advise against weed barrier fabric as it can trap bacteria and odors. Instead, focus on a well-draining base and proper infill.
- Secure Installation: Pets can be diggers! Secure the perimeter of pet turf every 2 inches with nails or consider a perimeter frame with staples for maximum security. You can learn more in this guide: How to Install Artificial Pet Turf – DIY.
Frequently Asked Questions about DIY Artificial Grass
We often get asked similar questions about fake grass DIY projects. Here are some of the most common ones:
How do you handle drainage for a fake grass DIY installation?
Proper drainage is fundamental to a successful artificial lawn. The key steps are:
- Proper Base: We always start with a well-prepared base layer of compacted aggregate (like crushed stone or Class 2 Road Base) that is 2-4 inches deep. This granular material allows water to percolate through efficiently.
- Slight Slope: We grade the ground with a slight slope (1-2% or 1-2 inches per 10 feet) away from any structures. This encourages surface water to move towards designated drainage points.
- Permeable Turf Backing: Most quality artificial grass products come with a porous or hole-punched backing that allows water to pass through the turf itself. We always ensure the turf we choose has excellent permeability.
- No Weed Barrier for Pets (sometimes): For pet areas, we sometimes skip the weed barrier to prevent odors and ensure maximum drainage directly into the base. For a deeper dive, check out our Artificial Grass Drainage Solutions Guide.
What kind of maintenance does DIY installed artificial grass need?
One of the biggest draws of fake grass DIY is reduced maintenance, but it’s not maintenance-free. We recommend:
- Regular Rinsing: A weekly rinse removes dust, pollen, and light debris.
- Debris Removal: Periodically sweep or blow off leaves, dirt, and other organic matter to prevent buildup and maintain appearance.
- Brushing High-Traffic Areas: Monthly, use a stiff broom to brush against the grain in high-traffic areas to help fibers stand upright.
- Spot Cleaning Spills: For spills, clean them promptly with a mild detergent solution and rinse thoroughly. Avoid highly acidic or bleach-containing cleaners.
- Pet Waste Cleanup: For solid waste, scoop it up. For urine, hose down the area thoroughly. For persistent odors, use a specialized turf neutralizer or Zeolite infill.
You can find a complete guide to maintaining your new lawn here: Artificial Grass Maintenance Complete Guide.
Is artificial grass safe for kids and pets?
Yes, modern artificial grass is designed to be safe for children and pets, making it a popular choice for families.
- Non-Toxic Materials: Most artificial grass is made from non-toxic, lead-free nylon or plastic (polyethylene, polypropylene) materials. We ensure our products meet strict safety standards.
- No Pesticides or Fertilizers: Unlike natural lawns, artificial turf doesn’t require harsh chemicals, creating a safer play environment.
- Cushioned Surface: For play areas, we can install foam padding underneath the turf to provide a softer, shock-absorbing surface, reducing the risk of injuries from falls.
- Pet-Friendly: Pet-specific turf is designed to be comfortable for paws, durable, and easy to clean. Concerns about crumb rubber infill (often used in sports fields) have been addressed by extensive testing, which has shown “no liftd health risks” to children and adults. For more detailed information on safety, check out our page on Safe Turf For Kids.
Conclusion: Enjoy Your Flawless, Low-Maintenance Lawn
There you have it – your comprehensive guide to a successful fake grass DIY installation! We’ve covered everything from planning and tools to the step-by-step installation process and ongoing maintenance. By taking on this project, you’re not just installing a lawn; you’re investing in a lifestyle of convenience, beauty, and environmental responsibility.
The sense of accomplishment you’ll feel looking out at your perfectly green, low-maintenance lawn, knowing you did it yourself, is truly best. You’ll enjoy year-round beauty, significant water savings, and more free time to spend enjoying your outdoor space rather than maintaining it.
For homeowners in the Twin Cities looking to integrate artificial turf with custom hardscapes or unique outdoor designs, our team at TMI Minnesota offers expert design and installation services. We specialize in changing outdoor spaces with unique designs, using leading-edge products to lift yard living.
Ready to upgrade your landscape?
Explore how to combine the lush look of turf with neat hardscaping by viewing our Artificial Turf with Pavers solutions.