
Why Artificial Turf is Your Yard’s New Best Friend
Foreverturf installation transforms your outdoor space into a lush, green paradise that stays beautiful year-round without the endless maintenance of natural grass. Here’s what you need to know:
Key Steps for Foreverturf Installation:
- Site preparation – Remove existing grass and excavate 3-4 inches deep
- Base construction – Install 2+ inches of crushed stone aggregate, compacted to 90%
- Turf placement – Roll out turf in same grain direction, allowing 24-hour acclimation
- Seaming and securing – Join sections with adhesive tape, secure perimeter every 2-3 inches
- Infill application – Apply 0.75-1 lb per square foot of sand or rubber infill
- Final grooming – Power broom fibers upright and rinse entire area
Artificial turf offers incredible benefits that make it the smart choice for busy homeowners. You’ll save thousands of gallons of water annually while eliminating the need for mowing, fertilizing, and constant yard work. ForeverLawn has installed over 50 million square feet worldwide, proving this isn’t just a trend – it’s the future of landscaping.
The installation process requires careful attention to detail, from proper drainage setup to precise seaming techniques. Getting it right the first time means enjoying a beautiful, durable lawn for 10+ years with minimal upkeep.
I’m Christopher Deanovic, Operations Leader at Task Masters, and I’ve guided countless Minnesota homeowners through successful foreverturf installation projects that transform their outdoor living spaces. My hands-on experience with landscape design and hardscaping ensures every installation meets the highest standards for both beauty and functionality.
Phase 1: Planning and Preparing Your Project Area
Alright, so you’re dreaming of that perfect, always-green lawn! Before we even think about rolling out your beautiful new foreverturf installation, we need to get down to some serious planning and prep. Think of it like building a fantastic house – you wouldn’t skip the foundation, right? The same goes for your stunning new lawn. Meticulous planning now means a flawless, long-lasting turf later!
Every successful foreverturf installation kicks off with a super thorough site assessment. We don’t just glance around! We dive deep into your existing yard. This includes checking out the current landscape, understanding your soil, and most importantly, evaluating your drainage. Does water pool in certain spots? Is your current drainage system up to snuff? Sometimes, a perfect turf needs a little extra help with drains, grading, or slopes to keep water flowing away. We figure all this out upfront!
We also carefully map out any hidden underground irrigation or electrical lines. We make sure they’re either capped, removed, or clearly marked, so no surprises pop up later.
Once we understand your yard’s unique quirks, we move on to the project layout and measuring. We’re super precise here, measuring every inch to make sure we minimize seams. Fewer seams mean a more natural, seamless look for your lawn! This careful planning is a big part of our Landscaping Design process. It’s where we help you truly envision how amazing your yard will look with its new, green upgrade!
Specialized Applications
One of the coolest things about modern artificial turf? It’s incredibly versatile! It’s not just for making your whole lawn green anymore. We’re experts at tailoring your foreverturf installation for all sorts of unique needs. Each one gets special attention:
- Pet Areas: Got furry friends who love to play (and sometimes make a mess)? We totally get it! For pet areas, we often suggest amazing products like K9Grass. It has a special Flow-Through Backing™ and even antimicrobial agents right in the blades. This means super drainage – over 10 inches per hour! – and it helps stop odors. Say goodbye to muddy paws and smelly spots! If your dog has turned your yard into a mud pit, a K9Grass foreverturf installation can truly save your outdoor space. Learn More info on K9Grass here.
- Putting Greens: Calling all golf lovers! Imagine having a professional-grade putting green right in your backyard. We can make it happen! We install surfaces that feel like a real tour green, complete with bumps, slopes, and even chipping areas. Products like GolfGreens are perfect for that optimal ball roll and realistic look. Picture yourself practicing your swing right here in the Twin Cities! You can Explore GolfGreens to see all the cool possibilities.
- High-Traffic Zones: Areas that see a lot of action – like play zones or busy commercial spots – need turf that can really take a beating. We pick tougher turf products with thicker fibers. We also recommend more infill (sometimes up to 1-2 pounds per square foot!) to keep the turf standing tall and prevent it from flattening out. For playgrounds, safety is our top priority. We use ASTM safety-rated turf, like Playground Grass, which can protect falls from up to 13 feet! Our foreverturf installation always ensures durability and safety, even in the busiest places.
Essential Tools and Materials for Your Foreverturf Installation
To make sure your foreverturf installation goes off without a hitch, having the right tools and materials is super important. Imagine trying to bake a cake without the right ingredients – it just wouldn’t work! Here’s a list of what we use to create your perfect lawn:
- Shovel: For initial digging and moving materials.
- Wheelbarrow: Super handy for hauling excavated soil and base material.
- Tape Measure: For precise measurements and layout.
- Utility Knife & Blades: Essential for cutting the turf to size and trimming edges. Always have plenty of fresh blades for clean cuts!
- Landscape Rake: For spreading and leveling the base materials.
- Plate Compactor (or Heavy Drum Roller): Absolutely critical for getting that required 90% compaction of the ground and base.
- Crushed Stone Aggregate (e.g., 3/4″ down to 1/4″ crushed drain rock): This is our go-to base material because it compacts well and drains beautifully. We steer clear of rounded rocks like pea gravel – they just don’t compact properly.
- Weed Barrier Fabric: A vital layer placed over the compacted ground to stop pesky weeds from popping up.
- Seaming Tape: Specially made for joining turf sections, often self-adhesive or used with a separate glue.
- Turf Adhesive: A strong, weather-resistant glue used with the seaming tape to create seams that are virtually invisible and incredibly strong.
- Galvanized Nails or Spikes (6-7 inches): For securing the turf along the edges and seams.
- Infill (Sand, Rubber, or a Blend): Applied after installation to help the turf blades stand upright, add weight, and protect the turf from sun damage.
- Power Broom: Used to properly work the infill into the turf fibers and brush up the blades.
- Hand Tamper: For compacting smaller, hard-to-reach areas.
- Marking Paint or Chalk: For outlining the installation area.
- Garden Hose: For wetting the base during compaction and rinsing down the turf.
- Wide Shop Broom: For general cleanup and initial brushing.
- Optional: Nailer Boards (synthetic or treated wood): For creating a clean, secure edge, especially when your turf borders asphalt or concrete.
Site Excavation and Base Construction
Okay, this is where the real work begins! Building the base is probably the most important step for your foreverturf installation. A strong, well-built base means your lawn will last for ages, stay stable, and drain perfectly. It’s truly the secret to a flawless, long-lasting result!
First things first, we get rid of any existing sod. That means clearing out all the old grass, roots, mulch, and big rocks. Sometimes, we even use a special sod cutter to make sure the surface is completely clear.
Next up is excavation. We dig down about 3 to 4 inches deep. Here in the Twin Cities, where our ground can freeze and thaw, we often go for the full 4 inches. This extra depth helps prevent any shifting over time as the ground moves. We want your turf to stay perfectly put!
Once we’ve dug it out, we shape the subgrade. This means creating the right slopes so water always drains away from your home or other structures – super important! Then, we compact this subgrade. We aim for at least 90% compaction. This step is key to preventing future settling and giving your turf a rock-solid foundation.
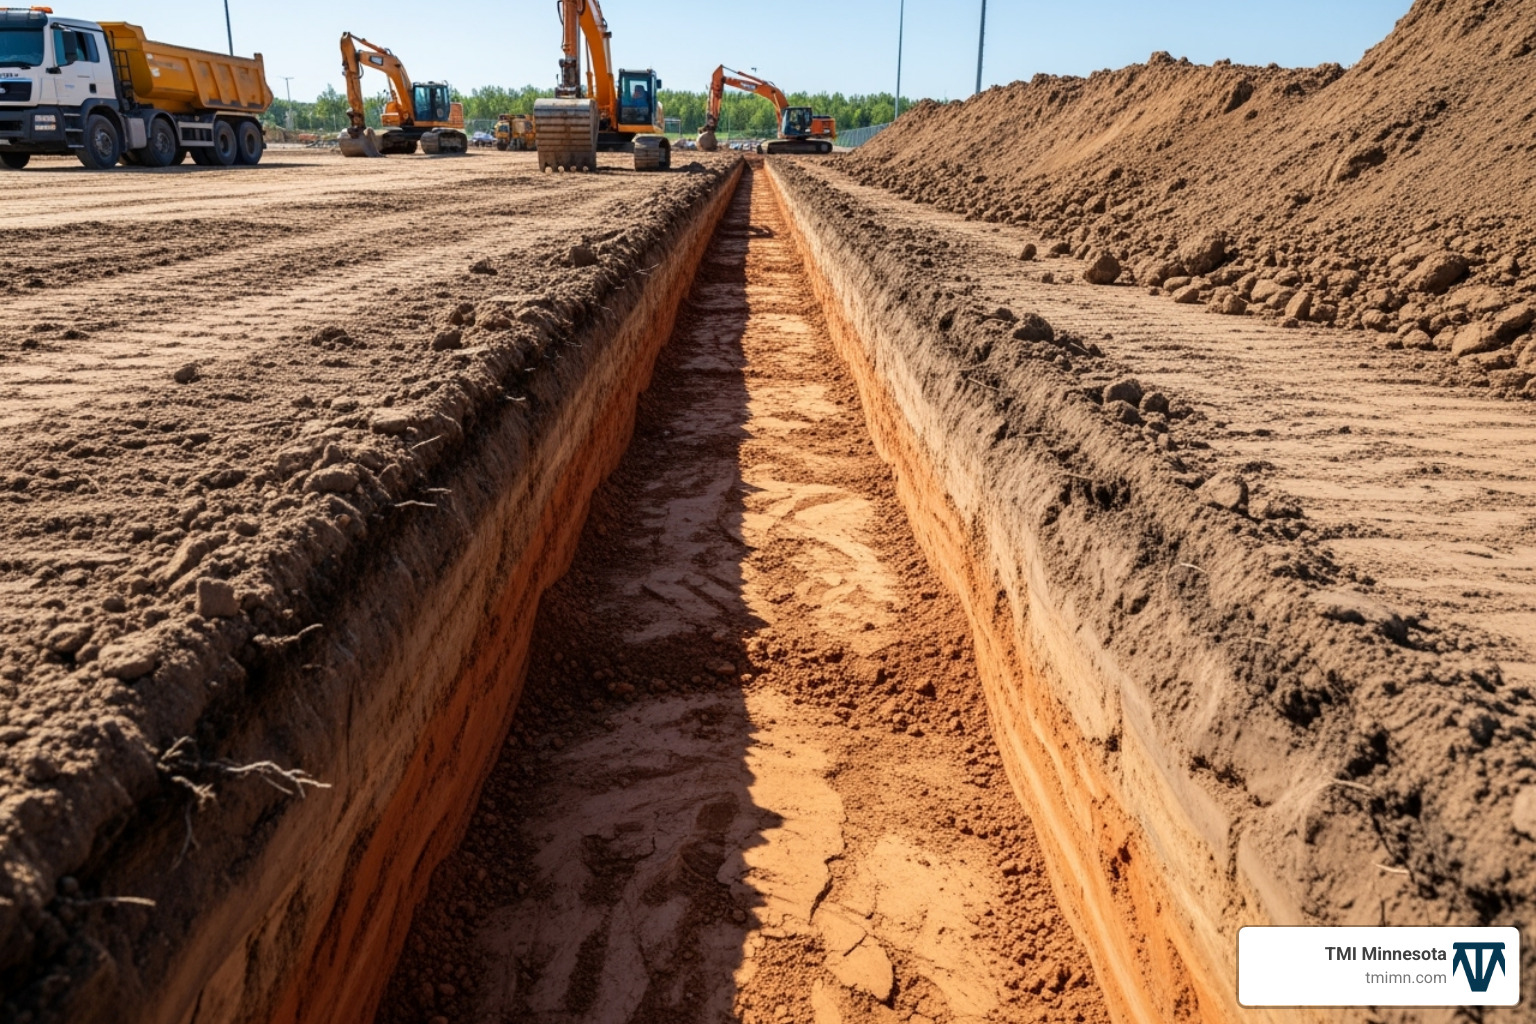
Now, it’s time for the base aggregate. We bring in a special crushed stone, usually 3/4″ down to 1/4″ crushed drain rock. This material drains incredibly well and compacts tightly. We lay it down to a minimum depth of 2 inches. For areas that get a lot of foot traffic, we might even go a bit deeper.
We spread this material evenly, then compact it again, also to at least 90% compaction. This quality base is what makes your foreverturf installation drain water super fast – over 10 inches per hour! No more puddles or muddy spots, even after a big rain.
If your design includes perimeter boards (these are synthetic or treated wood nailer boards), we install them flush with the ground around the edges. They create a really clean and secure border for attaching the turf.
Finally, we make sure the entire base is perfectly level and smooth. We fill in any small dips and compact them down. This meticulous base prep truly is the secret sauce for a flawless, long-lasting foreverturf installation. You’ll love the smooth, even look!
The Step-by-Step Foreverturf Installation Process
With the base perfectly prepared, we’re ready for the exciting part: laying down the turf! This is where your vision truly starts to come to life.
Before unrolling the turf, we allow for an acclimation period. Just like a good bottle of wine, artificial turf needs to breathe! We typically let the turf rolls acclimate for 24 hours after unrolling them. This helps prevent wrinkling and ensures the material settles before cutting and seaming.
When laying out the turf, ensuring consistent grain direction is crucial. Artificial turf has a “grain” – the direction the fibers lean – and if rolls are laid in opposing directions, the seams will be noticeable, and the color will appear inconsistent. We carefully position each roll so that the fibers all lean in the same direction, creating a uniform, natural appearance.

We strategically plan seam placement to have the least amount of seams possible, minimizing labor and ensuring the most natural look. Once laid out, we’re ready for the precise work of cutting and seaming. For a visual guide, you can Watch an installation video that demonstrates many of these steps.
Cutting and Seaming for a Flawless Finish
This stage is all about precision, creating that seamless, natural appearance that makes artificial turf so appealing. We begin by carefully trimming the edges of the turf rolls. The goal is to make perfectly straight cuts, removing any un-tufted edges from the manufacturing process. This straight edge is essential for an invisible seam.
For seaming, we lay the turf sections adjacent to each other, ensuring the fibers are running in the same direction and the stitch lines (the rows of tufted fibers) match up perfectly. We use a high-quality seaming tape, placing it beneath the seam, centered between the two turf edges. Then, we apply a specialty turf adhesive in a zigzag pattern along the tape.
The key to a strong, durable, and invisible seam is micromechanical bonding. This means the adhesive creates a strong bond not just with the backing, but also with the individual fibers, pulling everything together tightly. We carefully fold the turf edges back over the adhesive, pressing them firmly into place. To further secure the seams, we often use landscape staples every 6 inches or so along the seam line, burying them deep within the turf fibers so they are completely hidden. This creates a bond that stands the test of time, even in the fluctuating Minnesota climate.
Securing the Perimeter
Once the turf is laid out and seamed, securing the perimeter is the final step to ensure your foreverturf installation stays put, even through strong winds or active play.
If we’ve installed nailer boards (synthetic or treated lumber) around the perimeter, we secure the turf to these boards using stainless steel staples, screws, or nails. We place staples every 2-3 inches apart, ensuring a tight, secure hold. This method creates a very clean and durable edge, especially useful when the turf abuts hardscaping like patios, sidewalks, or driveways. Perimeter boards are typically set 3/4 inches below the surrounding area for a clean transition.
For areas without perimeter boards, we use galvanized spikes (6-7 inches long) to secure the turf directly into the compacted base. These spikes are spaced about 8-10 inches apart along the edges. We drive them deep, ensuring they are completely hidden within the turf fibers.
Securing around obstacles like trees or walkways requires a custom approach. We carefully cut the turf to fit snugly around these features, leaving about a 6-inch radius uncovered around tree bases to allow for growth. We then use spikes or additional adhesive to secure the turf tightly around these contoured edges, ensuring no loose spots or tripping hazards. This meticulous attention to detail at the perimeter is what gives your foreverturf installation a professional, finished look.
Phase 2: Finishing Touches and Aftercare
You’re almost there! With the turf laid and secured, we move into the final touches that transform your foreverturf installation from a construction project into a stunning outdoor living space. This is where all that careful preparation pays off, and honestly, it’s my favorite part of the process.
After the turf is fully installed, we conduct a thorough post-installation cleanup. This isn’t just about picking up scraps – we’re talking about a complete site restoration. We remove any excess materials, trimmings, and debris from the site. We even sweep your driveway and walkways clean. I always tell my team, “We should leave their property cleaner than we found it,” and that’s exactly what we do.
The final inspection is where our attention to detail really shines. We walk every square foot of your new lawn, checking seams for perfect alignment, testing edges for proper securing, and ensuring the overall appearance meets our high standards. Any minor adjustments get handled on the spot. This meticulous approach is what makes our Softscape Services stand out in the Twin Cities market.
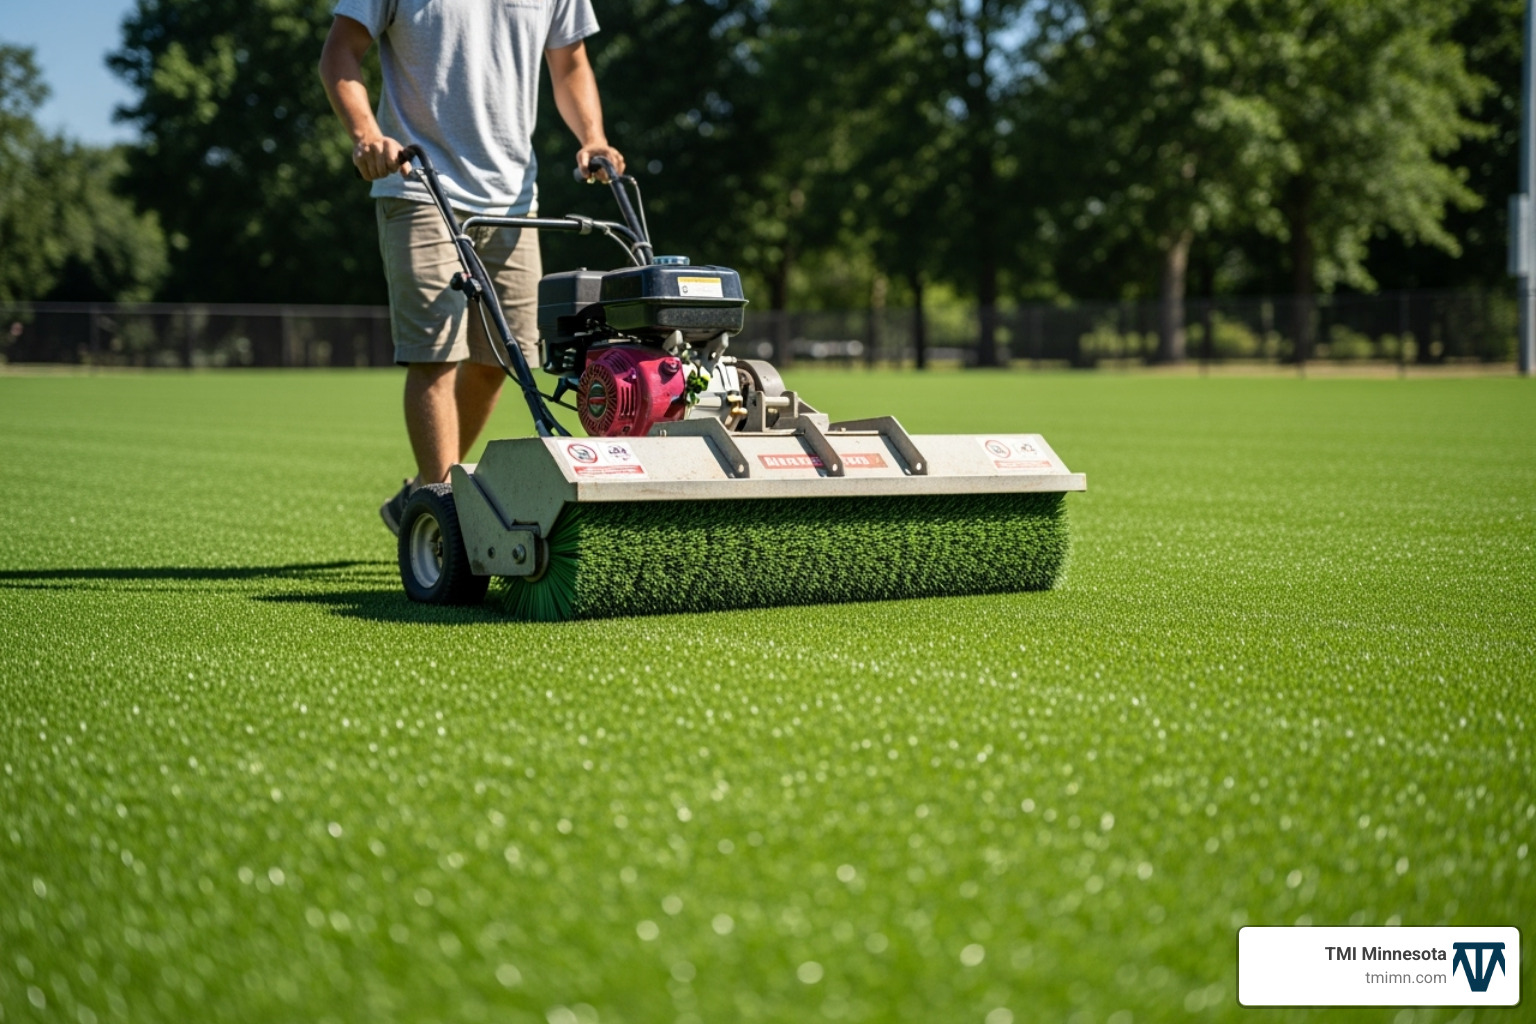
Applying Infill: The Final Step in Your Foreverturf Installation
Here’s where the magic happens – infill application is what transforms your turf from looking “installed” to looking absolutely natural. Many homeowners don’t realize how crucial this step is, but trust me, it makes all the difference.
What is infill? Simply put, it’s a granular material we spread into the turf fibers after installation. Think of it as the secret ingredient that brings everything together.
The benefits are impressive. Blade support keeps your turf fibers standing tall and prevents that dreaded matting effect, especially in high-traffic areas where kids play or pets roam. Ballast adds weight to hold everything in place – no more worrying about shifting or wrinkling during Minnesota’s unpredictable weather. Most importantly, infill provides durability and protection by shielding the turf backing from harmful UV rays, which significantly extends the life of your foreverturf installation.
We typically work with two main infill types. Washed sand is the most popular and cost-effective option, providing excellent performance for most applications. For specialized needs, we might recommend cryogenic rubber or acrylic-coated sand, which offer improved cushioning and temperature control.
The application rate matters tremendously. We apply 0.75 to 1 pound per square foot for standard installations, though high-traffic areas might need up to 1-2 pounds per square foot for optimal performance. One 50-pound bag of rubber infill typically covers about 50 square feet of turf.
We spread the infill using a drop spreader, applying it in thin, even layers. Never dump large quantities in one spot – that’s a rookie mistake that creates uneven surfaces. We also never apply infill when the material or turf is wet, as this causes clumping and poor distribution.
After spreading, we use a power broom to work the infill down into the base of the turf fibers. This process settles the material between the fibers and brushes the turf blades upright, creating that lush, natural appearance that makes people do double-takes.
Long-Term Maintenance for Lasting Beauty
Here’s the best part about your foreverturf installation – the maintenance is practically effortless! While you can finally say goodbye to weekend mowing and constant watering, a little routine care keeps your turf looking showroom-perfect for years.
Routine cleaning is as simple as it gets. Once a month (or as needed), use a leaf blower or light rake to remove leaves, dust, and debris. This prevents organic matter from breaking down in the infill, which could lead to odors or drainage issues down the road.
Rinsing your turf periodically works wonders, especially during dusty Minnesota summers or after heavy pollen seasons. A simple hose-down keeps everything fresh and helps settle the infill properly.
Every three months or so, especially in high-traffic areas, brush the fibers with a push broom against the grain or use a specialized turf rake. This eliminates debris, stabilizes the fibers, and keeps them standing tall and vibrant. It’s like giving your lawn a good hair brushing!
Spot cleaning couldn’t be easier. For spills, just spray with water and clean up. Pet waste gets removed and rinsed thoroughly. For pet odors, a mild detergent or specialized turf cleaner neutralizes any smells. If you’ve chosen K9Grass with its antimicrobial properties, odor control becomes even more effortless.
Most stain removal happens with warm water and mild household detergent. For tougher stains, we always recommend checking your turf manufacturer’s specific guidelines.
Seasonal care in the Twin Cities requires just a bit of winter wisdom. Artificial turf handles our harsh winters beautifully, but avoid using metal shovels or sharp objects for snow removal. Light snow can melt naturally, or you can carefully clear it with a plastic shovel.
Follow these simple steps, and your foreverturf installation will remain a beautiful, low-maintenance centerpiece of your outdoor living space for a decade or more. It’s honestly that straightforward!
Frequently Asked Questions about Artificial Turf
It’s natural to have questions when you’re considering a big change like a foreverturf installation! We get asked a lot about artificial turf, and we’re always happy to share clear, straightforward answers. Think of us as your friendly neighborhood turf experts, here to explain everything.
How does artificial turf handle drainage?
This is often one of the first questions people ask, and it’s a great one! You might wonder if artificial turf will just sit there like a giant puddle after a rain. But here’s the good news: our foreverturf installation systems are actually designed for superior drainage, often outperforming natural grass.
How does it work? Well, the turf itself has a special backing that lets water pass right through it. Think of it like a colander for your lawn! Beneath that, we build a carefully designed layered base system. This includes a minimum of 2 inches of crushed stone aggregate, compacted very tightly (to a 90% compaction rate). This stony layer acts like a super-efficient drain field. This smart combination means water flows quickly and easily through the system, often at a rate of over 10 inches per hour! No more puddles, no more mud, and certainly no standing water. It’s truly a “grass without limits” when it comes to managing water.
How long does artificial turf last?
High-quality synthetic turf is incredibly tough! It’s built to stand up to all sorts of weather, even our sometimes-challenging Minnesota climate. When you combine a proper foreverturf installation with just a little routine care, you can easily expect your new lawn to last for many, many years.
Most premium products, like the ones from ForeverLawn that we love to install, come with a manufacturer’s warranty of at least ten (10) years. This warranty usually covers things like general wear and tear, and any damage from the sun’s UV rays. But honestly, we’ve seen many installations continue to look fantastic and perform beautifully for much longer than that! It truly is a smart, long-term investment that keeps on giving back in beauty and very little upkeep.
Can I install artificial turf myself or should I hire a professional?
You might be wondering if this is a fun weekend DIY project. For very small, simple areas, a DIY foreverturf installation is technically possible. However, it’s important to know that this process is quite labor-intensive. It also requires specific tools, very precise measurements, and specialized knowledge to get that truly professional, seamless look and feel.
Getting the base perfectly prepared, making those seams invisible, and applying the infill just right are all crucial steps. If they’re not done correctly, it can affect how your turf looks, how long it lasts, and even whether your warranty is valid.
For larger areas, tricky landscapes, or special projects like a backyard putting green or a dedicated pet system, hiring an experienced installer like us at TMI Minnesota is definitely the way to go. We have the expertise, all the right heavy-duty equipment (like plate compactors and power brooms), and the experience from countless foreverturf installation projects. This ensures the job is done perfectly, protecting your investment and giving you the peace of mind that your outdoor space will look absolutely fantastic for years to come.
Transform Your Landscape with a Perfect Installation
Imagine stepping outside to a yard that’s always green, always perfect, no matter the season. A foreverturf installation isn’t just about getting a new lawn; it’s about investing in a lifestyle that’s easier and more enjoyable. Think of all the time and money you’ll save when you ditch the mowing, watering, and fertilizing for good! Instead, you’ll have a beautifully manicured space, ready for play or relaxation, all year long.
Here at TMI Minnesota, we bring our expertise in changing outdoor spaces right to your Twin Cities home. We’re proud to use only the best products and our unique designs to make your yard living experience truly special. Our goal is to give you a flawless finish that not only boosts your home’s curb appeal but also provides a durable, beautiful, and functional outdoor area for years to come.
We take care of every single detail of your foreverturf installation with immense precision and care. From that very first look at your yard to preparing the ground just right, expertly joining the turf sections, and finally applying the infill – we’ve got it all covered. Our professional touch ensures your new turf works perfectly, drains wonderfully, and keeps its stunning looks for many, many years. That means pure peace of mind for you.
Ready to finally enjoy a perfect, low-maintenance lawn without all the fuss? Take a peek at some of our amazing changes in our Landscape Gallery. Or, even better, let’s chat! Contact us about our Foreverturf services today! We’d love to help you bring the yard of your dreams to life.