
Why Garden Pathways Transform Your Outdoor Space
Garden pathway ideas can completely change how you experience your backyard. The right path doesn’t just get you from point A to point B—it creates structure, guides exploration, and turns a simple walk into a mindful journey through your landscape.
Quick Garden Pathway Ideas:
• Pea gravel paths – $1-$3.15 per sq ft, easy DIY installation
• Stepping stones with mulch – Most affordable weekend project
• Flagstone with moss – Natural, low-maintenance look
• Brick herringbone – Classic cottage charm, $600-$800 for materials
• Reclaimed wood boardwalk – Perfect for damp areas
• Mixed materials – Combine stone, gravel, and plants for unique design
As one landscape expert puts it: “Paths and walkways can make or break a garden. Well-constructed, well thought out garden pathways can add so much to an outdoor space, as much as a beautiful planted bed, or even a lovely view.”
Your front entry creates that crucial first impression—99% of realtors say curb appeal matters for home value. But pathways do more than boost property appeal. They prevent soil compaction from foot traffic, create defined spaces for entertaining, and let you enjoy your garden year-round.
Whether you’re looking to solve muddy lawn patches, connect different garden areas, or simply add visual interest, the right pathway material and design can transform your outdoor experience on any budget.
I’m Christopher Deanovic, Operations Leader at Task Masters, where I’ve spent years helping Minnesota homeowners bring their garden pathway ideas to life through thoughtful landscape design and expert hardscape installation. My hands-on approach combines innovative design with practical solutions that work beautifully in our challenging climate.
Simple garden pathway ideas word guide:
– bespoke garden designs
– drought-resistant landscaping
– custom pergola builders
Why Paths Matter
Think about how you move through your garden right now. Do you take the same route to the shed every time, wearing down the grass? Do you avoid certain areas when it’s wet because they’re too muddy? Garden pathway ideas solve these everyday frustrations while creating something beautiful.
A thoughtful pathway becomes your garden’s navigation system. It naturally guides visitors to your prize-winning roses, draws attention to that perfect reading nook under the oak tree, or leads to a hidden fire pit area. Instead of wandering aimlessly, people follow the path’s gentle curves to find what you want them to see.
Paths also bring structure to sprawling yards. Without them, large landscapes can feel overwhelming or disconnected. A well-placed walkway connects your patio to the vegetable garden, links the front yard to the backyard, or defines separate zones for entertaining and quiet reflection.
Here in Minnesota, pathways solve serious practical problems too. Spring thaws and summer storms create muddy conditions that make yards unusable for weeks. A solid path keeps your family moving through the landscape without tracking mud indoors or damaging delicate plantings.
Research shows that repeated foot traffic kills grass and compacts soil, creating those unsightly bare patches that never seem to recover. Instead of fighting this natural wear pattern, smart homeowners accept it by installing attractive pathways where people naturally want to walk.
During our challenging winters, a well-designed path provides stable footing when sidewalks get icy. Materials like textured stone or brick offer better grip than smooth concrete, while proper drainage prevents dangerous ice buildup.
The beauty is that solving these functional needs doesn’t mean sacrificing style. The right pathway material and design turns a practical necessity into your landscape’s most charming feature.
How to Use This Guide
Think of this guide as your personal pathway planning companion. We’ve carefully organized these garden pathway ideas to match your comfort level and weekend availability—starting with simple projects you can tackle in a single afternoon and building up to more ambitious installations that might span several weekends.
Each pathway option comes with honest details about material costs, installation difficulty, and ongoing maintenance. No surprises or hidden complexities. If you’re the type who loves getting your hands dirty with DIY projects, you’ll find step-by-step guidance and pro tips I’ve learned from years in the field. Planning to work with landscape professionals instead? These insights will help you communicate exactly what you want and understand what goes into quality installation.
The beauty of pathway design is that there’s no single “right” approach. Your perfect path depends on your budget, skill level, climate challenges, and personal style. Maybe you’re drawn to the cottage charm of weathered brick, or perhaps the clean lines of a gravel ribbon speak to your modern sensibilities.
Throughout each section, you’ll find practical wisdom about what works well in Minnesota’s challenging climate—because a pathway that looks stunning in a magazine might not survive our freeze-thaw cycles without proper planning. We’ll help you avoid common pitfalls and choose materials that age beautifully rather than becoming maintenance headaches.
Whether you’re solving a muddy mess by your back door or creating an enchanting journey through your garden beds, this guide will help you make confident decisions about changing your outdoor space.
12 Inspiring Garden Pathway Ideas
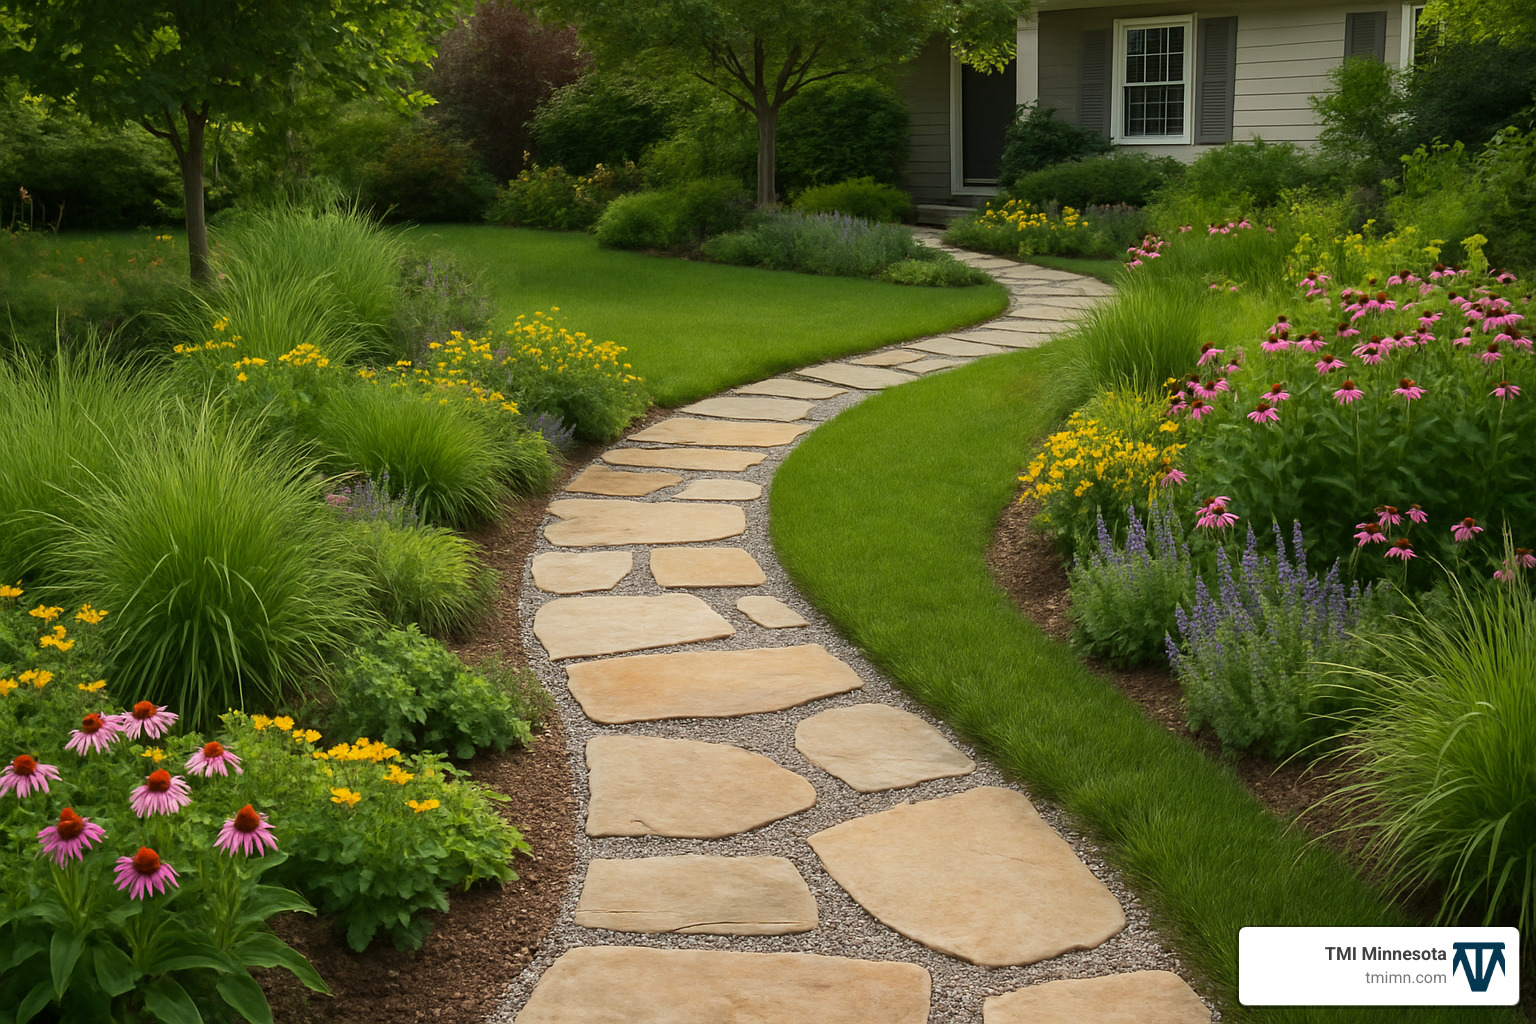
Finding the perfect pathway for your outdoor space doesn’t have to break the bank or require professional installation. These garden pathway ideas range from simple weekend projects to stunning statement pieces that transform how you experience your landscape.
The beauty of pathway design lies in mixing materials and textures. Pea gravel creates affordable, permeable surfaces that handle our Minnesota weather beautifully. Flagstone with moss growing between joints offers that natural, weathered look that makes paths feel like they’ve always belonged in your garden.
For those who love classic charm, brick herringbone patterns create timeless appeal with warm tones that complement almost any home style. If you’re dealing with wet areas or want something unique, a wood boardwalk made from reclaimed materials adds rustic character while solving drainage challenges.
Don’t overlook creative options like recycled glass pathways that sparkle in sunlight, or even bottle cap mosaics for a playful conversation starter. Decomposed granite compacts beautifully for a smooth walking surface, while stone offcuts from local suppliers give you premium materials at budget-friendly prices.
The most interesting paths often combine elements. Picture concrete slabs alternating with mulch trails and planted sections, or grass steppers that let your lawn flow around structured elements. These mixed-material approaches create visual interest while serving different practical needs throughout your landscape.
Cottage-Charm Brick Walk
Nothing says “welcome home” quite like a brick pathway winding through your garden. This classic choice brings warm tones and timeless appeal that works beautifully with both historic homes and new construction looking for established character.
Brick pavers cost around $600-$800 for materials on a standard patio-sized area, making them a solid mid-range investment. The secret to stunning results lies in choosing the right pattern. Herringbone layouts create visual movement that draws the eye forward, while running bond patterns feel more formal and structured.
Quality matters here. Choose actual brick pavers rather than regular building bricks—they’re designed specifically for ground contact and offer better slip resistance through textured surfaces. The mortar joints between pavers also provide crucial grip during wet conditions.
Edging makes or breaks the final look. Clean lines define where your path ends and garden beds begin. Consider exploring our Garden Border Ideas for plant selections that complement brick’s earthy tones. Overflowing perennials like foxgloves, hydrangeas, or lavender create that quintessential cottage garden contrast between structured hardscape and soft, flowing plantings.
Zen-Like Gravel Ribbon
Sometimes the simplest solutions create the most impact. Pea gravel represents one of the smartest garden pathway ideas for homeowners wanting professional results without the professional price tag—just $1-$3.15 per square foot installed.
This permeable surface handles our challenging freeze-thaw cycles like a champion while providing excellent drainage during heavy rains. The key to professional-looking results lies in proper preparation and edging.
Metal edging sunk into the ground prevents gravel from migrating into your flower beds and maintains those clean, crisp lines that make paths look intentional. Choose angular gravel over rounded pebbles—it compacts better and stays put during storms.
The beauty of gravel paths lies in their simplicity. Keep plantings minimal and architectural. A single specimen tree, ornamental grasses, or carefully placed hostas create focal points without overwhelming the path’s clean aesthetic. There’s something meditative about the gentle crunch of footsteps on gravel that transforms a simple walk into a mindful moment.
Woodland Boardwalk
Reclaimed wood boardwalks solve one of landscaping’s trickiest challenges—creating beautiful pathways through damp or boggy areas where traditional materials might shift, sink, or become permanently muddy.
This raised path approach works beautifully in shade gardens or anywhere drainage remains problematic despite your best efforts. The liftd design allows air circulation underneath, preventing moisture buildup that leads to premature wood decay.
When working with reclaimed materials, choose rot-resistant species like cedar or treat your lumber with quality outdoor sealers. Safety matters too—ensure boards are thick enough to prevent flexing under foot traffic. We recommend at least 2-inch planks for stability and longevity.
Damp soil areas often feature the most interesting plant communities. Ferns, wild ginger, and native groundcovers thrive in the filtered light beneath boardwalk structures, creating habitat for beneficial insects while maintaining that authentic forest ambiance. The raised pathway lets you enjoy these plantings year-round without worrying about muddy shoes.
Eco Path from Tombstone Offcuts
One of the most creative and budget-conscious garden pathway ideas involves repurposing flagstone scraps from monument makers. This approach gives you premium stone materials at a fraction of retail cost while keeping waste out of landfills.
The Stone Path From Tombstone Residues project shows exactly how to create stunning flagstone paths using these recycled materials. The process requires some creativity—think of it as solving a large puzzle where you start with edge pieces and work inward.
Reuse projects like this often produce the most interesting results because you’re working with varied shapes and sizes rather than uniform manufactured pieces. The organic patterns feel naturally integrated into garden settings, as if the stones have always belonged there.
This budget-friendly approach requires some detective work in sourcing materials, but the results rival expensive flagstone installations. Fill joints with stone dust or polymeric sand for a professional finish that resists weed growth while allowing water infiltration.
Choosing the Best Path Material: Pros, Cons & Cost
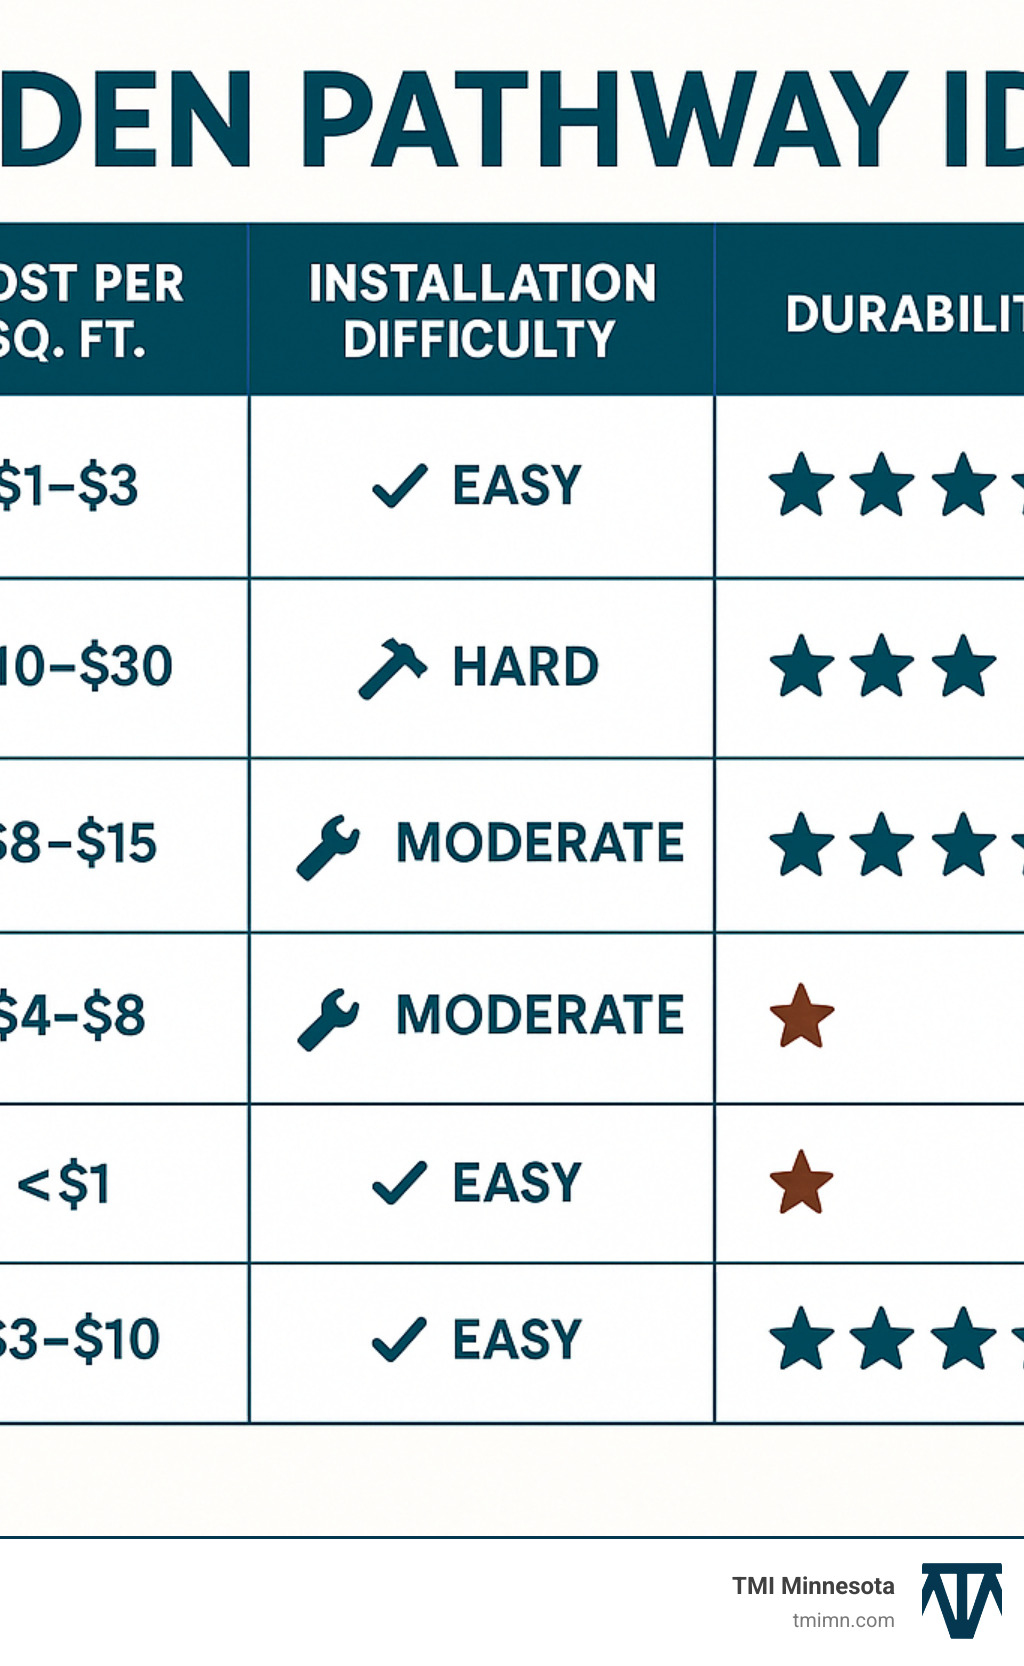
| Material | Cost per sq ft | Durability | Maintenance | Best For |
|---|---|---|---|---|
| Pea Gravel | $1-$3.15 | Good | Low | Curved paths, drainage areas |
| Flagstone | $8-$20 | Excellent | Very Low | Formal gardens, high traffic |
| Brick | $3-$8 | Excellent | Low | Historic homes, cottage gardens |
| Wood Planks | $2-$6 | Fair | Medium | Damp areas, rustic settings |
| Mulch | $0.50-$2 | Poor | High | Temporary paths, woodland areas |
| Stepping Stones | $3-$10 each | Good | Low | Lawn integration, casual use |
Choosing the right material for your garden pathway ideas feels overwhelming with so many options available. The truth is, there’s no single “best” material—just the right fit for your specific needs, budget, and style preferences.
Pea gravel remains our most popular recommendation for first-time pathway builders. At $1-$3.15 per square foot, it’s forgiving to install and handles mistakes gracefully. Plus, if you change your mind about the path’s shape later, gravel paths adapt easily.
Flagstone sits at the premium end but delivers best elegance and longevity. Yes, $8-$20 per square foot stings initially, but this investment pays dividends over decades. We’ve seen flagstone paths installed in the 1980s that still look stunning today with zero maintenance beyond occasional leaf removal.
Brick offers that sweet spot between affordability and sophistication. At $3-$8 per square foot, it costs more than gravel but creates timeless appeal that works with almost any home style. The key advantage? Brick ages beautifully, developing character rather than looking worn.
Climate & Style Match
Minnesota throws everything at outdoor materials—from -30°F winters to swampy spring thaws. Your pathway material needs to laugh in the face of our freeze-thaw cycles and shrug off heavy snow loads.
Permeable materials like gravel and mulch excel here because they allow water to drain rather than creating ice sheets. When spring arrives and everything turns to mud, these materials dry out quickly and stay walkable.
Solid surfaces like flagstone and brick handle our climate beautifully too, but they need proper installation. That means excavating down 6 inches, adding landscape fabric, and creating a compacted gravel base. Skip these steps, and you’ll have shifting, cracked paths within two seasons.
Your home’s architecture should guide material selection. Traditional and colonial homes sing with brick pathways that echo their classic lines. Contemporary designs benefit from clean gravel ribbons with steel edging or sleek concrete pavers. Craftsman and rustic styles practically demand natural stone that feels like it grew from the earth.
Drainage becomes critical in our clay soils. Impermeable surfaces need careful grading to prevent water from pooling and creating dangerous ice patches. We often install French drains alongside solid pathways to handle heavy spring runoff.
Budget Snapshot
Here’s the reality about pathway costs—materials represent just the tip of the iceberg. You’ll also pay for excavation, base preparation, edging, and professional installation if you’re not going the DIY route.
DIY installations can slash costs by 50-70%, but they demand significant time and physical effort. Weekend warriors often underestimate the back-breaking work of excavating and moving gravel. Be honest about your energy levels and available time.
Pea gravel delivers the best bang for your buck on large installations. Stepping stones provide budget-friendly solutions for lighter traffic areas where you just need occasional foot placement. Brick and flagstone require higher upfront investment but deliver decades of service with minimal ongoing costs.
Don’t forget long-term expenses when budgeting. Wood pathways need periodic sealing or replacement every 5-10 years. Stone materials might last 50+ years with proper installation. In Minnesota’s harsh climate, investing in quality base preparation costs less than rebuilding a failed path in three years.
Check What Are Average Gravel Prices? for current market rates, but prices fluctuate with fuel costs and seasonal demand.
When Sustainability Leads Design
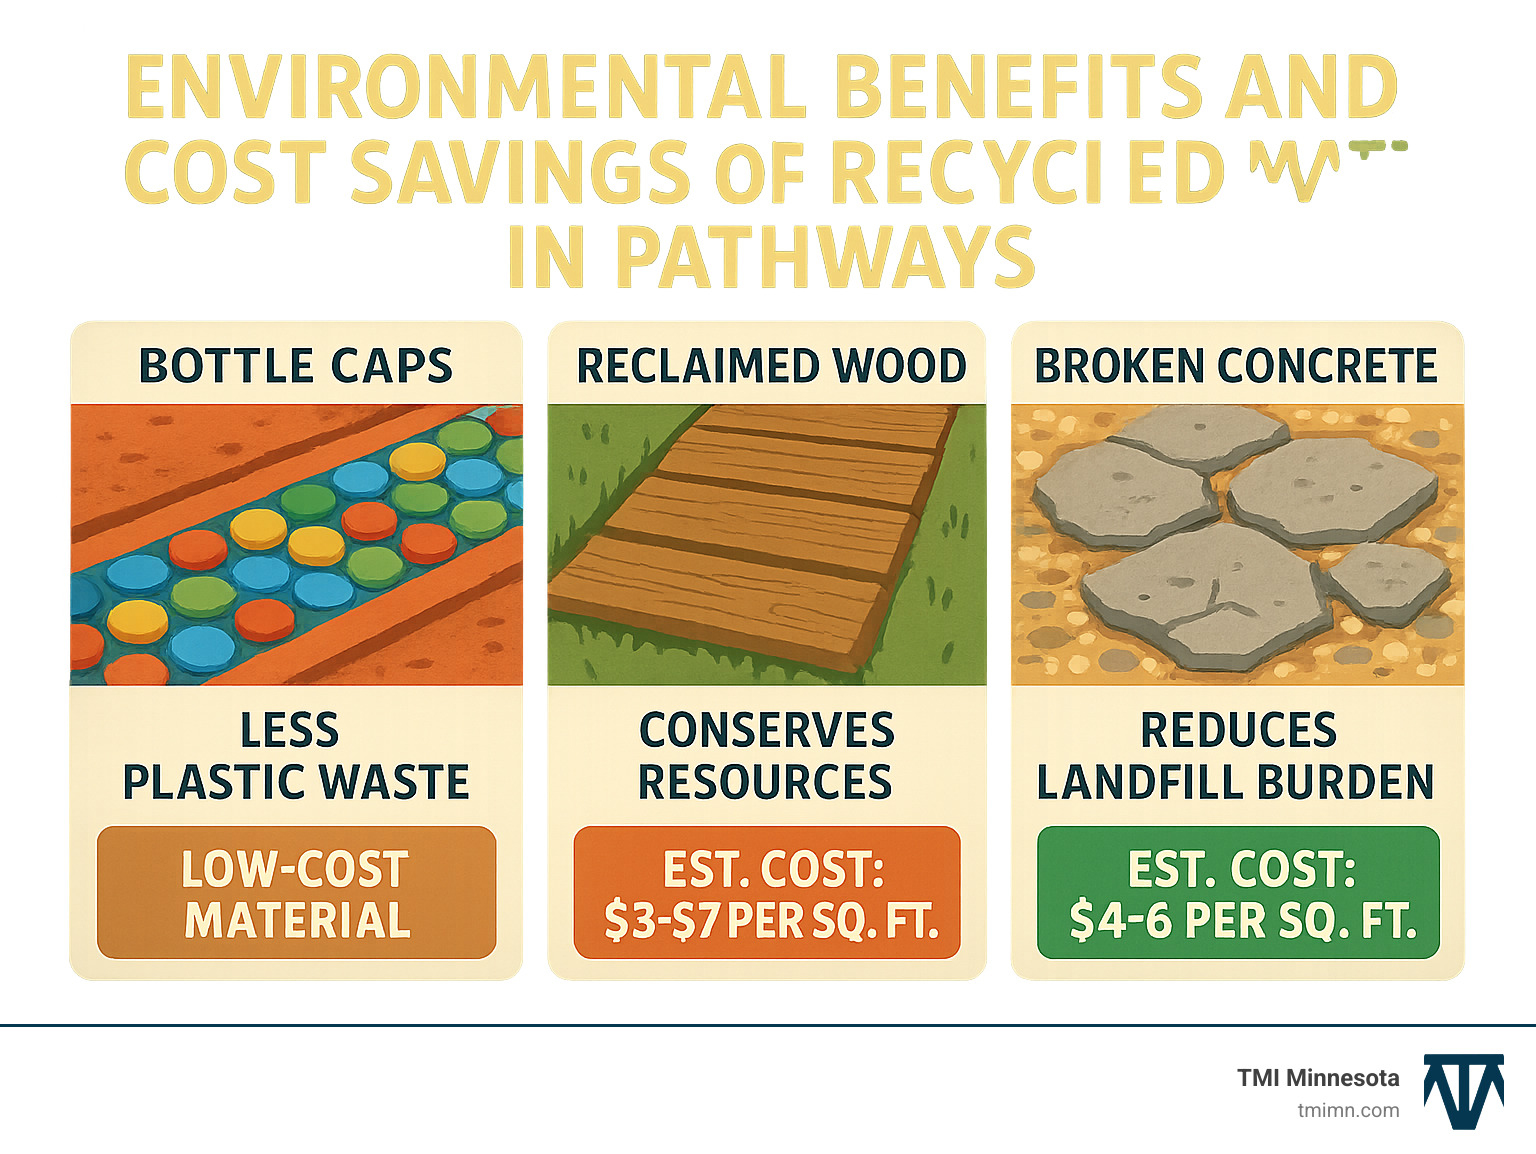
Eco-friendly garden pathway ideas don’t just reduce environmental impact—they often create the most interesting and unique designs. Recycled materials like reclaimed brick, broken concrete chunks, or collected glass bottles divert waste from landfills while adding character that new materials can’t match.
Locally-sourced materials minimize transportation emissions and give your pathway regional authenticity. Minnesota limestone and sandstone connect your landscape to our geological heritage while supporting local quarries and reducing shipping costs.
Permeable surfaces support groundwater recharge and reduce stormwater runoff that overwhelms municipal systems during heavy rains. This matters more than you might think—every square foot of permeable pathway helps prevent flooding downstream.
Plant selection around pathways impacts sustainability too. Native groundcovers require minimal watering once established and provide crucial habitat for pollinators struggling with habitat loss. Avoid invasive species that might escape from pathway edges into natural areas—they cause ecological damage that takes decades to reverse.
Reclaimed wood from old barns, decks, or pallets adds history and character while reducing demand for new lumber. Just ensure the wood hasn’t been treated with harmful chemicals before incorporating it into your landscape.
DIY Pathway Projects on a Budget

Creating beautiful garden pathway ideas doesn’t require a huge budget or professional installation. Some of the most charming pathways come from weekend DIY projects using creative materials and simple techniques. These beginner-friendly options prove that a little ingenuity goes a long way toward changing your outdoor space.
The beauty of budget pathway projects lies in their flexibility. You can start small, test different looks, and expand over time. Many homeowners find that these simple approaches actually suit their gardens better than expensive alternatives. Plus, there’s something deeply satisfying about walking on a path you built with your own hands.
Stepping Stones & Mulch
This classic combination delivers maximum impact for minimum investment—typically under $100 for a 20-foot path. The contrast between solid stepping stones and soft mulch creates visual interest while solving practical problems like muddy lawn areas and worn grass patches.
Start by mapping your route with spray paint or a garden hose. Following guidance from How to lay stepping stones, you’ll want to dig holes 2 cm deeper than your stone thickness and add a thin layer of sharp sand for leveling. This prevents wobbling and ensures stones sit just below lawn level for easy mowing.
Stone spacing makes or breaks the walking experience. Position stones 18-24 inches apart to match natural stride length—too close feels choppy, too far creates awkward stretching. Test the spacing by walking the route before final placement.
Shredded hardwood mulch works best for our Minnesota climate since it breaks down slower than softwood options. The mulch suppresses weeds naturally and creates a soft landing around each stone. Choose smooth-surfaced stones for comfort, especially if family members enjoy barefoot garden walks.
Pallet-Wood Walkway
Free pallets transform into charming rustic pathways with basic carpentry skills and weekend effort. This approach particularly appeals to gardeners who love the weathered, natural look that develops over time. The key is proper preparation—sand rough surfaces, remove protruding nails, and treat with outdoor wood preservative for longevity.
Cut pallet boards to consistent 4-6 inch widths for the most professional appearance. Dig a shallow trench and level with topsoil, then position boards with slight gaps for drainage. The natural weathering creates appealing patina, though treated lumber obviously lasts longer in our freeze-thaw cycles.
Stability comes from embedding thicker boards slightly into soil or using landscape spikes for lighter planks. This technique works beautifully between raised garden beds where you need clean footing without permanent installation. The rustic charm fits perfectly with cottage gardens and informal landscapes.
Bottle-Cap Mosaic Strip
Turn collected bottle caps into colorful pathway accents that showcase creativity while giving new life to waste materials. This upcycling project works best as decorative strips within larger pathways rather than primary walking surfaces—think artistic borders or stepping stone decorations.
Clean caps thoroughly and sort by color before starting your pattern planning. The design possibilities are endless: rainbow stripes, geometric patterns, or even garden-themed mosaics. Prepare a concrete base or use existing stable surfaces like sidewalk edges for best results.
Apply construction adhesive and press caps firmly with minimal gaps. Seal everything with clear outdoor polyurethane for weather protection. Children love helping with color sorting and pattern design, making this a fun family project that teaches recycling values while creating something beautiful.
The conversation-starter factor of bottle-cap pathways can’t be overstated. Guests always notice these unique touches and want to hear the story behind them.
Design & Installation Essentials for Function and Beauty
Getting your garden pathway ideas right means thinking beyond just looks. The best pathways work beautifully while solving real problems like drainage, safety, and long-term durability. Our experience with Hardscape Design Services has taught us that a little extra planning upfront saves headaches (and money) later.
Mapping the Route
The width of your path completely changes how it feels to walk on. Comfortable walking requires 1.2 to 1.8 meters wide—enough space for two people to stroll side by side or for plants to spill over the edges without crowding. Narrow paths feel cozy and intimate, but you’ll find yourself walking single file. Super wide paths can make small gardens feel overwhelmed.
Curved pathways create mystery by hiding what’s around the next bend. They naturally slow people down, encouraging them to notice details like the texture of a hosta leaf or the scent of blooming lavender. Straight paths feel more formal and draw your eye directly to whatever’s at the end—perfect for showcasing a beautiful garden gate or sculpture.
Focal points matter when planning your route. Think about the views from your kitchen window or favorite outdoor chair. These sight lines help determine where your path should lead and what it should reveal along the way.
For sloped areas, keep the grade under 5% for comfortable walking. Steeper areas need steps or switchbacks that zigzag up the hill. This approach prevents erosion while creating interesting elevation changes that show off different parts of your garden.
Building Basics
Here’s where many DIY projects go wrong—skipping proper base preparation. In Minnesota’s challenging climate, excavating 6 inches deep makes the difference between a path that lasts decades and one that needs rebuilding in three years.
Remove all grass, roots, and organic matter that could rot and cause settling. Landscape fabric goes down next to block weeds while still allowing water to drain through. This step alone saves hours of maintenance later.
Add 2-3 inches of compacted gravel base for rock-solid stability. Angular gravel compacts much better than rounded pebbles—it locks together like puzzle pieces. Level everything carefully with a rake, then compact with a plate tamper for larger areas or a hand tamper for smaller projects.
The foundation supports everything above it and prevents frost heaving during our freeze-thaw cycles. Trust us—spending extra time on this invisible work pays off when your neighbors are rebuilding their paths and yours still looks perfect.
Edging & Borders
Professional-looking pathways need clean, defined edges that keep materials where they belong. Steel strips create modern, crisp lines that practically disappear once installed. Brick soldier courses offer traditional charm and work beautifully with both formal and cottage garden styles.
For a softer approach, living edges using low-growing perennials create gentle transitions between paths and garden beds. Creeping thyme releases fragrance when stepped on, while ajuga spreads into colorful carpets that tolerate occasional foot traffic. These plantings also feed beneficial insects and add seasonal interest.
Remember to leave space for maintenance access. You’ll need room for edging tools and seasonal cleanup. Avoid plants that drop messy fruit or require constant pruning near walking surfaces—nobody wants to dodge thorny branches on their morning garden stroll.
Light the Way
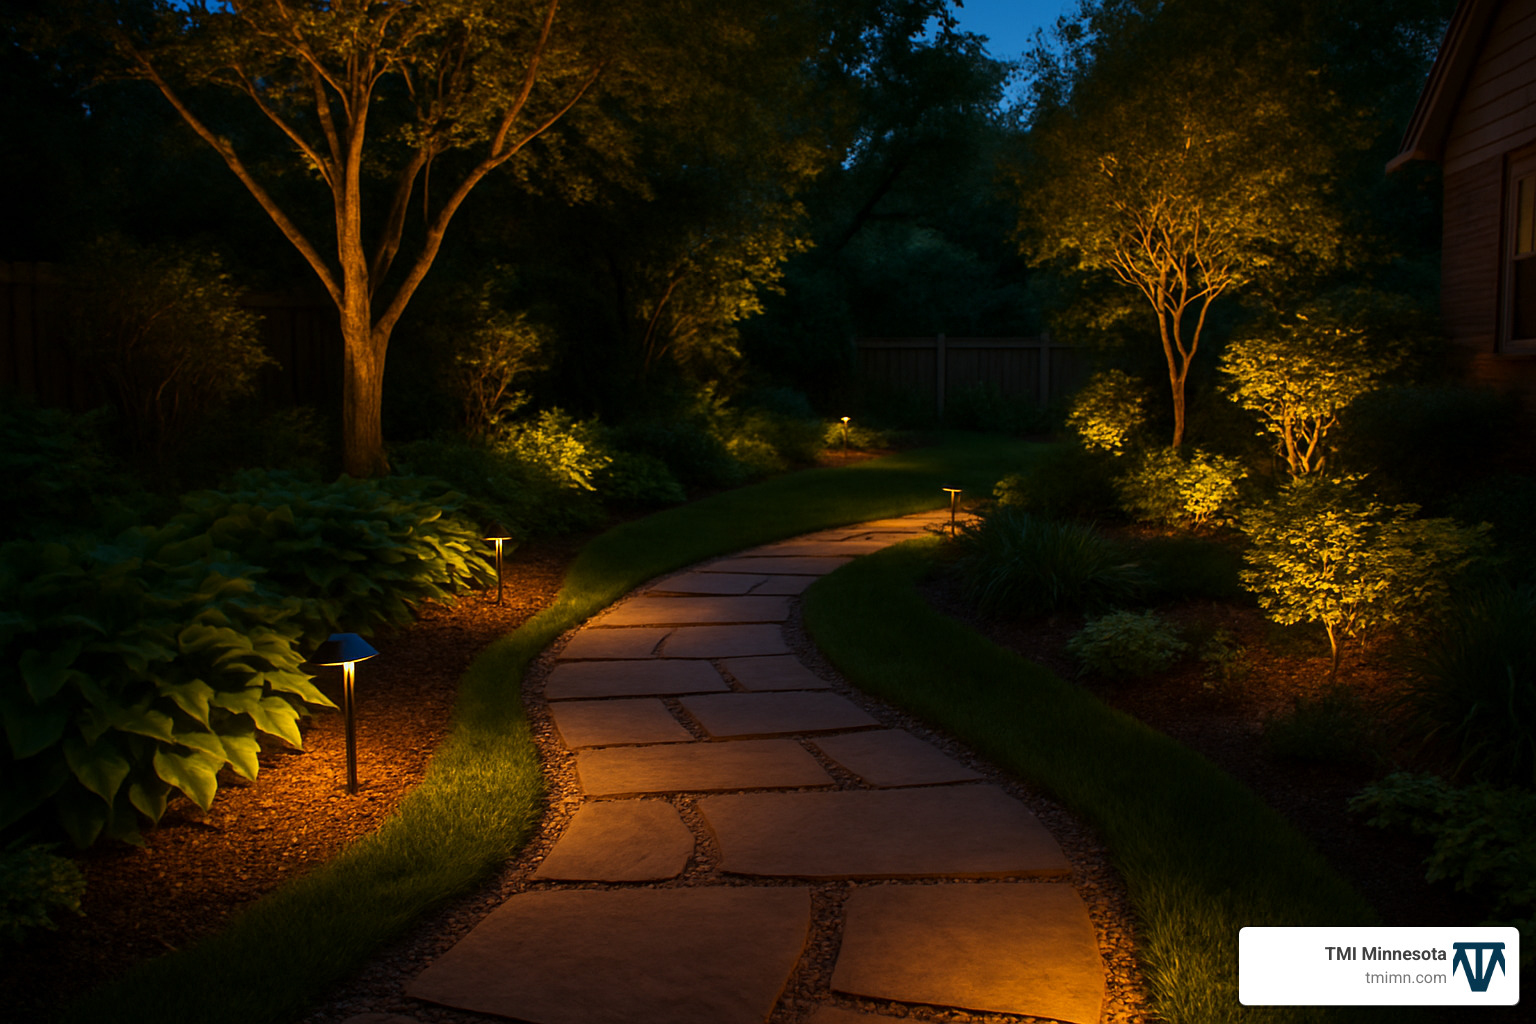
Pathway lighting transforms your garden into an evening destination while keeping everyone safe after dark. Low-voltage LED systems offer the best combination of energy efficiency and easy installation—no electrical permits required. Solar stake lights provide wireless convenience, though they struggle during our short winter days.
Plan lighting placement before installing your pathway to avoid tearing up finished work later. Space fixtures every 6-8 feet for good coverage, paying special attention to direction changes, steps, and potential trip hazards.
Warm white light (2700-3000K) creates inviting ambiance while providing enough visibility for safe walking. Harsh, bright white light feels more like a parking lot than a garden retreat.
Consider uplighting specimen trees or architectural features visible from your pathways. This layered lighting approach creates depth and visual drama while showcasing your landscape’s best features. Timer controls or photocells automate everything for convenience and security—your paths will welcome you home every evening without any effort on your part.
Maintenance, Accessibility & Eco-Friendly Tips
Creating beautiful garden pathway ideas is just the beginning—keeping them looking great and working for everyone requires smart maintenance and thoughtful design choices. Our approach to Softscaping and Hardscaping focuses on sustainable practices that make your landscape healthier while reducing long-term work.
Weed & Wear Management
The secret to weed-free pathways starts during installation, not after problems appear. Quality landscape fabric acts like an invisible shield, blocking weeds while letting water drain through naturally. When you pair this with proper drainage, you eliminate the soggy conditions where unwanted plants love to take root.
Pre-emergent herbicides applied in early spring give you another layer of protection. Think of them as a security system that stops weed seeds before they can germinate. This approach works much better than fighting established weeds later.
Your pathway will need some annual attention to stay looking its best. Top up loose materials like gravel or mulch each spring—Minnesota’s freeze-thaw cycles naturally shift these materials around. Check for settling or frost damage while you’re at it, and address any drainage issues before they turn into bigger headaches.
High-traffic areas need yearly compaction to prevent rutting and maintain that smooth, stable surface. A few minutes with a hand tamper keeps everything level and professional-looking. Well-maintained pathways can serve your family beautifully for decades with just this simple annual care.
Safe for Everyone
Great pathways welcome everyone, regardless of age or ability. Maximum 5% grades ensure wheelchair users can steer comfortably, while handrails on steps or steeper sections provide extra security for anyone who needs it.
Slip-resistant surfaces become especially important during our icy Minnesota winters. Textured materials naturally provide better traction than smooth surfaces. For users with visual impairments, tactile pavers or textured strips help with safe navigation, while contrasting materials clearly define pathway edges.
Lighting transforms safety after dark. Focus on steps, direction changes, and potential obstacles where people need extra visibility. During winter, remove snow and ice promptly using materials that won’t damage your pathway or harm nearby plants. Sand provides excellent traction without the chemical concerns of rock salt.
Green Practices
Sustainable garden pathway ideas do more than look beautiful—they actively support your local environment. Native groundcovers along pathway borders require less water, provide habitat for beneficial insects, and help your garden feel connected to Minnesota’s natural landscape.
Permeable surfaces like gravel or stepping stones with planted gaps reduce stormwater runoff while supporting groundwater recharge. When you position rain gardens adjacent to pathways, you capture runoff naturally while creating seasonal interest with moisture-loving plants. This approach helps manage those increasingly intense storm events we’re seeing more often.
Choosing materials with recycled content reduces environmental impact while often giving you superior performance. Recycled rubber pavers, reclaimed brick, and composite lumber prove that sustainability and durability go hand in hand. Local sourcing minimizes transportation emissions while supporting regional businesses—a win for everyone involved.
The best part? These eco-friendly choices often save money over time through reduced maintenance and water needs, proving that environmental responsibility and smart economics work beautifully together.
Frequently Asked Questions about Garden Pathway Ideas
Let’s tackle the most common questions homeowners ask when planning their garden pathway ideas. These answers come from years of helping Minnesota families create beautiful, functional outdoor spaces.
What is the most affordable garden path material?
Pea gravel wins hands down for budget-conscious homeowners, costing just $1-$3.15 per square foot. You can install it yourself in a weekend with basic tools, making it perfect for DIY enthusiasts who want professional-looking results without the professional price tag.
But here’s the real money-saver: stepping stones with mulch fill. This combination often costs under $100 for a 20-foot path and gives you that charming cottage garden look. The stones provide stable footing while the mulch suppresses weeds and feels soft underfoot.
Mulch alone works great for temporary or woodland paths, especially if you have access to free wood chips from local tree services. Just remember that cheaper materials might need more frequent refreshing—but that’s still less expensive than replacing a poorly installed expensive path.
How wide should a garden path be for comfortable walking?
Most comfortable paths measure between 4 and 6 feet wide (1.2 to 1.8 meters). This gives you room to walk side-by-side with a friend while allowing plants to spill gracefully over the edges without blocking your way.
Narrow paths around 3 feet create intimate, secret garden vibes but force single-file walking. They work beautifully for personal meditation walks or connecting hidden garden rooms. Wider paths of 5-6 feet accommodate wheelchairs and garden carts while leaving space for those gorgeous overflowing perennial borders.
Think about how you’ll actually use the space. Main pathways to your front door need generous width for carrying groceries or welcoming guests. Meandering garden paths can be narrower since they’re more about the journey than the destination.
How do I stop gravel from spilling into beds?
Proper edging solves 90% of gravel migration problems. Install metal strips, plastic barriers, or brick soldier courses at least 6-8 inches deep to contain loose materials. The key is getting them below frost line so Minnesota’s freeze-thaw cycles won’t push them up.
Here’s a pro tip: choose angular gravel over smooth pebbles. Angular pieces lock together better and resist washing away during heavy rains. Pea gravel looks lovely but round stones love to wander into your flower beds.
A weed-suppressing membrane with hexagonal grid pattern works like magic for keeping gravel in place. It allows drainage while creating little pockets that hold individual stones. This extra step during installation saves hours of raking escaped gravel back onto your path later.
For established paths having migration issues, try watering and compacting the gravel, then adding a thin layer of stone dust on top. It helps bind everything together while maintaining that natural look you love.
Conclusion
Your backyard change is just one pathway away. The perfect garden pathway ideas don’t require a massive budget or professional contractor—sometimes the most beautiful paths come from creative thinking and weekend effort.
Think about how different your outdoor space will feel with a thoughtful pathway guiding you through it. No more muddy tracks across the lawn during spring thaws. No more wondering how to connect your patio to that lovely corner garden. Instead, you’ll have a landscape that flows naturally and invites you outside in every season.
Whether you’re drawn to the cottage charm of brick pavers, the zen simplicity of pea gravel, or the creative appeal of recycled materials, your pathway choice reflects your personality and lifestyle. A weekend stepping-stone project might be exactly what your garden needs, or perhaps you’re ready for something more ambitious like a woodland boardwalk or flagstone installation.
The best part? These garden pathway ideas work beautifully in Minnesota’s challenging climate when properly installed. From freeze-thaw cycles to heavy spring rains, the right materials and techniques ensure your investment lasts for decades.
Ready to see your pathway vision come to life? At TMI Minnesota, we love helping homeowners find how the right hardscape design can completely change their outdoor experience. Our team understands which materials thrive in our local conditions and how to create pathways that feel custom-made for your space.
We combine innovative design with practical solutions that work year-round. Whether you need help with material selection, installation techniques, or want a completely custom design, we’re here to turn your favorite pathway ideas into the landscape of your dreams.
Visit TMI Minnesota to explore how we can transform your outdoor space into something truly special. Your perfect pathway is waiting—let’s build it together.