
Transform Your Backyard with a DIY Fire Pit
Outdoor fire pit construction is a rewarding weekend project that can turn your ordinary backyard into a cozy gathering space for family and friends. Here’s what you need to know to get started:
- Location: Place your fire pit at least 10 feet (ideally 25 feet) from structures and trees
- Size: Typically 3-4 feet in diameter and about 1 foot deep
- Materials: Fire-resistant materials like fire bricks, retaining wall blocks, gravel, and construction adhesive
- Time: Most DIY fire pits can be completed in a weekend (2-4 hours of actual construction time)
- Cost: $110-$500 depending on materials chosen
There’s something magical about gathering around a crackling fire on a cool evening. A well-constructed fire pit not only adds visual appeal to your outdoor space but also creates a natural focal point for entertaining throughout the year. Whether you’re roasting marshmallows in summer or enjoying the warmth on a crisp fall night, a DIY fire pit is an investment that keeps on giving.
I’m Christopher Deanovic from Task Masters, and I’ve guided countless Minnesota homeowners through outdoor fire pit construction projects that transform their backyards into functional, beautiful gathering spaces. My years of experience in landscape and hardscape design have taught me that the perfect fire pit balances safety, durability, and style.

Terms related to Outdoor fire pit construction:
Why Build a DIY Fire Pit?
There’s something almost magical about gathering around a flickering fire under the stars. Since ancient times, fire has drawn people together, creating a natural center for stories, laughter, and connection. When you bring this experience to your own backyard, you create an instant hub for meaningful moments with family and friends.
“With the colder weather approaching, a fire pit is a great project to create an outdoor entertaining space,” shared one of our recent clients from Maple Grove. This sentiment echoes what we hear from many Twin Cities homeowners who want to squeeze every possible day out of Minnesota’s outdoor living season.
Outdoor fire pit construction delivers remarkable value compared to its relatively modest investment. Most homeowners spend between $110-$500 on materials, significantly less than many other backyard upgrades that deliver similar impact. As one delighted customer put it, “I totally didn’t think we could do this for the price and the time it took.”
Unlike store-bought fire pits, building your own allows for complete customization. You can tailor the size, height, materials, and style to complement your existing landscape design and personal preferences. Want something that perfectly matches your home’s brick? Or perhaps a modern, sleek design? With DIY, the creative control stays in your hands.
Most fire pits measuring 3-4 feet across create the perfect intimate gathering space. This size comfortably accommodates 2-4 people, making conversation easy while everyone enjoys the warmth. It’s cozy without feeling cramped—just right for family evenings or small get-togethers with close friends.
“There’s never a bad time to make use of your outdoor wood-burning fire pit,” one enthusiastic homeowner shared. From roasting marshmallows on summer evenings to warming cold hands in the fall and winter, a well-built fire pit dramatically extends your outdoor living season. In Minnesota, where we cherish every moment of outdoor time, this benefit alone makes the project worthwhile.
Perhaps the most overlooked benefit is the personal satisfaction that comes from building something beautiful and functional with your own hands. Each time you gather around your fire pit, you’ll feel that quiet pride in knowing you created this special space.
One of our clients from Edina recently completed their outdoor fire pit construction project and couldn’t contain their excitement: “We finally got our stamped concrete patio finished last Friday. Can I just say… I’m in love! The fire pit was the perfect finishing touch and now we use the space almost every evening.”

Planning Your Outdoor Fire Pit Construction
Before you grab your shovel and start digging, taking time to plan your outdoor fire pit construction will save you headaches down the road. A thoughtful approach ensures your fire pit becomes a beloved backyard feature rather than a safety hazard or neighborhood eyesore.
Think of planning as the foundation of your project—just as important as the physical foundation you’ll build later. As one of our Minnetonka clients put it, “The hour we spent planning saved us days of frustration later.”
Choosing the Best Location for Your Outdoor Fire Pit Construction
Finding that perfect spot in your yard involves balancing several important factors:
Safety first: Position your fire pit at least 10 feet from any structures—your home, garage, shed, or wooden fence. Ideally, aim for 25 feet of clearance whenever possible. This isn’t just good practice; it’s often required by local ordinances.
One Edina homeowner learned this lesson the hard way: “We initially placed our fire pit too close to our wooden privacy fence. After a particularly windy evening sent embers flying, we quickly relocated it to a safer spot in the center of our yard.”
Wind patterns matter: Pay attention to which way the wind typically blows across your property. Nobody wants to be constantly dodging smoke while trying to enjoy a conversation. If you’ve noticed that summer breezes tend to blow from west to east across your yard, position seating accordingly.
Underground utilities: This simple step can prevent a dangerous disaster. Before digging anywhere in your yard, call 811 to have utility companies mark the location of underground lines. This service is free in Minnesota and could save you from a dangerous (and expensive) mistake.
Homeowner association rules: If you live in a neighborhood with an HOA, check their guidelines before starting your project. Some associations have specific requirements about fire feature placement, size, or even whether they’re allowed at all.
For inspiration on how a beautifully placed fire pit can improve your overall landscape design, browse our Modern Outdoor Designs gallery.
Deciding on Fire Pit Size and Shape
The dimensions of your fire pit will significantly impact both its functionality and visual appeal:
Diameter considerations: Most residential fire pits work best with an interior diameter between 3 and 4 feet. This size creates enough space for a good fire while keeping everyone close enough to talk and feel the warmth. As one of our St. Paul clients noted, “Our 3.5-foot pit is perfect—large enough for a decent fire but small enough that everyone can hear each other talk.”
Depth decisions: Aim for approximately 1 foot of depth for your fire pit. This provides enough room for fuel while keeping the flames visible to everyone seated around it. Too shallow, and you’ll have difficulty maintaining a good fire; too deep, and you’ll lose the visual appeal.
Shape selection: While circular fire pits remain the most popular (and easiest for beginners to build), square or rectangular designs can complement modern landscape aesthetics. Consider the other elements in your yard—if you have angular patio furniture or rectangular planting beds, a square fire pit might create a more cohesive look.
Seating strategy: Even at the planning stage, think about where people will sit. For comfortable conversation, most seating should be positioned about 6-7 feet from the edge of your fire pit. This distance provides warmth without excessive heat and allows easy movement around the space.
One Maple Grove family specifically designed their fire pit area with their multi-generational gatherings in mind: “We created a slightly larger pit with varied seating distances—closer benches for the kids who want to roast marshmallows and more distant Adirondack chairs for the grandparents who prefer a little less heat.”
Materials and Tools You’ll Need
Starting on your outdoor fire pit construction journey requires gathering the right materials and tools before you begin. I’ve guided countless Minnesota homeowners through this process, and having everything ready makes the difference between a smooth weekend project and multiple frustrating trips to the hardware store.
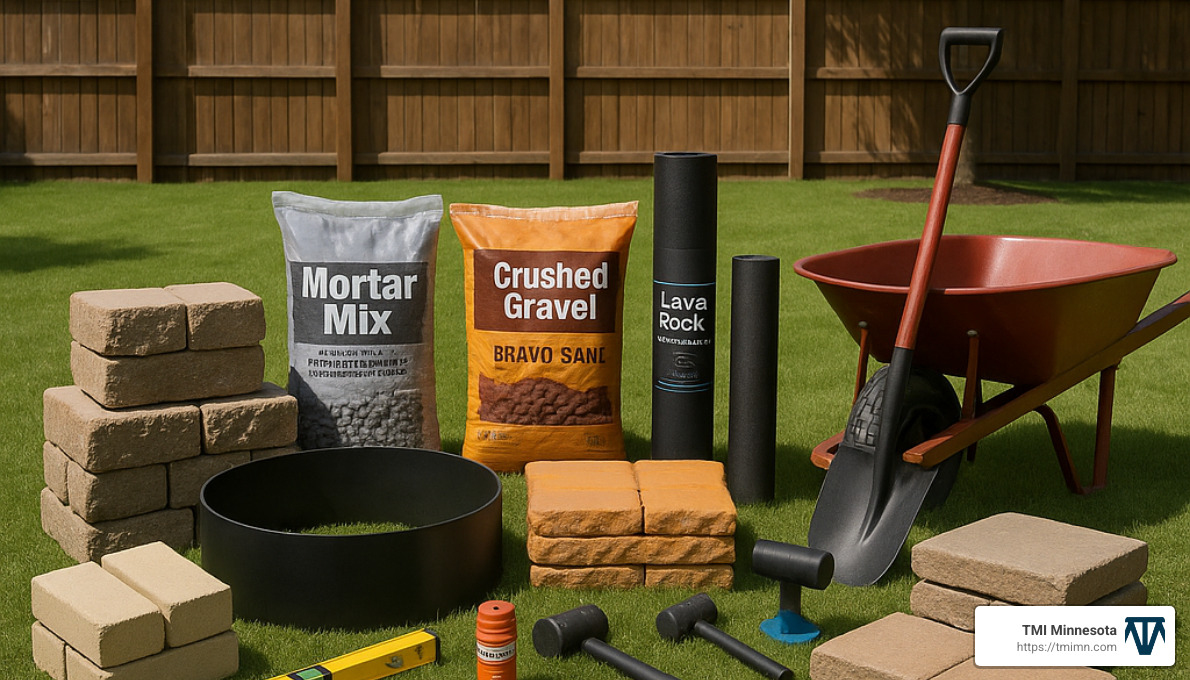
Essential Materials for Outdoor Fire Pit Construction
Let’s talk about what you’ll actually need to build a fire pit that’s both beautiful and safe. Safety is paramount when dealing with fire, which is why choosing the right materials matters so much.
Fire-resistant materials aren’t just a recommendation—they’re essential for preventing dangerous situations. One Twin Cities homeowner learned this lesson the hard way: “I initially used some leftover brick from another project, only to watch them crack and spall during our first fire. It was both disappointing and scary.”
For the structure of your fire pit, you’ll need 48-98 retaining wall blocks or fire-rated concrete blocks, depending on your design’s size and height. The interior should be lined with fire bricks, which are specifically engineered to withstand direct heat without cracking or exploding. Many homeowners also opt for a steel fire ring as an added layer of protection that extends the life of your fire pit.
To secure everything together, you’ll need either Mortar Mix or construction adhesive. For a first-time builder, construction adhesive is often easier to work with and doesn’t require mixing.
Creating a proper foundation is crucial for longevity. You’ll need about half a ton of crushed gravel for drainage and stability, along with paver sand for achieving a perfectly level base. Don’t skip the weed block and ground cover—it’s an inexpensive addition that prevents weeds from growing under your fire pit and potentially destabilizing it over time.
For finishing touches, consider lava rocks or fire glass for the interior. These materials aren’t just decorative—they help distribute heat and protect the bottom of your fire pit. Many homeowners also add capstones or decorative blocks for the top layer to create a finished look and a convenient ledge for setting drinks or roasting sticks.
Your tool list doesn’t need to be extensive, but having the right ones makes the job much easier. You’ll need a shovel for excavation, tape measure, marking paint (or string and stakes), levels in both 2-foot and 4-foot lengths, a hand tamper or plate compactor for the base, and a rubber mallet for gently adjusting blocks. Don’t forget safety gear, including gloves for mixing if you’re using mortar. A wheelbarrow is invaluable for moving materials around your yard, and if you’re using construction adhesive, you’ll need a caulk gun.
“We bought a couple extra blocks than we calculated needing,” shared a client from Bloomington, “which was a lifesaver when we accidentally cracked one during placement. Having spares saved us a trip back to the store mid-project.” This is wisdom worth following—always get about 10% more materials than your calculations suggest.
The cost of your outdoor fire pit construction will vary based on your material choices. A basic fire pit using standard retaining wall blocks might cost around $110, while more elaborate designs with premium materials could reach $500 or more. As one Minnetonka homeowner put it, “We spent about $125 total—$80 for the metal insert and $45 for 45 blocks at $1 each. Definitely worth every penny for the enjoyment we’ve gotten.”
Step-by-Step Guide to Outdoor Fire Pit Construction
Now that you’ve gathered your materials and tools, it’s time to roll up your sleeves and bring your fire pit to life. I’ve guided dozens of Minnesota homeowners through the outdoor fire pit construction process, and I’m excited to walk you through each step.
Step 1: Mark and Prepare the Site
The foundation of a great fire pit begins with proper site preparation. Think of this as laying the groundwork for countless future evenings around the fire.
Start by marking your fire pit’s footprint. Place a stake at your chosen center point, then attach a string cut to half your desired diameter plus the width of your blocks. With the string pulled tight, walk in a circle while spraying paint to create a perfect outline. If you’re building a square pit instead, use the trusty 3-4-5 method to ensure your corners are perfectly square.
Next, dig out the marked area to a depth of about 7 inches. I always recommend digging about 6 inches beyond your marked circle to give yourself some working room—you’ll thank yourself later! Once excavated, use a level and hand tamper to ensure the base is even.
A client from Minnetonka shared a valuable lesson with me: “If you’re working with heavy clay soil like we have in many parts of Minnesota, consider renting a sod cutter and power tiller. Our backs thanked us!” This small investment can make a big difference in your enjoyment of the project.
Step 2: Build the Gravel Base
A solid, well-drained base is essential for a long-lasting fire pit. Pour crushed gravel to create a base approximately 5 inches thick. Many of my clients have found success adding a slightly deeper section in the middle—what we call a central sump—for better drainage, which is especially helpful during Minnesota’s wet seasons.
Thoroughly wet the gravel with a garden hose to help it settle, then compact it firmly using a hand tamper or plate compactor. Work in a circular pattern from the outside in, ensuring even compaction throughout. Check frequently with your level to ensure the base remains even, adding or removing gravel as needed.
“We put gravel into the center of the fire pit after we’d stacked a couple of courses,” one clever DIYer shared with me. “This made the job much easier than trying to fill it all at the end when the walls were higher.” It’s these little tricks that can make your project go more smoothly.
Step 3: Lay the First Layer of Blocks
This first course of blocks is critical—it establishes the shape and ensures your entire structure will be level. Arrange your blocks in a complete circle or square, ensuring they touch tightly. For a typical 3-foot interior diameter, you’ll need about 12-14 blocks per layer.
Use your level constantly during this step—check across multiple blocks and around the entire perimeter. Any unevenness now will be magnified in upper layers. Use your rubber mallet to gently tap blocks into position, and add or remove sand beneath blocks that aren’t sitting level.
I love this tip from a homeowner in Edina: “We dry-stacked our first layer without adhesive, which allowed us to make small adjustments until everything was perfect. Only then did we disassemble and rebuild with adhesive.” This extra step can save you frustration later on.
Step 4: Test-Fit the Fire Pit Bowl
If you’re incorporating a metal fire pit bowl or ring, now’s the time to ensure it fits properly. Center it within your first layer of blocks and check that the lip rests securely on the edge of the blocks. If the fit isn’t quite right, adjust your block placement now, before adding more layers.
This is also the time to plan for any air flow considerations your design might require. If you need air gaps for better combustion, mark these locations now.
“Test-fitting the fire bowl after assembling each layer ensures a perfect fit before applying adhesive,” one of my experienced clients advised. “It’s much easier to make adjustments now than to try fixing issues later.” This small step can prevent major headaches down the road.
Step 5: Add Construction Adhesive and Build Up Layers
With your first layer set and level, it’s time to build upward. Using a caulk gun, apply a zigzag bead of outdoor-rated construction adhesive to the top of your first layer of blocks. Position the second layer so that each block bridges the joint between two blocks below—this “staggering” creates a stronger structure.
Continue checking for level with each new block. Ensure each one is level both horizontally and in relation to adjacent blocks. Repeat the process of adding adhesive and staggering joints for each subsequent layer. Most fire pits look best with 3-4 layers of blocks.
Construction adhesive typically needs 2-7 days to fully cure, depending on the product and weather conditions. As one of my DIY enthusiasts likes to say, “It’s called progress, not perfection! Our fire pit has a few small alignment issues, but once we were enjoying s’mores around it, nobody noticed except me.”
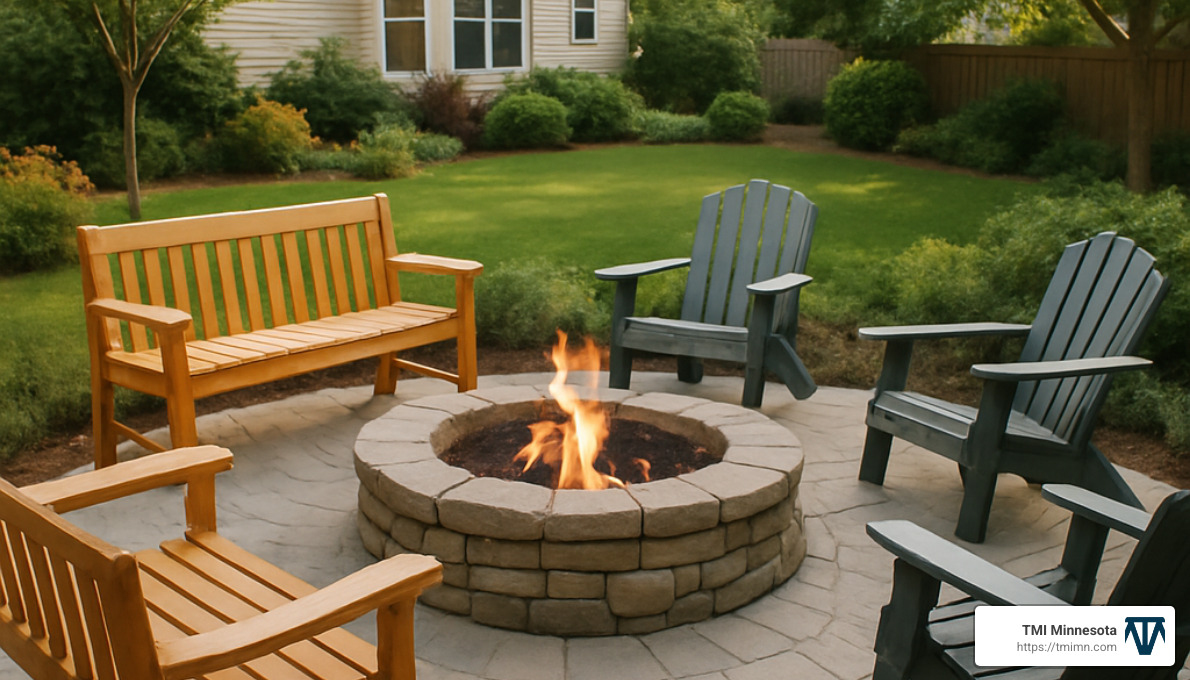
Step 6: Finish Your Fire Pit
The final touches transform your structure into a functional, beautiful fire pit. Line the interior with fire bricks to protect the structure from direct heat. These can be secured with high-temperature mortar for added stability.
Fill the bottom of the pit with lava rocks, fire glass, or a layer of sand. This not only looks attractive but helps with drainage and heat distribution. If you’re using a fire bowl or ring, place it securely on the top layer.
For a polished look, consider adding decorative capstones to the top layer. Many of my clients also create a dedicated seating area around their fire pit, placing chairs or benches about 6-7 feet from the edge for comfortable warmth.
A homeowner from Plymouth shared this clever addition: “We added a 36-inch wide crushed limestone pathway around our fire pit, which not only looks great but keeps the area around the pit neat and prevents mud during Minnesota’s wet seasons.” These finishing touches can truly lift your outdoor fire pit construction from good to great.
Safety Tips and Best Practices
When it comes to outdoor fire pit construction, safety isn’t just a suggestion—it’s essential. Throughout my years of guiding Minnesota homeowners through backyard projects, I’ve learned that a safe fire pit begins with proper planning and continues with responsible use.
Before you even pick up a shovel, take time to research the regulations in your area. Local fire codes vary significantly across Twin Cities communities, and what’s permitted in Edina might be prohibited in Minnetonka. Similarly, if you live in a neighborhood with a homeowner association, review their guidelines—some have specific rules about fire pit size, location, or even whether they’re allowed at all.
One absolute must-do: call 811 at least 48 hours before you start digging. This free service will mark any underground utilities on your property. As one homeowner in Plymouth finded the hard way, “We nearly hit a gas line that wasn’t where we thought it was. That 811 call probably saved us from a dangerous situation.”
During the construction phase, protect yourself by wearing appropriate safety gear. Gloves prevent cuts from rough materials, eye protection shields against flying debris when cutting blocks, and a dust mask keeps harmful particles out of your lungs. Your back will thank you for using proper lifting techniques when handling those heavy retaining wall blocks—bend at the knees, not the waist, and get help with particularly heavy loads.
Keep curious children and pets away from your work area. Those partially built fire pits can be unstable and potentially dangerous until completed and the adhesive has fully cured.
Once your beautiful fire pit is ready for action, responsible use becomes paramount. “I haven’t heard of any deaths, but have heard of injuries,” cautions one experienced builder regarding improper materials. “Use materials that will not spall/explode! Do not use ‘regular’ concrete or bricks, river rock, or any porous material.”
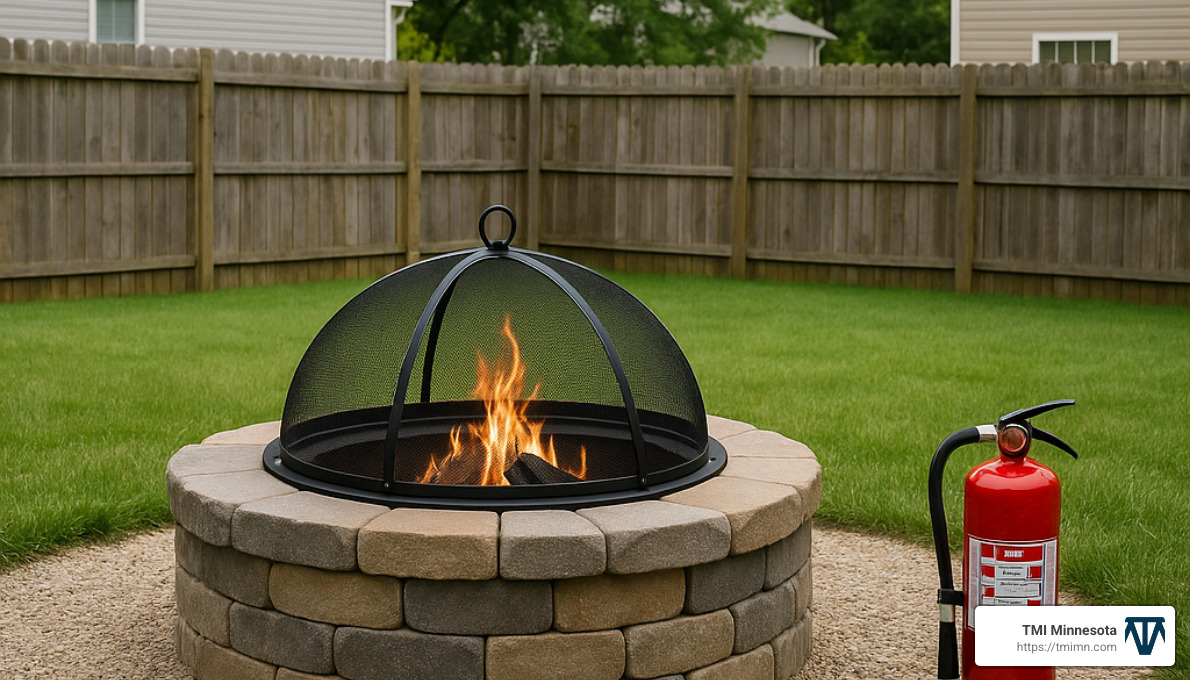
Never leave a fire unattended—not even for “just a minute.” Keep fire suppression tools nearby, whether that’s a fire extinguisher, garden hose, or bucket of sand. A client from St. Louis Park shared this important reminder: “We always make sure our fire is completely out before heading inside. Even if it looks extinguished, we pour water over it and stir the ashes to ensure no hot spots remain.”
Weather conditions matter significantly. Avoid using your fire pit during high winds that could spread embers or during extremely dry periods when vegetation is more susceptible to catching fire. A spark screen is a worthwhile investment to prevent wayward embers from escaping.
Be mindful of what you burn. Stick to seasoned hardwoods like oak or maple—never burn pressure-treated lumber, painted wood, trash, or yard waste like leaves. These can release toxic chemicals when burned or create excessive smoke that will annoy your neighbors.
Regular maintenance ensures both safety and longevity. Check periodically for loose or damaged blocks and repair them promptly. Clean out ashes only after they’ve completely cooled—which can take several days. Before each use, inspect your fire pit for animal nests, accumulated debris, or water that might have collected.
Consider covering your fire pit when not in use. This simple step protects it from weather damage and extends its lifespan considerably. Many Minnesota homeowners find that a custom-fitted cover is well worth the investment, especially given our harsh winters.
Frequently Asked Questions about Outdoor Fire Pit Construction
What is the best location for a fire pit?
Finding the perfect spot for your fire pit balances safety, practicality, and enjoyment. Safety experts recommend placing your fire pit at least 25 feet away from any structures—your home, garage, shed, and don’t forget about overhead tree branches. If your Minnesota backyard doesn’t have that much space (and many don’t), maintain at least 10 feet of clearance from any structure.
Different Twin Cities municipalities have their own specific requirements, so checking your local regulations before breaking ground is essential.
Wind patterns matter too. Nobody wants to be constantly shifting seats to escape smoke, so observe which way the breeze typically blows in your yard. A client in Woodbury shared their thoughtful approach: “We positioned our fire pit so we could enjoy both the fire and the natural woodland setting behind it. It’s become our favorite spot to unwind in the evening.”
Also consider accessibility—you want a spot that’s easy to reach but not in a high-traffic area where people (especially children) might accidentally get too close to the flames. The perfect location creates a destination in your yard that feels both connected to and separate from your main living spaces.
How do you build a stable gravel base?
The foundation of any successful outdoor fire pit construction is quite literally… the foundation! A properly built base prevents settling and shifting that could compromise your fire pit’s structure over time.
Start by excavating your marked area to a depth of about 7 inches. This might sound deep, but trust me—this preparation pays dividends in the long run. Next, add roughly 5 inches of crushed gravel. Avoid rounded pea gravel here, as it tends to shift over time. Minnesota’s freeze-thaw cycles can be particularly tough on outdoor structures, so this stable base is non-negotiable.
Once your gravel is in place, thoroughly wet it with a garden hose. This helps the material settle into place before compaction. Then comes the workout portion of the project—use a hand tamper or plate compactor to firmly pack the gravel. Work in a circular pattern, starting from the outside and moving inward.
“Pour a generous amount of crushed gravel to create a 5-inch thick base, wet it thoroughly, and then compact it using a hand tamper for a firm, level foundation,” advises one professional installer I work with regularly.
Check for level across the entire base, making adjustments by adding or removing gravel as needed. For extra precision, some builders add a thin layer (about ½ inch) of paver sand on top of the compacted gravel.
A clever trick many Minnesota homeowners use is creating a central drainage sump—essentially a deeper section in the middle of the pit filled with additional gravel. This helps manage water runoff, which is particularly important given our significant seasonal precipitation.
What materials are needed for constructing a fire pit?
Gathering the right materials before you begin your outdoor fire pit construction saves time and prevents frustrating mid-project store runs. While specific needs vary based on your design, here’s what most standard fire pits require:
For the structure itself, you’ll need retaining wall blocks or fire-rated concrete blocks—typically between 48-98 blocks depending on your pit’s size and design. Many Twin Cities homeowners have found success with RumbleStone blocks, which offer a more natural look than standard concrete blocks while remaining budget-friendly.
Interior lining is crucial for safety and longevity. Fire bricks specifically designed to withstand high temperatures are essential for the inside walls of your pit. Regular bricks or concrete blocks can trap moisture and potentially crack or explode when heated—definitely not the excitement you’re looking for during a relaxing evening!
To hold everything together, you’ll need construction adhesive or mortar designed for outdoor use. Many builders also incorporate a steel fire ring, which isn’t strictly necessary but provides additional structure and protection.
For the base, gather crushed gravel (approximately ½ ton), paver sand for precise leveling, and landscape fabric to prevent weeds from growing underneath your beautiful new feature. The interior bottom of your pit will need lava rocks, fire glass, or sand—materials that can withstand heat while providing drainage.
Your tool list should include: a shovel and pick for excavation, both 2-foot and 4-foot levels, tape measure, string, stake, and spray paint for marking, a hand tamper or plate compactor, rubber mallet, wheelbarrow, and safety equipment (gloves, eye protection, dust mask). Don’t forget a caulk gun for applying adhesive.
“Only use stones in your fire pit that are specified as heat-resistant,” cautions one expert I frequently collaborate with on Minnesota landscape projects. This advice cannot be overstated—using the wrong materials can lead to dangerous situations when your pit is in use.
Conclusion
There’s something truly magical about gathering around a fire on a cool Minnesota evening, watching the flames dance as conversation flows easily among friends and family. Building your own fire pit is more than just a weekend project—it’s creating a centerpiece for outdoor memories that will last for years to come.
Throughout this guide, we’ve walked through every aspect of outdoor fire pit construction, from selecting the perfect location to putting the finishing touches on your new backyard feature. With proper planning, quality materials, and careful attention to safety details, you’ve learned how a DIY fire pit can transform an ordinary yard into an inviting outdoor living space.
Your fire pit should feel like a natural extension of your landscape—complementing your existing design while providing a cozy, welcoming spot for gatherings in any season. Whether you’ve opted for a simple, rustic circle of stones or a more elaborate hardscape feature, the fundamentals remain the same: a solid foundation, heat-resistant materials, and thoughtful construction create a fire pit that’s both beautiful and functional.
At TMI Minnesota, we’ve helped countless Twin Cities homeowners reimagine their outdoor spaces. While many homeowners enjoy the satisfaction of a DIY project, others prefer to leave their outdoor fire pit construction to experienced professionals. Our team brings years of expertise to every project, ensuring that your outdoor living space perfectly balances beauty, functionality, and safety.
“Our backyard was just unused space before,” shares one of our Edina clients. “Now with our new fire pit area, we’re outside almost every evening. It’s completely changed how we use our home.”
For additional inspiration or to explore how a professionally designed and installed fire pit could lift your outdoor living experience, we invite you to browse our Hardscape Gallery or learn more about our comprehensive Outdoor Living Upgrades.
Whether you choose to build your own fire pit using our guide or partner with our professional team, the result will be the same—a warm, inviting space that extends your living area beyond your home’s walls and creates a natural gathering spot for friends and family throughout Minnesota’s changing seasons.
As winter gives way to spring and summer transitions to fall, your fire pit will stand ready to welcome gatherings, quiet evenings under the stars, and all the moments in between. As one client recently told us, “Our fire pit has become the heart of our outdoor space—it’s where we connect, relax, and make the most of Minnesota’s beautiful outdoors, no matter what the thermometer says.”
Ready to transform your backyard with a custom fire pit that perfectly suits your space and style? Contact TMI Minnesota today for a consultation, and let our experienced team help you bring warmth, beauty, and functionality to your outdoor living area.
