
Transform Your Backyard into a Culinary Oasis
Ever noticed how everyone gravitates to the kitchen during gatherings? It’s the natural heart of any home – the place where conversations flow as freely as the food and drinks. Now imagine taking that magnetic energy and moving it outdoors, under open skies and gentle breezes.
An outdoor kitchen installation does exactly that – it extends your living space beyond your home’s walls, creating a perfect backdrop for everything from Tuesday family dinners to Saturday night entertaining. I’ve seen how these spaces transform not just backyards, but family lifestyles.
I’m Christopher Deanovic, Operations Leader at Task Masters Minnesota. After overseeing dozens of outdoor kitchen installations – from simple modular units to elaborate custom builds – I’ve learned that the perfect outdoor cooking space balances functionality, durability, and visual appeal while reflecting your unique entertaining style.
The typical outdoor kitchen installation unfolds across five key phases. First comes planning (usually 1-2 weeks), where dreams meet practical reality. Next is foundation preparation (2-3 days), followed by utility installation (1-2 days), structure assembly (2-7 days), and finally those finishing touches (1-2 days) that make the space uniquely yours. DIY enthusiasts should block off 2-3 weekends, while professional installations typically wrap up in 1-2 weeks.
Investment-wise, most homeowners spend around $13,000, though budget-conscious options start near $5,000 and luxury designs can easily exceed $30,000. But here’s the truly impressive part – these kitchens deliver between 55% and 200% return on investment depending on your location. And that’s before calculating the value of countless memories made around the grill with people you love.

Want to explore complementary outdoor features? Check out our guides on backyard oasis designs, backyard water features, and outdoor fire feature ideas.
Why This Guide Matters
If you’re reading this, you’re probably tired of that endless summer shuffle – you know the one, where you’re constantly running between your indoor kitchen and that lonely grill outside, missing half the conversation and working twice as hard. Or maybe you’ve been scrolling through social media, eyeing those magazine-worthy outdoor kitchens and thinking, “Could I have that?”
Yes, you absolutely can – and this guide will show you how.
We’ve created this comprehensive resource to explain the entire outdoor kitchen installation process. Whether you’re a weekend warrior ready to tackle this project yourself or you’re planning to hire professionals like our team at TMI Minnesota, you deserve to understand every step, decision point, and consideration along the way.
At TMI Minnesota, we believe informed homeowners make the best decisions. That’s why we’ve packed this guide with practical insights about timelines, materials, design considerations, and budget expectations – all custom to different skill levels and comfort zones.
Safety comes first in everything we do. Outdoor kitchens involve multiple utilities – gas, water, and electricity – that must be properly installed to prevent serious hazards. Throughout this guide, we’ll highlight when DIY approaches make sense and when it’s best to call in licensed professionals, especially for utility connections that must meet local building codes. After all, the only thing better than a beautiful outdoor kitchen is one that’s as safe as it is stunning.
Choosing Your Outdoor Kitchen Type
Before digging that first shovel into your yard, let’s talk about what kind of outdoor kitchen installation is right for you. This choice affects everything from how much you’ll spend to how long the project will take—and of course, how your backyard oasis will ultimately look and function.
Types of Outdoor Kitchens
Picture this: it’s a warm summer evening, and you’re flipping burgers while chatting with friends, a cold drink within reach, and everything you need right at your fingertips. Sounds perfect, right? But getting there starts with choosing the right type of outdoor kitchen.
The fully DIY route gives you complete creative control. You’ll build everything from scratch using lumber, concrete blocks, or metal framing. While this approach lets you customize every detail, it also requires serious construction skills and significant weekend time. I’ve seen homeowners create stunning spaces this way, though it’s definitely not for the faint of heart!
Modular systems are like adult building blocks—pre-designed components that fit together to create your cooking space. These units typically include cabinet sections that house grills, refrigerators, and storage. They strike a nice balance between personalization and convenience.
For those who want something even simpler, Ready-to-Assemble (RTA) kits arrive 95% assembled and can transform your patio in hours rather than weeks. They’re perfect if you’re handy but don’t want a massive project.
Prefabricated units are the “plug-and-play” option of outdoor kitchen installation. These complete units get delivered to your home requiring minimal assembly, and many come on wheels for mobility—ideal if you have a smaller space or might want to rearrange occasionally.
Finally, custom-built professional kitchens (like those we create at TMI Minnesota) are designed and built specifically for your space by experts. While they come at a premium price point, the quality, design expertise, and warranty often make them worth the investment.

Pros & Cons Snapshot
| Type | Cost Range | Timeline | Customization | Skill Level Required |
|---|---|---|---|---|
| DIY from Scratch | $5,000-$12,000 | 2-3 weekends | High | Advanced |
| Modular | $7,000-$20,000 | 1-2 weekends | Medium | Intermediate |
| RTA Kits | $8,000-$15,000 | 1-2 days | Medium | Beginner-Intermediate |
| Prefabricated | $3,000-$10,000 | Hours | Low | Beginner |
| Custom Professional | $15,000-$50,000+ | 1-3 weeks | Very High | None (hired) |
I love what Maria Conti, a respected outdoor living expert, says about this decision: “Aesthetics are important but when it comes to building an outdoor kitchen, functionality and durability reign supreme.” That wisdom has guided us through dozens of installations for Minnesota homeowners.
Must-Ask Questions Before You Buy
Before you commit to any outdoor kitchen installation approach, grab a cup of coffee and honestly ask yourself these questions:
What’s your realistic budget? And I mean realistic—include not just the fun stuff like materials and appliances, but also the less exciting costs like utility connections and permits. Nothing spoils a project like surprise expenses halfway through.
How much space do you actually have? Grab a tape measure and figure out your available footprint. Remember to leave plenty of room to move around—our experts recommend at least 3-4 feet of clearance so you’re not bumping into guests while flipping steaks.
Think about your cooking style too. Are you primarily a burger-and-hot-dog griller? A simple setup might be perfect. But if you dream of making wood-fired pizzas, smoking brisket, or stir-frying on a side burner, you’ll want more specialized equipment.
Consider the future as well. One homeowner told us after their outdoor kitchen installation: “We initially wanted just a grill and counter, but we’re so glad we planned for future additions. Two years later, we added a pizza oven that’s now the star of our summer parties.”
And don’t forget about Minnesota’s weather! Our climate demands materials that can handle everything from summer humidity to winter freezes. What works in Arizona might not be ideal for your Plymouth or Edina backyard.
Taking time with these questions now will save you headaches (and potentially thousands of dollars) down the road. And remember, our team at TMI Minnesota is always happy to walk through these considerations with you—no pressure, just helpful advice to make your outdoor dreams a reality.
Site Planning & Preparation
Finding the perfect spot for your outdoor kitchen installation is like choosing the best seat in a theater—it can make or break your experience. This planning stage is where thoughtful decisions pay huge dividends, while hasty choices can lead to headaches down the road.
Location Selection
Your outdoor kitchen’s location should balance convenience with comfort. Most homeowners find that placing their kitchen about 15-20 feet from their indoor kitchen hits the sweet spot—close enough for easy trips back and forth, but far enough to keep smoke and heat from becoming a nuisance.
When it comes to placement strategy, you’ve got two main options. A perimeter kitchen nestles against your home, making utility connections simpler and offering some protection from the elements. Meanwhile, a satellite kitchen stands independently in your yard, creating a destination spot that draws guests into the landscape—though it requires more extensive utility work.
Wind direction matters more than you might think. Nobody wants to eat in a cloud of smoke, so position your cooking areas with prevailing winds in mind. In Minnesota, our westerly winds mean eastern-facing grills often work best, carrying smoke away from both your home and seating areas.
The summer sun can turn cooking into a sweaty ordeal, so consider natural shade from trees or plan to add pergolas or umbrellas. As one of our clients put it: “I didn’t think about afternoon sun when planning my kitchen. Now I wouldn’t dream of cooking without my pergola cover!”
Don’t forget to check your HOA rules before getting too attached to your plans. Many neighborhoods have specific regulations about outdoor structures that could affect everything from height to materials to setbacks.
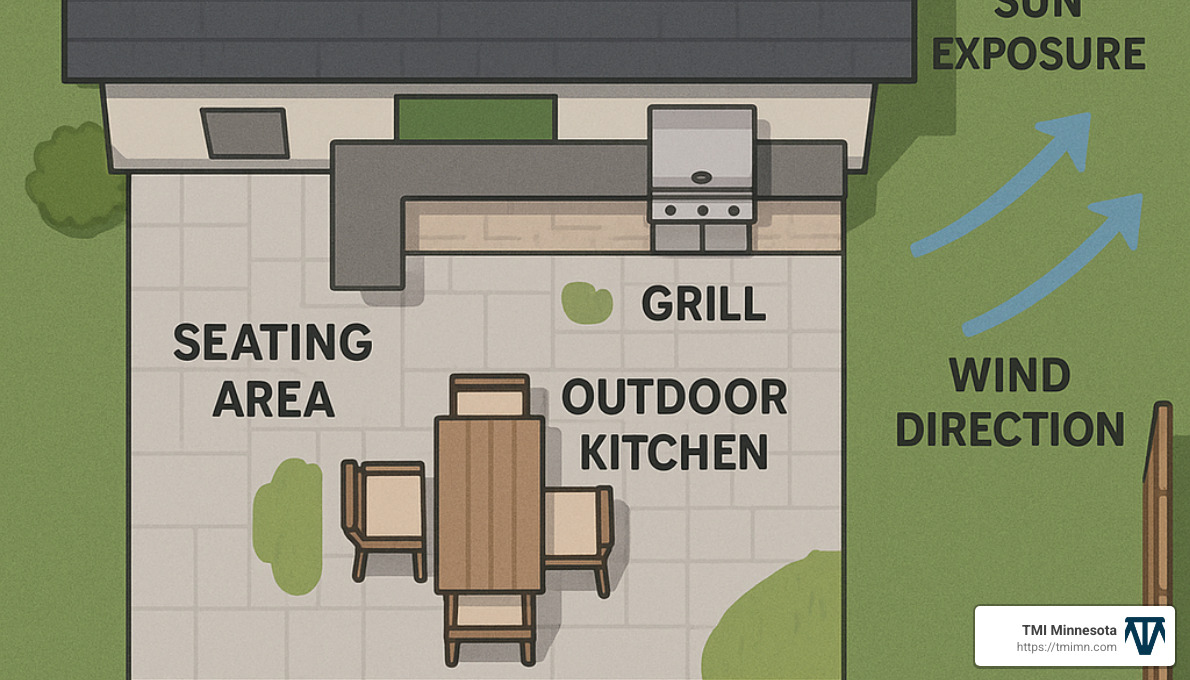
Measuring & Mock-Up
Before spending a dime on materials, get intimate with your space. Grab a tape measure and document every dimension of your intended area. Then transfer these measurements to graph paper (1 square = 1 foot works wonderfully) to create a scaled blueprint of your dream kitchen.
Here’s where a bit of creativity saves heartache: use cardboard boxes or chalk outlines to create a life-sized mock-up of your kitchen. Walk around it, pretend to cook, and imagine hosting friends. This simple step has saved countless homeowners from layout regrets.
“Using cardboard boxes to mock up our kitchen saved us from a major mistake,” shared one of our Twin Cities clients. “We realized our original plan would have blocked the pathway to our pool area completely!”
Pay special attention to workflow when positioning appliances. Your outdoor kitchen installation should flow naturally between prep areas, cooking stations, and serving spaces—just like your indoor kitchen.
Foundation Options
Every great outdoor kitchen stands on a solid foundation. If you’re lucky, your existing patio might do the job—but first ensure it’s level and can support the substantial weight of an outdoor kitchen (especially those with stone or concrete elements).
For new installations, a properly constructed paver base offers both stability and design flexibility. Many of our clients choose this option because it allows the kitchen to integrate seamlessly with surrounding hardscaping.
A poured concrete pad provides maximum stability and longevity. Just remember to incorporate a slight slope (about ¼ inch per foot) for proper drainage—standing water is the enemy of outdoor structures in our freeze-thaw Minnesota climate.
If you’re dreaming of a deck-top kitchen, proceed with caution. Standard deck construction rarely supports the weight of stone, concrete, and appliances. We almost always recommend additional structural support beneath the kitchen area.
For more inspiration on creating cohesive outdoor living spaces, check out our Outdoor Dining Space Design page.
Permits and Regulations
The least exciting but potentially most important part of your outdoor kitchen installation involves paperwork. Most municipalities require building permits for permanent outdoor structures, and separate permits may be needed for gas, water, and electrical work.
Setback requirements dictate how close you can build to property lines, while fire safety codes typically mandate at least 10 feet between cooking equipment and combustible structures. These regulations aren’t suggestions—they protect both you and your neighbors.
One Edina homeowner learned this lesson the hard way: “I almost started building without checking permits. Turns out, my city required plans approval and three separate inspections for my outdoor kitchen project. Getting retroactive permits would have been a nightmare!”
At TMI Minnesota, we’ve steerd these regulations countless times and can help ensure your project meets all local requirements. A little paperwork upfront prevents costly corrections later—leaving you free to enjoy your outdoor cooking space worry-free.
Tools, Materials, and Safety Essentials
Let’s face it—you’re only as good as your tools. When it comes to outdoor kitchen installation, having the right equipment and materials makes all the difference between a weekend project and a month-long headache.
Essential Tools
Whether you’re tackling a DIY build or assembling modular components, you’ll need a reliable toolkit. For those brave souls building from scratch, your shopping list should include measuring tools like a tape measure and both 2-foot and 6-foot levels—trust me, that longer level is worth its weight in gold when checking large surfaces.
Power tools are your best friends here: a quality circular saw, a dependable drill/driver, and an angle grinder with a diamond blade for cutting stone or concrete. Don’t forget the masonry tools if you’re working with stone veneer—both notched and flat trowels will make your life easier, along with a decent mortar mixing tub.
If you’re going the modular route, you can scale back to the basics: a good drill/driver with multiple bits, a level, and a pry bar for adjustments. Some shims for leveling and clamps for holding pieces in place will save you from begging friends to lend a hand.
“I thought I could get by without a long level,” laughs Mike, a recent TMI Minnesota client. “Three crooked countertop attempts later, I finally bought one. Should’ve done that from day one!”
Materials Selection
Your outdoor kitchen will face rain, snow, sun, and everything in between—especially here in Minnesota. Choosing the right materials isn’t just about looks; it’s about creating something that lasts.
For framing, you’ve got options. Pressure-treated lumber is budget-friendly but will eventually need replacement. Metal framing offers durability but watch for corrosion issues. Concrete block stands up to anything Mother Nature throws at it, but it’s heavy and labor-intensive. Many of our clients opt for manufactured modular frames made from galvanized steel—they’re specifically designed to withstand outdoor conditions.
When it comes to exterior finishes, stone veneer gives you that luxurious, natural look that ages beautifully. If authentic stone is beyond your budget, cultured stone offers a similar appearance with less weight and easier installation. Stucco provides an affordable, clean look, while classic brick never goes out of style. Tile gives you endless design possibilities but requires more maintenance in our freeze-thaw climate.
For countertops, granite remains the gold standard—it resists heat, stains, and weather beautifully. Concrete countertops allow for custom shapes and colors but need proper sealing. Tile counters are budget-friendly but those grout lines can be high-maintenance outdoors. Stainless steel is practically indestructible but can get uncomfortably hot in summer sun.
All outdoor appliances should be rated for exterior use, with stainless steel being the industry standard. For cabinetry, look for marine-grade polymers in high-moisture areas and powder-coated metals for durability against the elements.
Safety Essentials
Safety isn’t just a suggestion—it’s essential when combining fire, electricity, and gas in an outdoor setting. A properly installed outdoor kitchen needs to address several safety concerns:
First, fire safety should be top of mind. Install a dedicated fire extinguisher within easy reach of your cooking area. Use non-combustible materials around heat sources and maintain proper clearances (at least 10 feet from structures). If your kitchen is covered, proper ventilation is non-negotiable.
For electrical safety, all outlets must be GFCI-protected and weatherproofed. Outdoor wiring has specific code requirements that differ from indoor installations—this is one area where consulting a professional electrician is often worth the investment.
Gas safety requires automatic shut-off valves and materials specifically rated for gas lines. Always test for leaks using a simple solution of dish soap and water (bubbles indicate leaks) before firing up your appliances for the first time.
Don’t forget personal protection during the build. Gloves protect your hands from rough materials, safety glasses shield your eyes from flying debris, dust masks prevent respiratory issues during masonry work, and hearing protection is essential when using power tools.
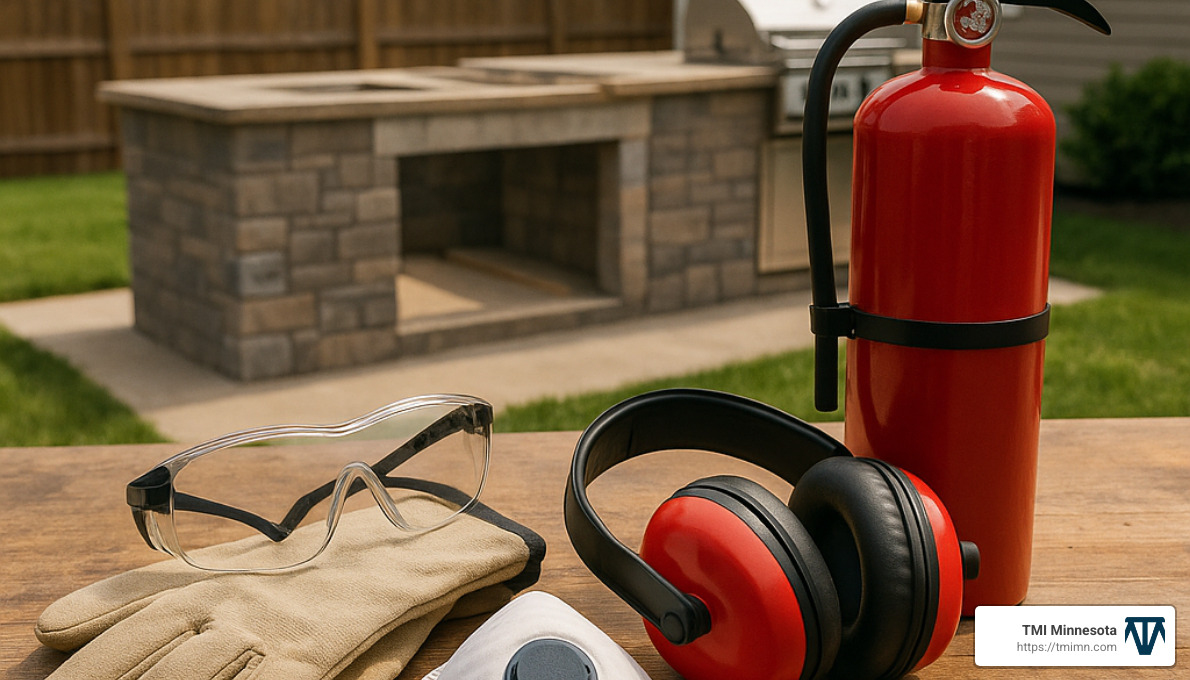
For in-depth information on home safety considerations, check out this valuable Scientific research on fire safety.
Shopping Checklist
Before you begin your outdoor kitchen installation, gather all your materials to avoid mid-project hardware store runs. For a basic DIY build, you’ll need framing materials like pressure-treated 2x4s and plywood, along with appropriate fasteners including deck screws and concrete anchors.
Don’t skip the moisture barriers—builder’s felt and waterproofing membrane will prevent water damage down the road. Surface materials like cement board, wire lath, and mortar create the foundation for your finish work, while finishing materials include your chosen stone veneer, grout, and sealant.
For modular kitchens, focus on leveling materials like composite shims and adjustable feet, connection hardware such as bolts and brackets, and finishing items including caulk and sealant.
“The difference between a good outdoor kitchen and a great one often comes down to the small details—like using marine-grade sealant instead of standard caulk,” shares our lead installer at TMI Minnesota. “These little upgrades might cost a few dollars more upfront but save hundreds in maintenance later.”
Step-by-Step Outdoor Kitchen Installation
Let’s roll up our sleeves and walk through the actual outdoor kitchen installation process. Whether you’re a dedicated DIYer or planning to hire professionals, understanding these steps will help you steer your project with confidence.
DIY Outdoor Kitchen Installation Workflow
Building your outdoor kitchen from scratch is like putting together a puzzle—one piece at a time, with a delicious result at the end!
Step 1: Build the Frame
Start by constructing a sturdy base frame about ½” off the ground using pressure-treated lumber or metal studs. For most DIYers, building three separate boxes—one for the grill and two for sides—makes the project more manageable and less overwhelming.
Take your time ensuring the frame is perfectly level and plumb. A crooked frame means crooked everything else later! Use shims where needed and secure everything to your foundation with appropriate anchors or fasteners. This frame is literally the foundation of your outdoor cooking dreams.
Step 2: Sheathe the Frame
Next, cover your frame with exterior-grade plywood, being careful to leave properly sized openings for doors, drawers, and appliances. This is where your measuring skills really matter! Once the plywood is secured, apply a waterproofing membrane or builder’s felt over it. This critical weather barrier protects your structure from Minnesota’s sometimes harsh elements.
Step 3: Apply Lath and Scratch Coat
Now for some real craftsmanship. Attach wire lath to your sheathed frame, overlapping the sheets by 2 inches for strength. Secure this mesh with galvanized nails or screws every 6 inches vertically and 12-15 inches horizontally.
Apply a ½-inch scratch coat of mortar over the lath, working in manageable sections. While the mortar is still wet (but firm enough to hold a mark), score it horizontally with a notched trowel. These grooves create a better bonding surface for your finish materials. Let this cure for about an hour until it’s firm but not completely hardened.
Step 4: Apply Stone Veneer or Finish Material
Before diving in, organize your stone pieces by type—corners, shorts, and longs—to create a smooth workflow. Always start with corner pieces and work from bottom to top, like building a miniature stone wall.
“Back-butter” each stone by applying mortar to its back before pressing it firmly into place. Maintain consistent joint widths between stones for a professional look. For necessary cuts, use an angle grinder with a diamond blade—and don’t forget your safety gear! Once all stones are placed, allow the mortar to set for a full 24 hours before moving forward.
Step 5: Install Countertop
Countertop installation is definitely a two-person job! Measure and cut your material to size, allowing for an appropriate overhang (typically 1-2 inches). Create any necessary cutouts for your sink, grill, or other built-in appliances.
Apply construction adhesive to the top of your frame, then carefully set the countertop in place. This step often requires at least two people—three is even better. Once positioned, seal all joints and edges according to the specific requirements of your countertop material.
Step 6: Install Appliances and Fixtures
The exciting part! Insert your grill, refrigerator, sink, or other appliances according to each manufacturer’s specifications. Connect utilities (gas, water, electric) following all code requirements—this is one area where cutting corners can be dangerous.
Test all connections thoroughly before finalizing the installation. Then add the finishing touches like cabinet doors and hardware that make your outdoor kitchen both functional and beautiful.
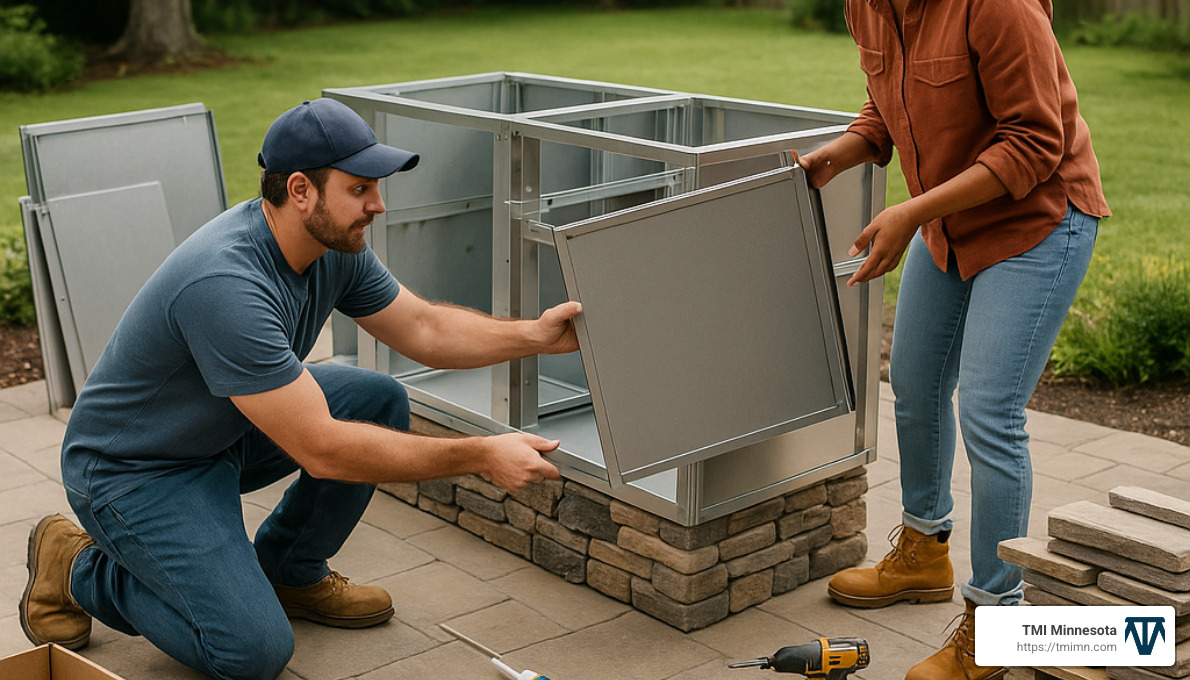
“Building our outdoor kitchen was definitely a two-weekend project,” shares Minnesota homeowner Mike Johnson. “The first weekend was framing and scratch coat, the second was stone veneer and countertop. Having a helper was absolutely essential for the heavy lifting.”
Professional Outdoor Kitchen Installation Workflow
When you hire professionals like our team at TMI Minnesota, we handle the heavy lifting while you handle the dreaming. Our process typically follows these phases:
First, we start with a detailed design consultation where we work closely with you to create a custom design that perfectly fits your space, needs, and style preferences. We’ll help you steer material choices and layout options that maximize both beauty and function.
Next comes site preparation, where our team handles all foundation work, including pouring concrete if needed. We ensure the base is perfectly level and ready to support your outdoor kitchen for years to come.
For utility installation, we bring in licensed professionals to handle gas, water, and electrical connections to code. This critical step ensures your kitchen is not just beautiful but safe and functional in all seasons.
During structure construction, we build the kitchen frame according to design specifications, using materials selected for durability in Minnesota’s climate. Our experienced craftsmen ensure every detail is perfect.
The appliance installation phase is where your kitchen starts to take shape. High-quality appliances are precisely fitted and connected by specialists who understand the nuances of outdoor installations.
Finishing brings your vision to life with countertops, veneer, and decorative elements that complete the look. We pay attention to every detail, ensuring clean lines and perfect seams.
Finally, we conduct a final inspection to ensure everything meets code requirements and our exacting quality standards. We’ll walk you through operating your new outdoor kitchen and answer any questions before we consider the job complete.
Professional installation typically takes 1-2 weeks from start to finish, depending on complexity and weather conditions. While it’s more expensive than DIY, the peace of mind and professional results are worth considering.
Modular Kit Assembly Tips
For those choosing a modular or Ready-To-Assemble (RTA) outdoor kitchen installation, the process is streamlined but still requires attention to detail.
Begin with careful preparation by unpacking all components and checking for any shipping damage. Organize parts according to the instruction manual—this simple step saves hours of frustration later! Before placing a single component, double-check that your foundation is perfectly level.
For base installation, position the modules according to your plan, using the included leveling feet or shims to ensure everything sits perfectly flat. Connect modules using the provided hardware, making sure all connections are tight and secure. Many manufacturers recommend anchoring the assembled base to your foundation for stability.
When it comes to appliance installation, insert each piece into its designated opening with care. Make utility connections according to manufacturer instructions, and always ensure proper ventilation around all appliances. This is especially important for gas grills and refrigeration units.
Countertop placement is typically the trickiest part of modular assembly. Carefully position the countertop on the base—this usually requires 2-3 people working together. Secure according to kit instructions and seal any seams if your countertop comes in multiple pieces.
Finish with the finishing touches by installing cabinet doors and drawers, adding any decorative elements included with your kit, and applying recommended sealants to protect your investment.
“Our RTA outdoor kitchen arrived 95% assembled,” reports Twin Cities resident Sarah Miller. “My husband and I had it set up in about four hours, and most of that time was spent making sure everything was perfectly level.”
No matter which approach you choose, patience and precision pay off. Taking your time with each step of your outdoor kitchen installation will reward you with a beautiful, functional space that serves your family for years to come.
Utility Connections & Code Compliance
Getting the utilities right is where many DIY outdoor kitchen installations go from dream to disaster. As someone who’s seen everything from perfectly executed projects to costly mistakes, I can tell you that this is one area where cutting corners simply isn’t worth it.
Gas Line Installation
Your outdoor grill deserves a reliable gas supply that’s both convenient and safe. Most outdoor kitchens use natural gas or propane, and the installation process requires careful planning:
The path from your home’s gas supply to your outdoor kitchen should be as direct as possible while avoiding any potential hazards. Only use materials specifically approved for gas lines—typically black iron pipe for exposed runs, flexible gas connectors for appliance hookups, or yellow polyethylene pipe for underground installations.
When installing underground gas lines, trenching needs to be at least 18 inches deep to protect from frost and accidental damage. Always install shut-off valves at both the source and the appliance end—this isn’t just convenient, it’s a critical safety feature.
“I can’t stress enough how important proper gas line installation is,” says Mike, one of our experienced contractors at TMI Minnesota. “We always pressure test new lines and check every fitting with soapy water to find even the tiniest leaks before they become dangerous.”
Important reminder: In virtually all Minnesota communities, gas line installation must be performed by a licensed professional and requires proper permits and inspection. This is one area where DIY rarely makes sense.
Water Supply and Drainage
Adding a sink to your outdoor kitchen installation lifts its functionality, but requires thoughtful planning for both supply and drainage:
For water supply lines in our Minnesota climate, frost-proof materials are non-negotiable. Install accessible shut-off valves that allow for complete winterization, and consider whether you’ll need hot water—a dedicated supply can be worth the extra effort for serious outdoor cooks.
Drainage options vary based on local codes and your property:
– Connection to your home’s sewer system offers the most convenience but requires permits
– Gray water systems can be ecological options where allowed by local regulations
– Dry wells work in some situations but check with local authorities first
Minnesota’s freeze-thaw cycles demand extra attention to winterization. Your drainage system must allow for complete emptying before winter, and fixtures should be freeze-resistant. One of our clients learned this lesson the hard way when a forgotten drop of water expanded and cracked an expensive fixture during our first cold snap.
Electrical Requirements
From refrigeration to mood lighting, electricity brings convenience and ambiance to your outdoor kitchen. Getting it right means focusing on safety and weatherproofing:
Your outdoor kitchen installation should have its own dedicated 20-amp circuit with GFCI protection. Underground electrical lines need proper conduit buried at appropriate depths (typically 18-24 inches). Every connection and outlet needs weatherproof protection against our Minnesota elements.
Think about lighting in three layers: task lighting that illuminates cooking surfaces, ambient lighting that creates atmosphere, and path lighting that ensures safety when moving around your outdoor space after dark.
Safety features aren’t optional—they’re essential. Every outlet needs weatherproof covers and GFCI protection, and all components must be properly grounded. Electrical work done correctly will serve you reliably for years; done incorrectly, it can become a serious hazard.
For a comprehensive overview of planning your outdoor kitchen, check out this Outdoor Kitchen Planning Guide.
Safety Clearances & Ventilation
Fire safety isn’t something to compromise on, especially when combining heat sources with structures:
Your grill should maintain at least 10 feet of clearance from combustible structures—this isn’t just a suggestion, it’s a crucial safety rule. Allow at least 3 feet of clearance on all sides for comfortable operation and to prevent accidental burns.
If your outdoor kitchen installation includes a covered area, proper ventilation becomes essential. Install a hood with appropriate ventilation capacity, use ventilated panels in cabinet areas housing gas components, and always use insulated grill jackets when embedding grills in any potentially combustible materials.
The materials surrounding heat sources should be non-combustible, and your countertop material needs to withstand the heat from cooking equipment. I’ve seen beautiful wooden structures charred beyond repair because someone underestimated how much heat their grill would generate.
Permits & Paperwork
Nobody loves paperwork, but skipping the permit process is a recipe for regret:
Most permanent outdoor kitchen installations require a building permit. Add electrical work? You’ll need an electrical permit. Water lines and drainage? That’s a plumbing permit. Gas lines? You guessed it—a gas permit. And don’t forget to check if your neighborhood has an HOA that requires project approval before you begin.
“I’ve seen homeowners forced to tear out completed outdoor kitchens because they didn’t get proper approvals,” shares a local building inspector we work with regularly. “The permit process isn’t just bureaucracy—it ensures your installation is safe and up to code.”
At TMI Minnesota, we help our clients steer the permitting maze, ensuring every outdoor kitchen installation we complete is not just beautiful, but legal and safe. When you’re investing thousands in your outdoor living space, the last thing you want is compliance issues down the road.
Costs, Timeline & Avoiding Mistakes
Let’s talk dollars and sense when it comes to your outdoor kitchen installation. I’ve seen countless homeowners get that deer-in-headlights look when the final bill arrives—simply because they didn’t have a clear picture of costs upfront. Let’s make sure that doesn’t happen to you!
Cost Breakdown
Your outdoor culinary dream can range from modest to magnificent, with prices to match:
Budget-Friendly: $5,000-$15,000
For this investment, you’ll get a functional basic island with a decent grill, enough counter space for prep work, and simple finishes that won’t break the bank. Think of it as the starter model—it gets the job done without all the bells and whistles.
Mid-Range Marvels: $15,000-$30,000
Step up to this tier for a noticeable upgrade in quality and functionality. You’ll enjoy better appliances, more durable countertops, and extra features like a compact refrigerator or sink that make outdoor cooking truly convenient. This is where most of our Twin Cities clients land—balancing quality with sensible spending.
Luxury Landscapes: $30,000+
The sky’s the limit here! Premium appliances that professional chefs would envy, expansive countertop areas for entertaining, full utility connections, and high-end finishes that make your outdoor kitchen the envy of the neighborhood. One of our Lake Minnetonka clients jokes that his outdoor kitchen is nicer than his indoor one—and he’s not wrong!
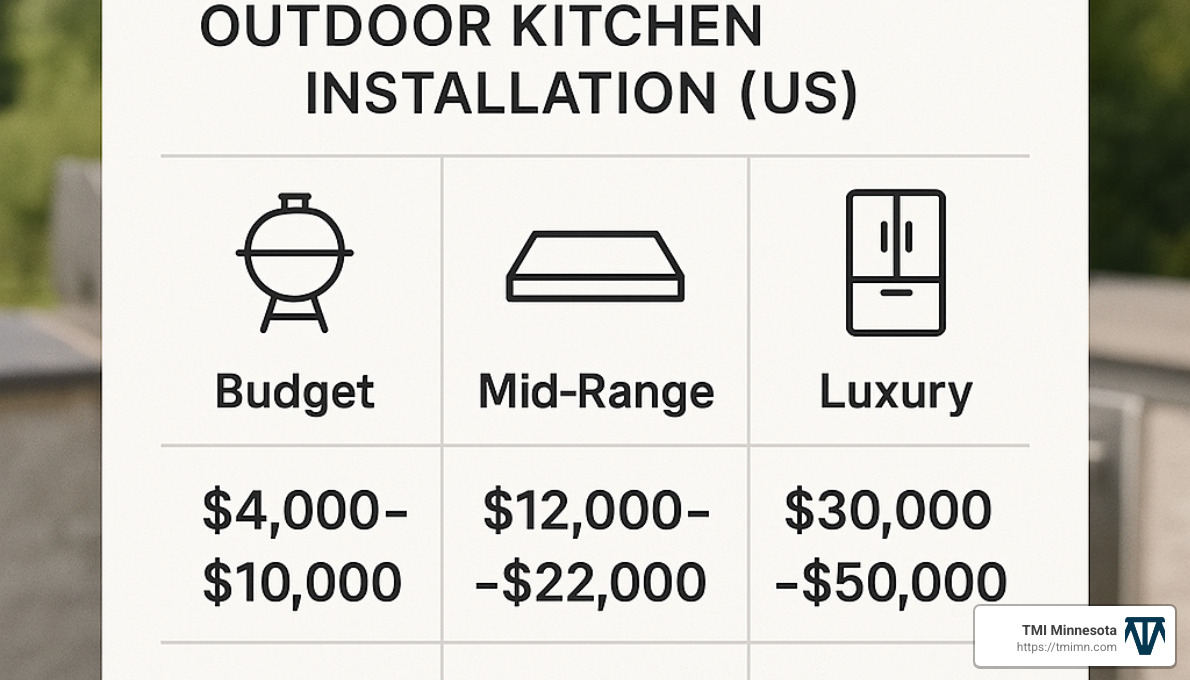
The silver lining? Outdoor kitchen installations offer impressive returns on investment—anywhere from 55% to 200% depending on your location and quality. Our Minnesota clients typically see around 75-80% ROI, plus years of priceless family memories.
Timeline Expectations
Rome wasn’t built in a day, and neither is your outdoor kitchen. Here’s what to expect:
DIY from Scratch: Plan for 2-3 weekends of work (plus planning time beforehand)
Your first day will involve building the frame—the skeleton of your kitchen. Next comes sheathing and lath application, followed by 1-2 days of stone veneer work (this always takes longer than folks expect!). Finally, you’ll spend a day installing countertops and appliances. Minnesota’s unpredictable weather might extend this timeline, so build in some buffer.
Modular/RTA Installation: A weekend warrior’s dream at just 1-2 days
Half a day for site prep, another half to full day for assembly, and then time for utility connections varies based on complexity. One of our clients in Edina completed her modular kitchen installation in a single Saturday—and hosted a cookout the very next day!
Professional Installation: Typically 1-2 weeks from start to finish
We’ll spend 1-2 weeks on design and planning before breaking ground. Then comes site preparation (1-2 days), construction (3-5 days), and finishing touches (1-2 days). The advantage? You can focus on planning your first outdoor gathering while we handle the heavy lifting.
Budget Savers & Splurge Points
Smart spending is about knowing where to save and where to splurge. Here’s my insider advice after years in the business:
Where to Save: Start with a prefabricated rolling cart instead of a built-in structure if budget is tight. Begin with a modest footprint that you can expand later as funds allow. Choose modular components rather than custom-built elements—they’re more affordable and still look great. Manufactured stone veneer gives you the luxury look of natural stone at a fraction of the cost. And consider tile countertops instead of solid stone to shave thousands off your budget.
Where to Splurge: Never skimp on your grill—it’s the heart of your outdoor kitchen and where performance really matters. Invest in weather-resistant countertop materials; this isn’t the place to cut corners in our harsh Minnesota climate. Proper ventilation systems aren’t sexy, but they’re essential for safety and comfort. Quality stainless steel appliances and fixtures will stand up to the elements year after year. And always, always pay for professional utility connections—the safety of your family is worth every penny.
As one of our Minnetonka clients told us: “I wish I’d spent less on fancy cabinet doors and more on a better grill. The doors look nice, but the grill is what we use every single day.”
Top 5 Installation Pitfalls
Even the most careful DIYers can fall into these common traps. Consider yourself warned!
Poor Leveling: Nothing ruins an outdoor kitchen installation faster than a wobbly foundation. Improper leveling leads to drainage nightmares, countertops that look like rollercoasters, and appliances that don’t perform correctly. I’ve seen homeowners try to fix this after the fact—it’s always costly and rarely fully successful.
Inadequate Ventilation: Your grill needs to breathe! Insufficient airflow around gas appliances creates serious fire hazards and performance issues. One Plymouth homeowner called us in a panic when his built-in grill kept going out—turns out his DIY kitchen had zero ventilation provisions.
Wrong Materials: That beautiful cedar cabinet might look stunning in your kitchen catalog, but it won’t survive a Minnesota winter outdoors. Using indoor-rated materials outside is a recipe for rapid deterioration. Stick with materials specifically designed for outdoor use.
Skipping Permits: I get it—permits feel like unnecessary red tape. But bypassing them can result in costly corrections or even complete removal if you’re caught. One Maple Grove client had to tear out a nearly completed outdoor kitchen because it violated setback requirements. Don’t learn this lesson the hard way!
Neglecting Drainage: Water is the enemy of outdoor structures. Without proper drainage, you’ll face foundation damage and premature deterioration. A slight slope (about 1/4 inch per foot) away from your home ensures water runs off rather than pools.
“We built our outdoor kitchen three years ago,” shared one of our St. Paul clients, “and the only thing I regret is not planning better for Minnesota winters. Make sure everything can be properly winterized—it’ll save you headaches down the road.”
Ready to transform your backyard into an outdoor culinary paradise? Visit our outdoor living upgrades page for more inspiration!
Maintenance, Durability & Future Upgrades
Your outdoor kitchen installation isn’t just a summer project—it’s an investment that should bring joy for years to come. With Minnesota’s challenging weather cycles, proper maintenance is essential for preserving both function and beauty.
Materials That Last
When we build outdoor kitchens for our Twin Cities clients, material selection is always our starting point for long-term success.
Granite countertops remain the champion of outdoor surfaces. I’ve seen 10-year-old granite installations that still look magnificent despite enduring everything from summer barbecue spills to winter ice storms. The natural stone resists heat, stains, and those brutal freeze-thaw cycles that can destroy lesser materials.
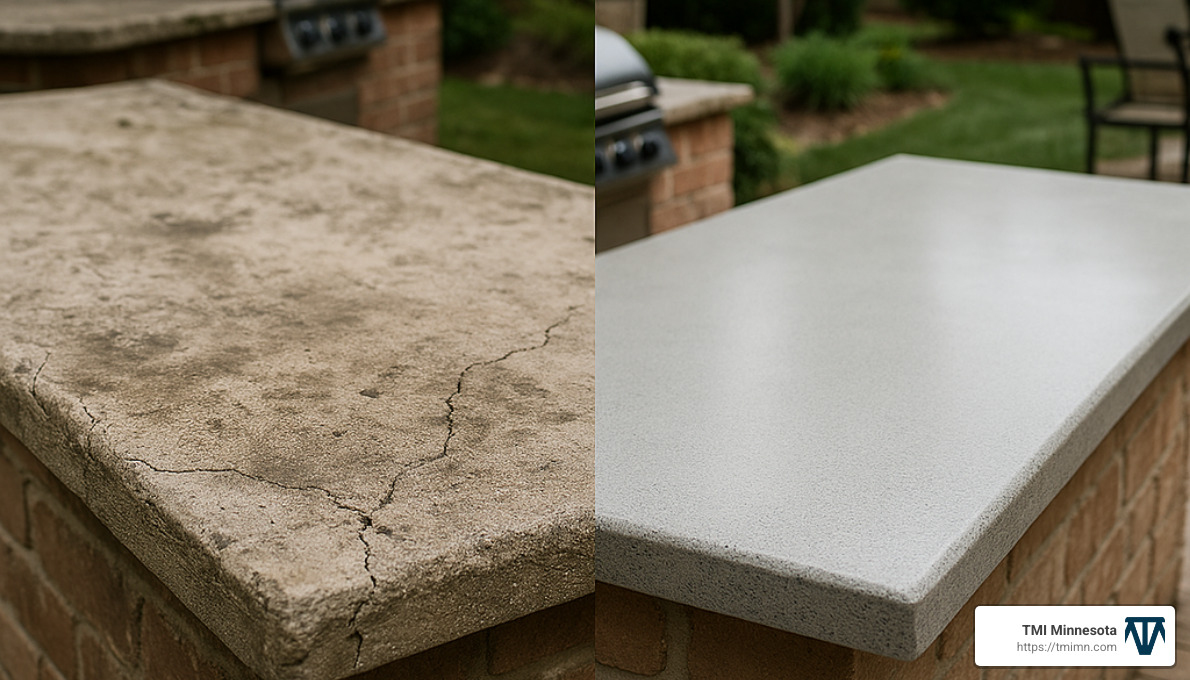
Concrete countertops offer another durable option, though they do require annual sealing to prevent moisture damage. One of our clients in Edina skipped this maintenance step and finded hairline cracks after just two winters—a costly lesson in preventive care.
For the structure itself, concrete panels have proven remarkably resilient in our climate. Marine-grade polymer cabinetry, while more expensive upfront, offers virtually maintenance-free performance that many of our busy homeowners appreciate. As one customer told me, “I wanted to cook outside, not spend my weekends maintaining my kitchen.”
When selecting appliances, the grade of stainless steel matters tremendously. Always choose 304-grade or better for our Minnesota environment. I’ve seen budget 430-grade stainless develop rust spots after just one season, while quality 316-grade fixtures maintain their luster for a decade or more.
Routine Care Schedule
Taking care of your outdoor kitchen installation doesn’t need to be overwhelming. Breaking maintenance into manageable chunks helps preserve your investment without creating a burden.
Monthly attention keeps small issues from becoming big problems. A quick wipe-down of all surfaces with appropriate cleaners prevents staining and buildup. I always recommend checking gas connections with soapy water to spot potential leaks before they become dangerous, and inspecting for any signs of water damage or uninvited critters making homes in your cabinetry.
Each season brings its own maintenance needs. Spring calls for a thorough cleaning after winter’s dormancy. Summer is the time to look for UV damage to materials, especially if you have polymer components. Fall means preparation for winter, and winter itself requires protection for components not in use.
Annually, certain tasks deserve your attention. Resealing concrete or porous stone countertops prevents moisture penetration. A thorough inspection and cleaning of gas lines and burners ensures safe operation. I always tell our clients to check and tighten all hardware and inspect electrical components for wear—it’s amazing how many problems this simple step prevents.
“I set calendar reminders for my outdoor kitchen maintenance,” shares one of our St. Paul clients. “It takes me less than an hour a month, but my kitchen still looks fantastic after five Minnesota winters.”
Winterizing Your Outdoor Kitchen
Living in Minnesota means respecting winter’s power to damage outdoor installations. Proper winterization is non-negotiable for preserving your investment.
For water systems, the process is straightforward but essential. Shut off the water supply at its source, then drain all lines completely. Using compressed air to blow out remaining water prevents frozen pipes and cracked fixtures. For sink traps, adding non-toxic antifreeze provides extra protection against unexpected freezes.
Appliances need special attention before winter sets in. Clean them thoroughly—food residue attracts pests seeking winter shelter. Disconnect and store propane tanks according to safety guidelines. For refrigerators and ice makers, manufacturer-approved covers provide important protection. When possible, smaller appliances are best removed and stored indoors.
The structure itself also needs winter protection. Apply appropriate sealants to surfaces before the first freeze. Consider covering countertops if they’re exposed to direct snow or ice. And always ensure proper drainage around your kitchen to prevent ice damage to the foundation.
“The first winter after our outdoor kitchen installation, we skipped proper winterization,” admits a Bloomington homeowner. “The repair costs that spring were more than triple what proper winterizing would have cost. We never made that mistake again!”
Planning for Future Upgrades
One of the smartest approaches to outdoor kitchen installation is thinking ahead about potential expansions. We often help clients design initial kitchens with future growth in mind.
A modular approach allows for adding components later without major reconstruction. I recommend installing slightly oversized gas and electrical capacity during initial construction—the marginal cost upfront is far less than retrofitting later. One forward-thinking client had us install capped gas and water lines in an adjacent area where she planned to add a pizza oven two years later—saving hundreds in future installation costs.
Speaking of pizza ovens, they’ve become our most requested upgrade in recent years. There’s something magical about gathering family around a wood-fired oven that transforms ordinary evenings into memorable experiences. Bar seating areas with dedicated refrigeration also rank high on wish lists, creating natural gathering spaces around the cooking area.
For extending Minnesota’s short outdoor season, heating elements and weather protection make tremendous differences. Pergolas or partial roof structures paired with strategically placed heaters can extend your outdoor cooking season by months.
“Our outdoor kitchen has evolved over five years,” shares a Lake Minnetonka resident. “We started with just a grill and counter, added a pizza oven the second year, and just completed a covered pergola with heaters. Each addition made the space more usable and special.”
For more inspiration on enhancing your outdoor living space beyond the kitchen, check out our Outdoor Living Upgrades page for complementary projects that can transform your entire yard.
Frequently Asked Questions about Outdoor Kitchen Installation
How long does outdoor kitchen installation take?
When friends ask me about timelines for outdoor kitchen installation, I always explain that it depends on which route they’re taking:
For the weekend warriors tackling a DIY project from scratch, you’re looking at 2-3 weekends of rolling up your sleeves and getting dirty. But remember, that’s active work time spread across 3-4 weeks because you’ll need to allow proper curing time between stages. That mortar and concrete won’t rush for anyone!
If you’re going with modular or ready-to-assemble systems, you can dramatically cut this down to just 1-2 days for the basic assembly. Though if you need to connect utilities, that’s a separate timeline.
For those choosing professional installation like we provide at TMI Minnesota, we typically complete the entire project in 1-2 weeks from start to finish, depending on how elaborate your vision is and what Mother Nature decides to throw our way.
Speaking of weather – it’s the wild card in any outdoor project. I’ve seen perfect plans delayed by unexpected rain showers, especially when working with concrete or mortar, which need specific temperature and humidity conditions to cure properly. Minnesota’s weather can be particularly unpredictable, so we always build a little flexibility into our schedules.
Do I need a permit for an outdoor kitchen?
The permit question comes up in almost every consultation, and the answer is usually “yes” – but with some nuance.
In most Minnesota communities, permanent structures require building permits. Gas lines always need specific permits and must be installed by licensed professionals (this is absolutely not a DIY task). Electrical work typically needs permits and often licensed electricians, while water and drainage connections generally require plumbing permits.
I’ve had clients get excited about a “loophole” they heard about – that structures under 100 square feet might be exempt from building permits. While this is true in some municipalities, it almost never applies to the utility connections. And even without a permit requirement, you’ll still need to comply with local setback regulations.
As one local building official wisely advised a client of ours, “Even if you don’t need a permit for the structure itself, you’ll likely need permits for any gas, electrical, or plumbing work.” My advice? Always check with your local building department before starting your outdoor kitchen installation. The small upfront effort saves massive headaches later.
What’s the average cost per linear foot?
When budgeting for your outdoor kitchen installation, thinking in terms of cost per linear foot of counter space helps create a realistic estimate:
For basic installations, expect to invest about $500-$700 per linear foot. This typically includes a simple structure, standard countertops, and basic built-in appliances.
Mid-range installations generally run $700-$1,000 per linear foot, offering better materials and more features.
High-end custom kitchens start around $1,000 and can exceed $1,500 per linear foot, featuring premium materials, sophisticated designs, and high-performance appliances.
To put this in perspective, a basic 10-foot linear outdoor kitchen might cost $5,000-$7,000, while that same length in a high-end custom design could easily exceed $15,000. Specialty appliances (like pizza ovens or smokers), extensive utility work, or premium materials will push your budget toward the higher end of these ranges.
How do I ensure my outdoor kitchen lasts through Minnesota winters?
As Minnesota natives, we’ve learned a thing or two about weatherproofing outdoor kitchen installations against our legendary winters!
First, material selection is crucial. Opt for freeze-thaw resistant materials like concrete, granite, and high-quality stainless steel that can handle those dramatic temperature swings without cracking or deteriorating.
Always incorporate proper drainage into your design. Even slight slopes (about 1/4 inch per foot) prevent water from pooling and forming ice that can damage surfaces and structures.
For plumbing, use frost-proof fixtures and design your water lines for complete drainage. There’s nothing worse than a burst pipe in your beautiful outdoor kitchen!
Consider adding some kind of covering – a roof, pergola, or awning provides valuable protection from snow load and ice accumulation.
Finally, develop a thorough winterization routine. Each fall, drain all water lines completely, disconnect and store propane tanks, clean and cover appliances, and protect sensitive components.
One of our Twin Cities clients who’s enjoyed their outdoor kitchen through five Minnesota winters shared their secret: “The key has been thorough winterization each fall and choosing materials specifically rated for extreme temperature changes.” Simple advice, but spot on!
Can I install an outdoor kitchen on an existing deck?
Yes, you can definitely install an outdoor kitchen on an existing deck – but please don’t skip these critical considerations:
Structural support is the biggest concern. Most residential decks aren’t designed to support the substantial weight of an outdoor kitchen, which can easily exceed 2,000 pounds. Before proceeding, consult a structural engineer to determine if reinforcement is needed. This isn’t a place to cut corners!
You’ll need to install proper non-combustible barriers between cooking appliances and the wooden deck structure. This isn’t just about building codes – it’s about preventing your beautiful deck from becoming a fire hazard.
Utility access requires special planning for deck installations. Running gas, water, and electrical lines to a deck often involves specialized approaches and almost always requires professional installation.
Check your local codes carefully. Many Minnesota jurisdictions have specific requirements for cooking appliances on wooden structures that go beyond standard building codes.
At TMI Minnesota, we’ve successfully completed numerous outdoor kitchen installations on reinforced decks. They create a wonderful integrated outdoor living space, but we always insist on a professional assessment of the existing structure before proceeding. Safety and longevity come first!
Conclusion
Outdoor kitchen installation represents one of the most rewarding outdoor living investments for Twin Cities homeowners. Whether you’re dreaming of a simple DIY grill station or an elaborate chef-worthy cooking space, your outdoor kitchen creates a natural gathering place while adding significant value to your property.
Throughout this guide, we’ve walked together through every step of creating your outdoor culinary oasis—from initial planning and material selection to installation techniques and long-term maintenance. The journey of building an outdoor kitchen is both exciting and challenging, but the end result transforms how you experience your backyard.
I’ve seen countless Minnesota families find the joy of outdoor cooking and entertaining in their custom kitchen spaces. One client recently told me, “Our outdoor kitchen isn’t just about cooking—it’s about creating memories with the people we love.” This sentiment captures exactly why these projects are so worthwhile.
Remember these essential points as you plan your project:
Plan thoroughly before breaking ground. The most successful outdoor kitchens start with careful consideration of location, utilities, and future needs. Take time to visualize how you’ll move through the space when cooking and entertaining.
Choose materials that withstand Minnesota’s climate challenges. Our freeze-thaw cycles demand durable, weather-resistant components that will look beautiful for years to come.
Prioritize safety with proper clearances, ventilation, and code-compliant utility connections. This isn’t just about regulations—it’s about protecting your family and home.
Consider your skill level honestly when deciding between DIY, modular systems, or professional installation. There’s no shame in knowing your limits and calling in experts for complex aspects of the project.
Maintain your investment with regular care and proper winterization. A little attention each season ensures your outdoor kitchen remains functional and beautiful for many years.
At TMI Minnesota, we’ve finded that single helpers make all the difference in outdoor kitchen installation projects. Whether you’re working with a friend on a DIY build or partnering with our professional team, having the right support ensures your project progresses smoothly from concept to completion.
Ready to transform your backyard into a culinary destination that will be the envy of your neighborhood? We’d love to help bring your vision to life. From initial design consultation to final installation, our team at TMI Minnesota will guide you through creating an outdoor kitchen that perfectly balances beauty, functionality, and durability—ensuring years of enjoyment in your extended living space.
For more inspiration on enhancing your outdoor living areas, explore our comprehensive resources on outdoor living changes and find how TMI Minnesota can help boost your backyard’s potential with an outdoor kitchen installation that fits your lifestyle perfectly.