
Why Proper Swing Set Installation Creates Safe Childhood Memories
Outdoor swing set installation transforms your backyard into a hub of childhood trip and family memories. The sound of children’s laughter echoing through your yard while they soar through the air on swings creates those precious moments that last a lifetime.
Quick Installation Overview:
- Plan – Choose location with 6+ feet clearance, level ground
- Prepare – Clear site, level ground, gather tools
- Build – Assemble frame, install accessories following instructions
- Anchor – Secure with ground anchors or concrete
- Play – Final safety check, add protective surfacing
But here’s the reality: installing a swing set safely takes more time and expertise than most homeowners expect. As one experienced installer notes, “Very few swing sets can be assembled in a day” – most projects require several weekends and careful attention to safety guidelines.
The Consumer Product Safety Commission requires at least 6 feet of clearance from buildings, trees, and fences. For swings specifically, you need space equal to twice the height of the swing beam. Getting these details right protects your children and ensures years of safe play.
At TMI Minnesota, we’ve overseen countless outdoor swing set installation projects throughout the state. Our hands-on experience with landscape design and home renovation has taught us that proper installation is the foundation of both safety and long-lasting family enjoyment.
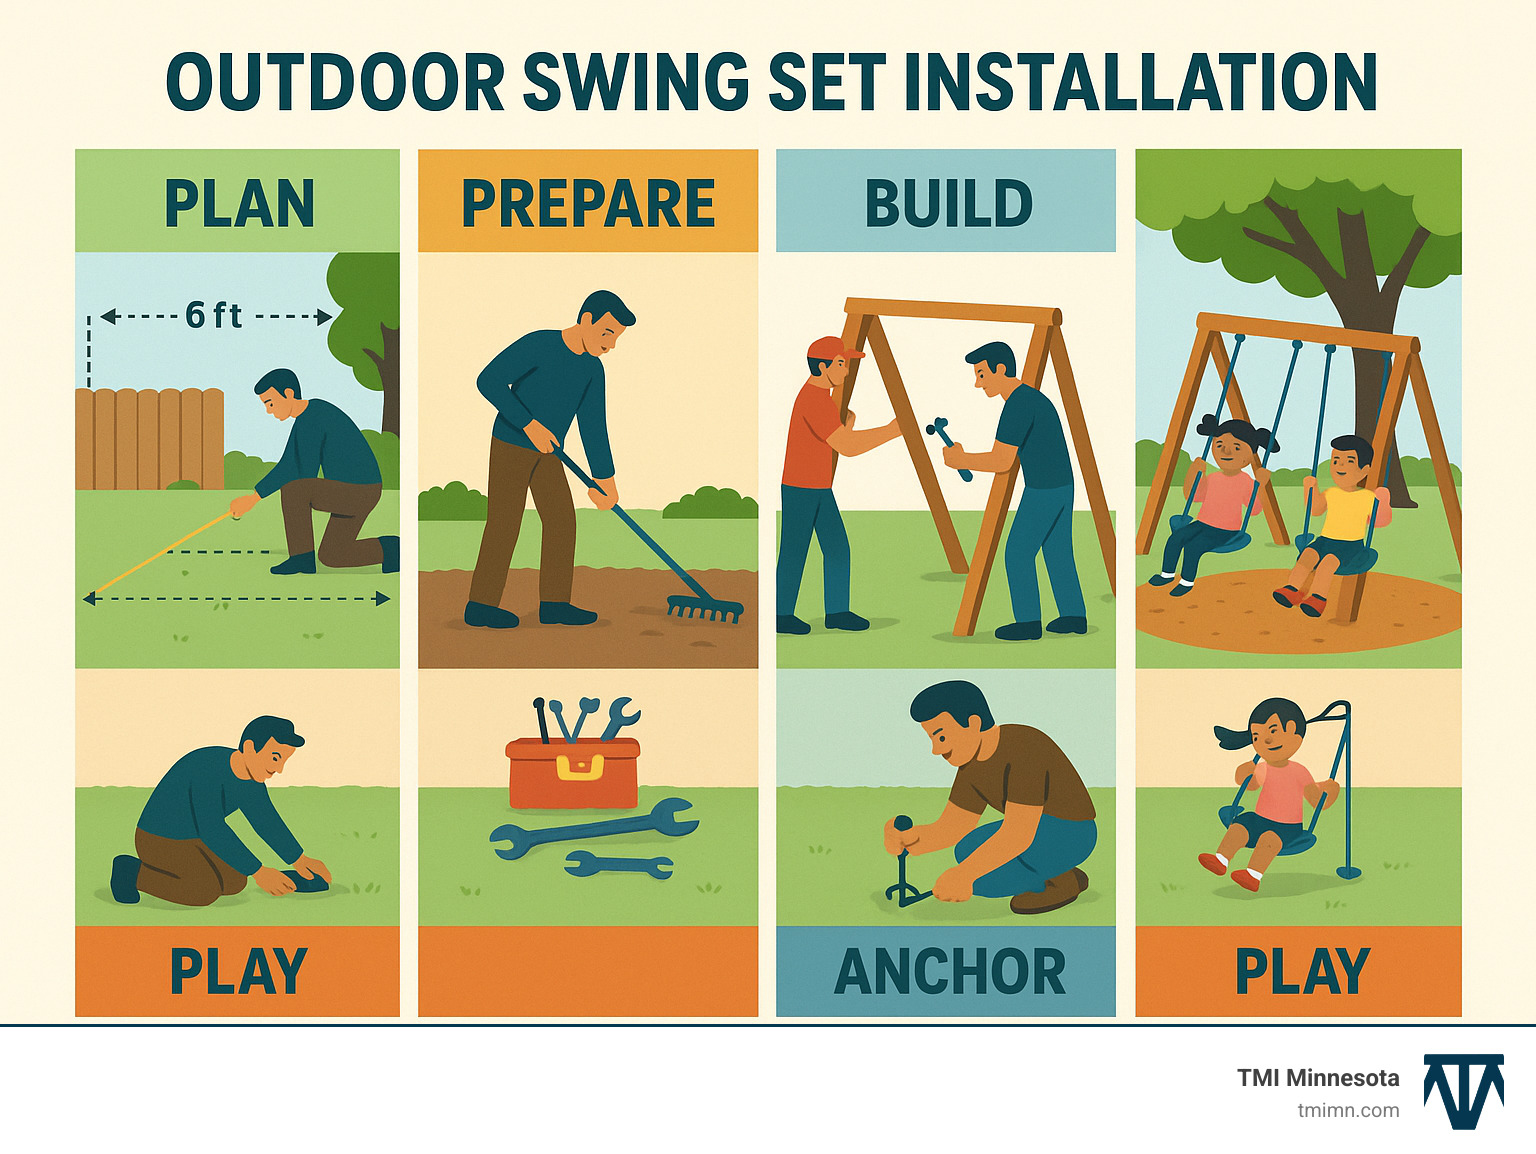
Outdoor swing set installation basics:
Pre-Installation Prep: Setting the Stage for Safety and Fun
Before we even think about opening a box or tightening a bolt, the most crucial step in any outdoor swing set installation is meticulous planning. This isn’t just about finding a spot where it “fits” but creating a safe haven for boundless energy and imaginative play. We always emphasize that essential safety considerations begin long before assembly, right down to the location we choose.
The Consumer Product Safety Commission (CPSC) is clear on this: we need an area that is at least 6 feet from any permanent structures or hazards. Think of it as a personal bubble for your swing set – no buildings, trees, large rocks, or fences should be within this safety perimeter. If your swing set includes swings (and let’s be real, most do!), we need to go a step further. The clearance required for swings should be equal to twice the distance of the height of the swings. So, if your swing beam is 8 feet high, you’ll need 16 feet of clear space in front and behind the swing path.
We also need to consider what’s above the swing set. Overhead obstacles like power lines or low-hanging tree limbs are absolute no-gos. A child’s joyful leap could quickly turn into a dangerous encounter. Furthermore, we always advise selecting a location that allows for easy visibility from the house. This way, you can keep a watchful eye on the little triprs while they play. Lastly, think about sun exposure. While some sun is great, too much direct sunlight can make metal components scorching hot. A spot with partial shade can protect both the equipment and tiny hands.
Ready to transform your outdoor space? We specialize in just that, offering hardscape and softscape installations that lift yard living. Our goal is to make your backyard not just beautiful, but functional and safe for the whole family. For more ideas on how we can help, check out our backyard playground ideas.
Choosing the Best Location
The “best” location for your outdoor swing set installation isn’t just about aesthetics; it’s fundamentally about safety and practicality. First and foremost, we look for level ground. An uneven surface might seem minor, but it can lead to instability, premature wear, and even tip-overs, especially during vigorous play. If your yard has a slight slope, a maximum of a 3-inch drop in grade is generally acceptable, as it can aid in drainage without compromising stability. We also want to ensure good drainage, avoiding low spots where water tends to pool, which can lead to muddy conditions and damage to the swing set’s materials over time.
Keeping the swing set away from fences, walls, and other fixed structures is paramount. This ensures that even the most enthusiastic swingers won’t make unintended contact. Crucial 6-foot safety zone around all sides of the playset. For the swing path specifically, allow at least 30 inches between individual swings and another 30 inches from any support beams. This critical spacing prevents collisions and allows for uninhibited movement.
For comprehensive insights into playground safety, we highly recommend reviewing the playground safety tips from the National Program for Playground Safety.
Essential Tools and Materials
Having the right tools on hand before you begin your outdoor swing set installation will save you a world of frustration and countless trips to the hardware store. Trust us, we’ve seen it all! While your specific swing set kit will come with its own list, here’s a general rundown of what we typically need:
- Socket wrench set: Indispensable for tightening various nuts and bolts.
- Power drill: Speeds up assembly, especially for pilot holes.
- Level: Essential for ensuring the frame is plumb and the ground is even.
- Tape measure: For accurate spacing and clearance checks.
- Shovel: For ground preparation and leveling.
- Hammer: For stakes or minor adjustments.
- Safety gloves: To protect your hands from splinters or pinches.
- Goggles: Crucial for eye protection from debris.
- Manufacturer’s instructions: This is your bible! Read it thoroughly, then read it again. It contains critical details specific to your model.
We also make sure to have durable gloves, protective goggles, and sturdy footwear for our team. Safety first, always!
Groundwork and Foundation: The Key to a Stable Swing Set
Think of your outdoor swing set installation as building a house – the foundation is everything. Without proper groundwork, even the sturdiest swing set won’t stand the test of time or the rigors of enthusiastic play. This is where we separate the weekend warriors from the professionals who understand that lasting safety starts from the ground up.
The truth is, most swing set failures happen because someone skipped the “boring” foundation work. We’ve seen beautiful playsets become wobbly disasters within months because the installer rushed through ground preparation. Don’t let that be your family’s story.
Preparing the ground and choosing the right surfacing are critical steps that contribute directly to the safety and longevity of your investment. This is where we lay the groundwork – literally – for years of happy memories and worry-free play.
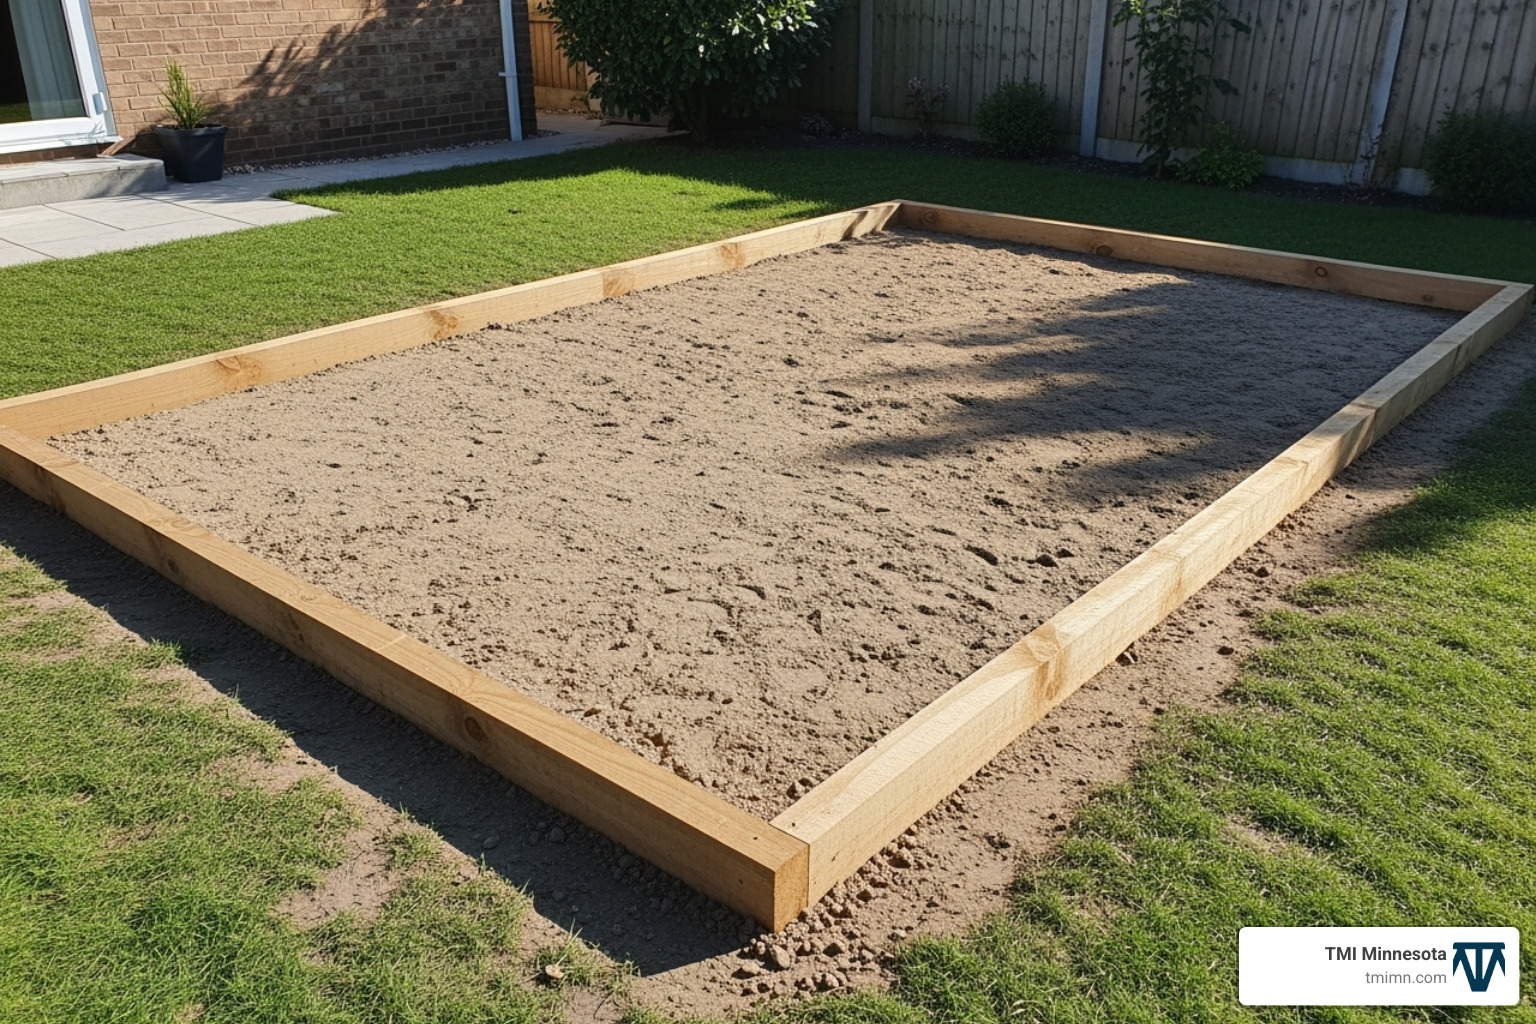
How to Properly Prepare the Ground for an Outdoor Swing Set Installation
Here’s where the real work begins – and honestly, it’s the part that separates a safe, long-lasting installation from one that becomes a headache. Preparing the ground properly is perhaps the most physically demanding, yet most vital, part of your outdoor swing set installation.
We always start by clearing the entire site of any debris. This means every rock, root, stick, and anything else that could create an uneven surface or pose a tripping hazard. Next comes removing the sod and grass from not just where the swing set will sit, but the entire safety zone around it. Trust us – grass growing through your safety surfacing isn’t just unsightly, it makes maintenance a nightmare.
Now comes the precision work: creating a perfectly level base. We use a time-tested technique that ensures professional results. First, we mark the perimeter with stakes at each corner, then run level twine between these stakes using a carpenter’s level. This creates our reference line – think of it as our guide for perfection.
The real muscle work happens next. Starting from the highest point, we dig out high spots and fill low areas until everything matches our level reference line. We use a long, straight board with a level on top to check multiple locations across the entire area. This isn’t a “close enough” job – precision here prevents problems later.
Finally, we compact the surface using a tamper. This step creates the firm, stable base that will support years of active play without settling or shifting.
For a visual guide on mastering these essential leveling techniques, we recommend checking out this video that demonstrates the process clearly.
Choosing the Right Safety Surfacing
Once your ground is prepped and leveled, selecting the right safety surfacing becomes your next critical decision for your outdoor swing set installation. This material serves as your primary defense against falls, cushioning impacts and preventing serious injuries. Let’s be clear: natural grass simply doesn’t provide adequate protection for playground equipment.
We’ve explored countless surfacing options over the years, and while many materials offer some level of protection, we’ve finded one that consistently outperforms others in terms of safety, longevity, and maintenance: Playground Grass, such as ForeverLawn®.
Wood mulch and chips offer good cushioning and are budget-friendly, but they require constant replenishment, can harbor insects, and become muddy in wet conditions. The CPSC recommends maintaining a 9-12 inch depth, which means regular maintenance and replacement.
Sand and pea gravel provide excellent drainage and are relatively inexpensive, but they can be tracked into your home, require frequent leveling, and need 9-12 inches of depth to meet safety standards. They also become less effective when wet or frozen.
Playground Grass like ForeverLawn® represents the superior choice for discerning homeowners. It provides consistent cushioning regardless of weather conditions, requires virtually no maintenance, stays clean and attractive year-round, and offers excellent drainage. While the initial investment is higher, the long-term benefits – no replenishment, no tracking, no pest issues, and consistent safety performance – make it the smart choice for families who want the best.
We strongly recommend Playground Grass as a superior, long-lasting, and low-maintenance option available from TMI Minnesota. It’s an investment in your family’s safety and your peace of mind.
Anchoring Your Swing Set for Maximum Stability
Even the most perfectly assembled swing set on the most level ground can become dangerous without proper anchoring. Preventing tip-overs is absolutely critical, especially during vigorous play or severe weather. This isn’t optional – it’s essential for safety.
The type of anchor you choose depends largely on your soil conditions and local climate. Concrete anchors provide the ultimate stability, especially in areas with freeze-thaw cycles or loose soil. They involve digging holes, setting anchor bolts in concrete, and allowing proper curing time.
Screw-in ground anchors offer easier installation and work well in most soil types. These spiral anchors twist deep into the ground and provide excellent holding power without the permanence of concrete.
The installation process requires precision. Each anchor point must be properly positioned, the anchors must be driven or installed to the correct depth, and all connections must be tight and secure. We always double-check our work because your family’s safety depends on it.
Different soil conditions require different approaches. Sandy soil needs deeper anchors, clay soil provides excellent holding power but can be challenging to work with, and rocky soil may require special equipment or techniques.