
Transform Your Backyard with a Stunning Paver Patio
A patio paver installation is a transformative project that creates a durable, beautiful outdoor space for entertaining, relaxing, and boosting your home’s value. Whether you’re replacing old concrete or starting fresh, understanding the process helps you tackle it yourself or confidently oversee professional work.
Quick Overview: Essential Steps for Patio Paver Installation
- Planning – Design layout, calculate materials, gather tools
- Site Preparation – Mark area, excavate 6-8″ deep, establish 1/4″ per foot slope
- Base Layer – Install landscape fabric, add 4-6″ compacted gravel
- Bedding Sand – Spread and level 1″ layer of sand
- Lay Pavers – Place pavers in pattern, cut as needed
- Edge Restraints – Secure perimeter with stakes
- Joint Sand – Sweep polymeric sand into gaps, compact, activate with water
The foundation of success is proper base preparation. A well-compacted 4-6 inch gravel base prevents settling and ensures your patio lasts for decades. While the process requires patience, the result is a professional-quality surface that handles weather and traffic with minimal maintenance.
Pavers offer advantages over poured concrete: you can replace a single damaged paver, they allow for better drainage, and the variety of colors and shapes allows for a truly custom look. The installation process has three main phases: planning, installation, and finishing. Skipping steps or rushing leads to problems like sinking pavers or weed growth.
At TMI Minnesota, we’ve guided countless patio paver installation projects from concept to completion. Our hands-on experience with base preparation, material selection, and proper installation techniques ensures every patio we build stands the test of time and Minnesota weather.
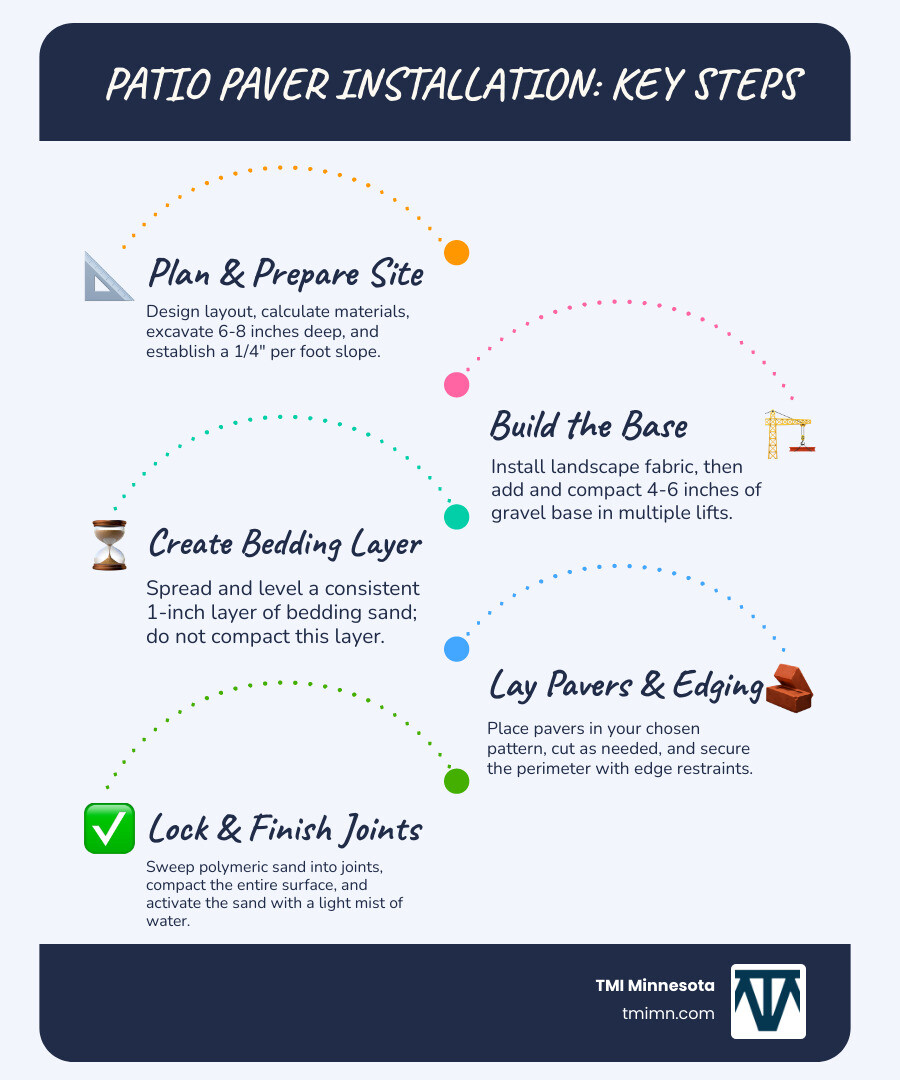
Patio paver installation terminology:
Phase 1: Planning and Preparation

This initial phase is critical for a smooth project and a long-lasting result. Proper planning prevents costly mistakes and rework.
Planning Your Patio Paver Installation Project
Before starting, carefully plan your patio paver installation. Sketch your layout on graph paper with precise measurements, considering how the space will connect to your home and landscape. Your intended use—whether for quiet mornings or busy BBQs—shapes the size and layout.
Choosing a paver pattern is a key design step. Classic herringbone adds visual interest and strength, basketweave offers a traditional look, and running bond provides a clean, modern feel. The pattern affects both appearance and stability. For more ideas, see this guide to block pave patterns.
Calculate materials by measuring your project’s total square footage, then add 5-10% overage for cuts and breakage. Projects with curves may need 10-15% extra. Also, measure the linear feet of the perimeter for edge restraints.
Gather your tools and materials beforehand. You’ll need a shovel, rake, wheelbarrow, plate compactor (essential for a professional result), rubber mallet, levels (long and short), tape measure, stakes, and string. Materials include your chosen pavers, gravel base (3/4 minus), bedding sand (concrete sand), and edge restraints with 10-inch spikes. You will also need 1-inch PVC pipes and a straight 2×4 screed board for leveling sand, plus safety gear like gloves and safety glasses.
Site Preparation: The Foundation of Success
Proper site preparation determines if your patio lasts for decades or fails in years. Shortcuts here lead to a wavy, sinking patio.
Start by marking the project area with stakes and string. To ensure square corners, use the 3-4-5 triangle method: measure 3 feet along one side and 4 feet along the adjacent side; the diagonal between those points must be 5 feet.
Before digging, call 811. This free service locates underground utility lines, preventing dangerous and expensive accidents. It is required by law in most areas.
Now, you can excavate. For patios and walkways, dig down 6-8 inches. This depth accommodates 4-6 inches of compacted gravel base, 1 inch of bedding sand, and the paver thickness (typically 2 3/8 inches). For driveways, excavate 10-12 inches for a thicker base.
Establishing proper slope is critical for drainage. Aim for a consistent slope of 1/4 inch per foot, directing water away from your home’s foundation. Use string lines and a line level to maintain this slope across the entire excavated area. Proper drainage prevents major headaches later. Our hardscape design services can help create a comprehensive plan that integrates drainage beautifully.
Phase 2: The Complete Patio Paver Installation Process
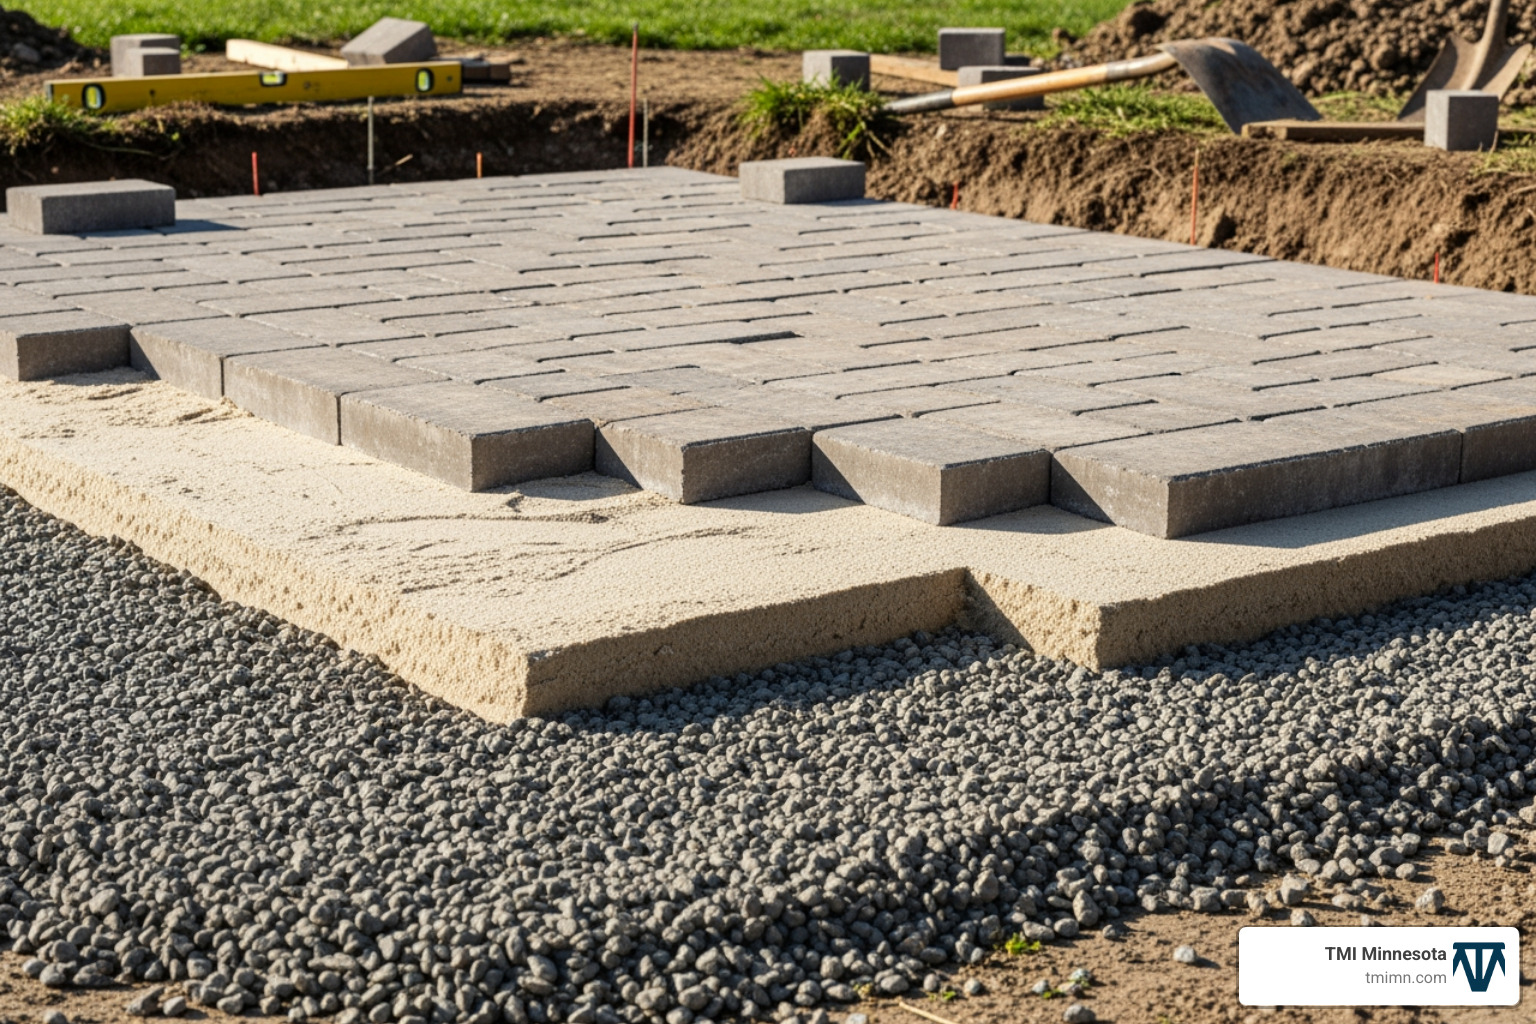
With the groundwork laid, it’s time to build your patio. Each layer is vital to the structural integrity and longevity of the final surface.
Building a Rock-Solid Base
The base is the most important step in a patio paver installation. A properly constructed base prevents shifting, settling, and weeds, ensuring your patio remains stable for decades.
After excavation, lay high-quality landscape fabric across the area, overlapping seams by 6-12 inches. This fabric separates the base from the soil and acts as a weed barrier.
Next, add the aggregate base material (typically 3/4 minus gravel). For patios, spread this to a compacted thickness of 4-6 inches. For driveways, increase this to 10-12 inches.
Critically, you must compact the gravel in 2-inch layers (lifts). After spreading each lift, use a plate compactor to achieve maximum density, making multiple passes in perpendicular directions. A properly compacted base is fundamental to all our hardscape installations, providing support against Minnesota’s freeze-thaw cycles.
Creating the Sand Bedding Layer
The bedding sand layer cushions the pavers and allows for minor adjustments to create a smooth surface. We use coarse concrete sand, never fine mason sand.
To get a uniform 1-inch thickness, lay two 1-inch diameter PVC pipes parallel to each other on the base, following the established slope. Spread sand over the pipes, then use a straight 2×4 board as a screed, dragging it across the pipes to remove excess sand. This leaves a perfectly smooth, 1-inch thick layer.
After screeding a section, carefully remove the pipes and fill the voids with sand. Do not compact the sand bedding layer; the pavers will settle it during the final compaction step. Avoid walking on the screeded sand.
Laying the Pavers and Installing Edging
Now, lay the pavers. Start from a fixed 90-degree corner or the longest straight edge to maintain alignment.
Place pavers gently onto the sand bed, following your pattern and maintaining a consistent 1/8-inch (3mm) gap between them. Some pavers have built-in spacer bars to help. Use a rubber mallet for gentle adjustments; never hammer pavers together.
Regularly check for levelness with a long level and string lines. If a paver is high, tap it down. If it’s low, lift it and add a small amount of sand underneath.
Mark and cut pavers as needed to fit around curves or edges using a masonry saw. Always wear safety glasses when cutting.
Once all pavers are laid, install paver edge restraints along all exposed edges. This vital step prevents pavers from spreading over time. Secure the restraints into the aggregate base with 10-inch landscape spikes every 12 inches. This locks everything together, ensuring your patio paver installation remains strong.
Phase 3: Finishing Touches and Pro Tips
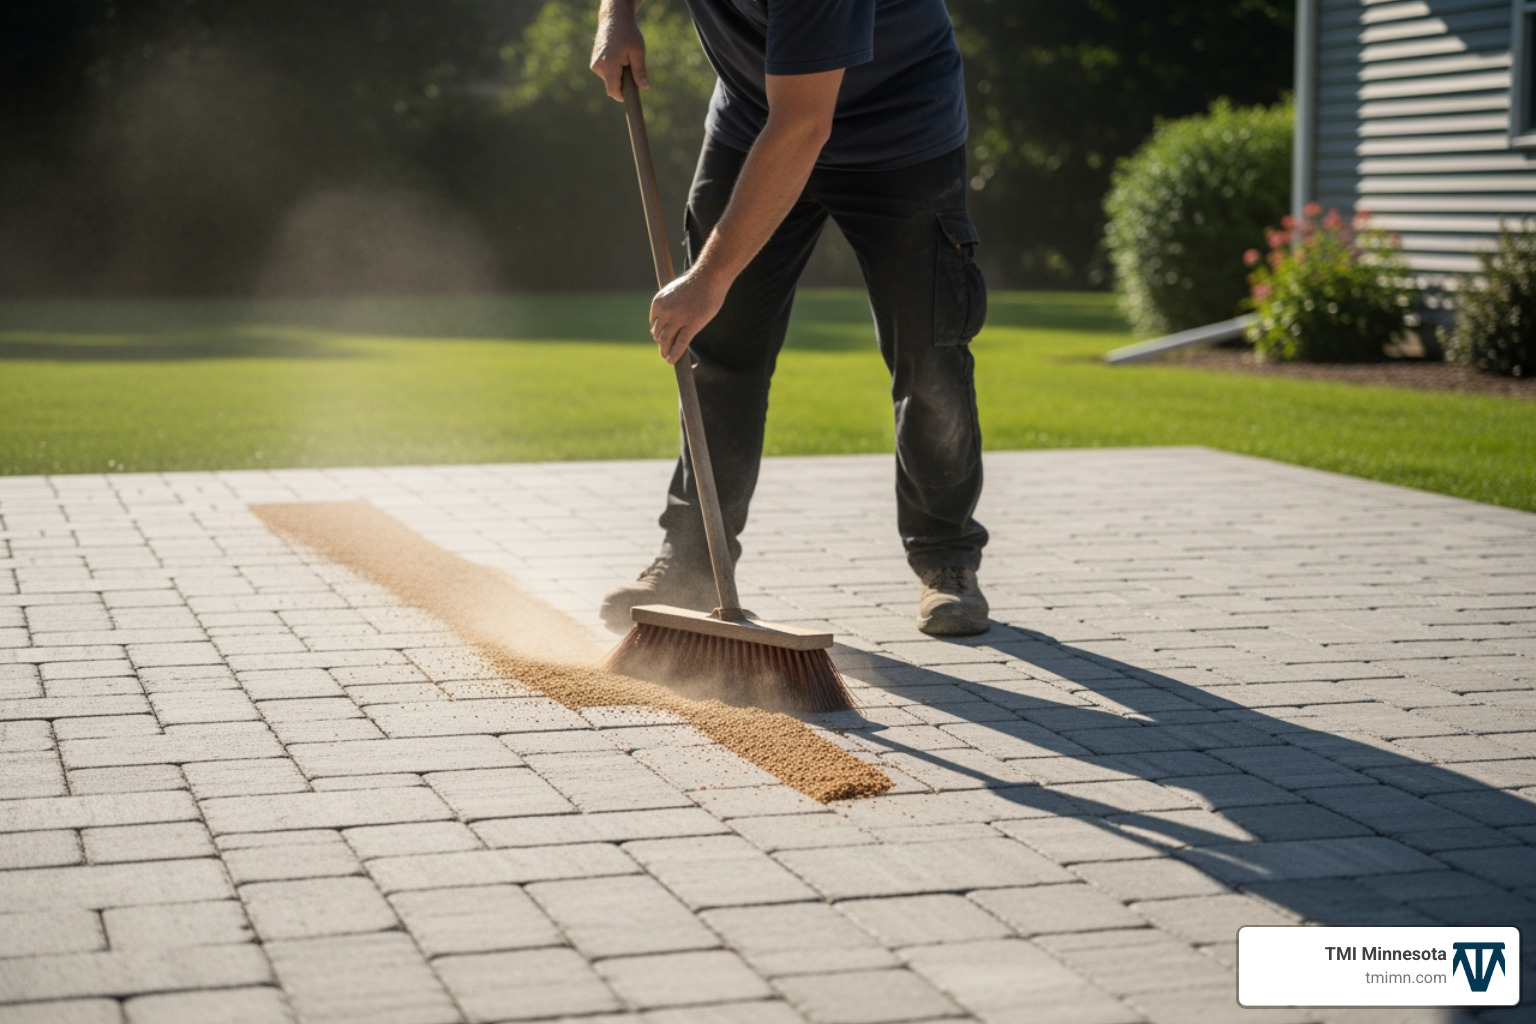
The final steps lock everything together, protect your investment, and give your patio a polished, professional look.
Locking It In: Jointing and Compaction
To stabilize the surface, sweep polymeric sand into the joints. This sand contains polymers that harden when wet, creating a durable, flexible bond that locks pavers together.
Ensure the paver surface is completely dry. Spread the sand generously and use a stiff broom to sweep it into every joint, filling them completely. This sand interlocks the pavers, prevents weed prevention, and deters insect damage. Unlike regular sand, it resists erosion from rain or power washing.
Next, run a plate compactor over the entire paved area. This settles the pavers and forces the sand deep into the joints. Use a protective mat on the compactor to prevent scuffing the pavers.
After compaction, use a leaf blower to remove all excess sand dust from the paver surface. Finally, activate the sand by applying a light mist of water, following the manufacturer’s instructions. The sand will harden in 24-48 hours, creating durable, weed-resistant joints.
Sealing and Long-Term Maintenance
We strongly recommend applying a paver sealer to protect your investment. A quality sealer provides stain protection against oil and spills, improves color improvement, and offers crucial weather resistance against Minnesota’s freeze-thaw cycles. Re-seal every 2-5 years, depending on traffic and sun exposure.
A major advantage of pavers is easy paver replacement. If a single paver is damaged, it can be removed and replaced without redoing the entire patio. This makes long-term maintenance efficient and is why pavers are ideal for custom outdoor living areas.
For routine cleaning, sweep with a stiff broom. For deeper cleaning, use specialized paver cleaners.
Common Mistakes to Avoid in Patio Paver Installation
Avoiding common pitfalls can save you time, money, and frustration.
- Inadequate Base Compaction: Failure to compact the gravel base in 2-inch lifts will lead to an uneven, sinking patio. Always use a plate compactor.
- Incorrect Slope and Poor Drainage: Without a 1/4 inch per foot slope away from your home, water will pool, causing stains, moss, and potential foundation damage.
- Forgetting Edge Restraints: Edge restraints are non-negotiable. They prevent pavers from shifting and spreading over time.
- Laying Pavers Too Tightly: A 1/8-inch gap is needed for jointing sand and to accommodate natural expansion and contraction, preventing chipping.
- Skipping Final Compaction: The final pass with the plate compactor after adding joint sand is what locks the entire system together. Skipping it results in an unstable surface.
Understanding the full scope of a patio paver installation is key. While DIY is rewarding, it’s a major undertaking. If you’re weighing your options, our guide to hardscape installation cost can help. For more tips, see these Do’s and Don’ts of Paver Installation.
Frequently Asked Questions about Paver Installation

Here are answers to the most common questions we receive about patio paver installation.
How thick should the base be for a paver patio?
For pedestrian areas like patios and walkways, a compacted gravel base of 4 to 6 inches is the industry standard. For driveways supporting vehicles, the base must be increased to a more substantial 10 to 12 inches to prevent settling and ruts.
How do you ensure proper drainage for a paver patio?
Proper drainage is achieved in two ways. First, the entire area is graded with a consistent slope of 1/4 inch per foot to direct surface water away from your home. Second, the permeable nature of the paver system allows water to filter through the joints and into the gravel base below, reducing runoff.
Can I install pavers over an existing concrete patio?
While technically possible, we generally do not recommend it. The existing concrete must be in perfect condition—no cracks or settling—and proper drainage must be achievable. In most cases, the old concrete has issues that will eventually affect the new pavers. For a guaranteed long-lasting result, removing the old concrete and building a proper paver base from scratch is the best approach. This eliminates hidden problems and ensures a stable foundation. For more on professional installation costs, see our guide on hardscape installation cost.
Conclusion: Enjoy Your New Outdoor Oasis
Building a patio paver installation is a rewarding project that transforms your backyard. By following each step—from planning and base preparation to laying pavers and jointing—you can build a durable, beautiful surface that will last for decades.
While a DIY installation is possible, large or complex designs with features like retaining walls or fire pits benefit from professional expertise. An experienced team can steer challenging site conditions and ensure a flawless result.
At TMI Minnesota, we specialize in patio paver installations that withstand our unique climate. We use leading-edge products and bring precision and experience to every project, creating stunning outdoor spaces.
Whether you build it yourself or partner with us, the result is a beautiful oasis that adds value to your home and joy to your life. Your backyard becomes an extension of your living space where memories are made.
Ready to design your perfect outdoor retreat? Explore our landscape design services today!