
Why Minnesota Homeowners Are Embracing Rain Garden Design
Rain garden design MN is changing how homeowners manage stormwater while creating beautiful, low-maintenance landscapes. These planted depressions collect runoff from roofs, driveways, and other hard surfaces, allowing water to soak into the ground within 24-48 hours instead of rushing into storm drains.
Quick Rain Garden Design Essentials for Minnesota:
- Location: 10+ feet from buildings, collect water from downspouts/driveways
- Size: 100-300 square feet for typical homes (1/3 the size of drainage area)
- Depth: 4-9 inches deep with flat bottom
- Soil Test: Dig 10″ hole, fill with water – should drain within 48 hours
- Plants: Native species like Purple Coneflower, Swamp Milkweed, Little Bluestem
- Benefits: Reduces flooding, filters pollutants, attracts wildlife, minimal maintenance
Rain gardens offer remarkable environmental benefits. They can reduce up to 90 percent of pollution from rainwater runoff while preventing erosion and recharging groundwater. Unlike traditional lawns, established rain gardens require no fertilizing or regular watering, making them perfect for busy homeowners.
These gardens also create stunning focal points that attract butterflies, birds, and beneficial insects. With Minnesota’s changing precipitation patterns, rain gardens help protect our lakes and rivers while adding natural beauty to your landscape.

Rain garden design MN terms to remember:
Planning Your Minnesota Rain Garden: Location, Size, and Soil
Success with your rain garden design MN project starts long before you pick up a shovel. Think of this planning phase as laying the foundation for years of beautiful, low-maintenance landscaping that actually helps the environment. Getting these basics right means your rain garden will work beautifully for decades to come.
Finding the Perfect Spot
Your rain garden needs to be where the action is – meaning where water naturally flows during a storm. The whole point is catching that runoff before it rushes off your property, so location is everything.
Look around your yard during the next good rainfall. Where does water collect? Downspouts are the obvious starting point since they channel so much roof water. Driveways and walkways also shed water quickly, making them perfect contributors to your garden. If you have a sump pump outlet, that steady flow can keep your rain garden working even during dry spells.
Maybe you already have that one soggy spot in your yard that stays wet long after everyone else’s lawn has dried out. That low area might be telling you exactly where your rain garden wants to live.
But here’s where safety gets serious. Your rain garden needs to respect some important boundaries. Keep it 10 feet from your house foundation – you want water soaking into your garden, not your basement. Stay 35 feet away from septic systems because rain gardens can affect how septic drain fields work. Wells need 50 feet of clearance to protect your drinking water.
Before you dig anywhere, call 811. This isn’t optional – it’s the law in Minnesota, and it’s free. Gopher State One-Call will mark all your underground utilities so you don’t accidentally turn your landscaping project into an emergency repair situation. Trust me, hitting a gas line is not the kind of excitement you want in your weekend plans.
Testing Your Soil’s Thirst
Here’s the thing about rain gardens – they only work if water actually soaks into the ground. If water sits in your garden for more than 48 hours, you’ve got problems. Not only will your garden fail to handle the next storm, but you’ll be breeding mosquitoes in your backyard.
The percolation test sounds fancy, but it’s really just digging a hole and watching water disappear. Dig a hole about 10 inches deep and 10 inches wide where you want your garden. Fill it with water and let it drain completely. Now fill it again and start timing.
If the water vanishes within 48 hours, you’re golden. Sandy soils drain fast – sometimes too fast. Clay soils can be stubborn, holding onto water like they’re afraid to let go. Both can work for rain gardens, but clay might need some help during construction.
Don’t panic if your soil drains slowly. We can work with almost any soil by adding compost or installing an underdrain system. The key is knowing what you’re dealing with before you start digging.
For the complete picture of your soil’s personality, consider sending a sample to the University of Minnesota Soil Testing Lab. They’ll tell you about nutrients, pH, and soil composition – information that helps with plant selection later.
How to Size and Shape Your Rain Garden Design MN
Now for the fun part – figuring out how big your rain garden should be. There’s actually a formula for this, but don’t worry, the math is pretty simple.
Your rain garden needs to handle all the water that runs off your impervious surfaces – that’s your roof, driveway, sidewalks, and any other hard areas. A good starting point is making your garden about one-third the size of the area draining into it.
Most residential rain garden design MN projects end up between 100 and 300 square feet. That might sound big, but remember – this garden is doing serious work managing all that stormwater. If you have a huge roof, consider multiple smaller gardens instead of one giant one.
The depth is just as important as the size. Keep your garden 4 to 9 inches deep with a completely flat bottom. That flat bottom is crucial – it ensures water spreads evenly across the entire garden instead of pooling in one corner.
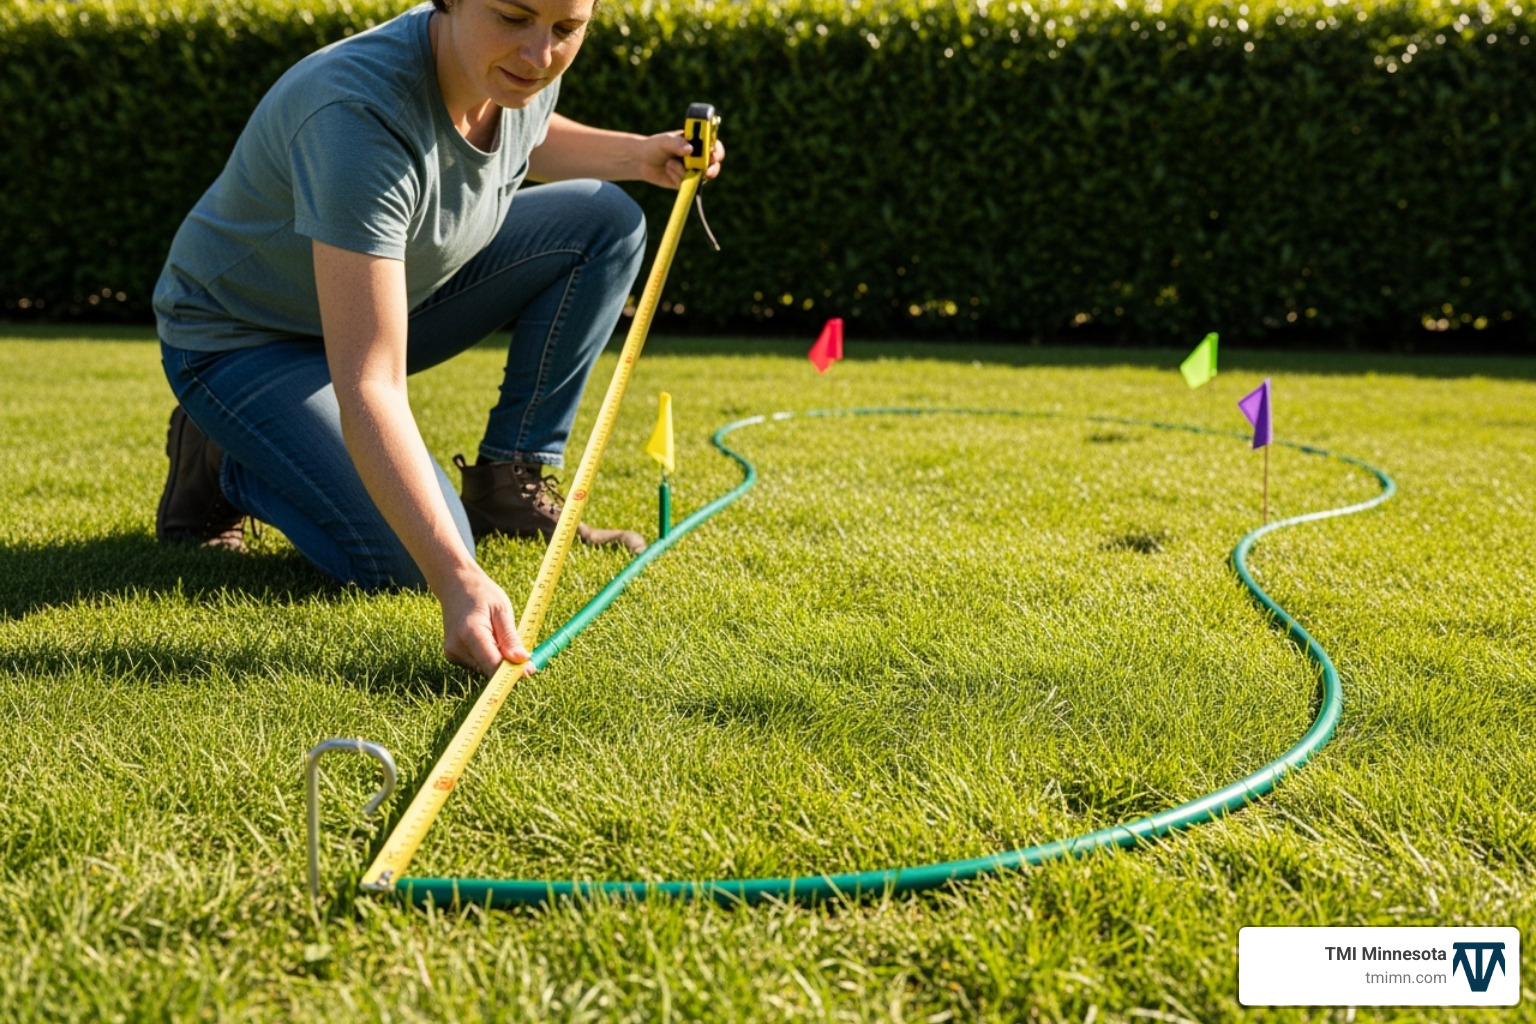
Shape is where you can get creative. Forget boring rectangles and squares. Kidney shapes and crescent shapes look natural and blend beautifully with existing landscaping. Grab a garden hose and lay out different shapes on the ground. Walk around them, look at them from your house windows, and see what feels right.
The best rain gardens look like they’ve always belonged in your yard, not like someone plopped down a construction project. Take your time with this step – you’ll be looking at this garden for years to come.
Building Your Rain Garden: A Step-by-Step Guide
With our planning complete, it’s time to roll up our sleeves and get digging! Building your rain garden is a hands-on process, but incredibly rewarding. You’ll literally be shaping your landscape and creating a vibrant new habitat right in your own yard.
Excavation and Preparation
This is where your rain garden design MN truly starts to take shape!
First, grab a rope, garden hose, or even some spray paint. Use it to clearly mark the boundaries of your chosen rain garden shape on the ground. This visual guide will help you stay on track.
Next, it’s time to remove the sod from within your outlined area. You can carefully lift it and relocate it to another part of your yard if you have bare spots, or simply add it to your compost pile.
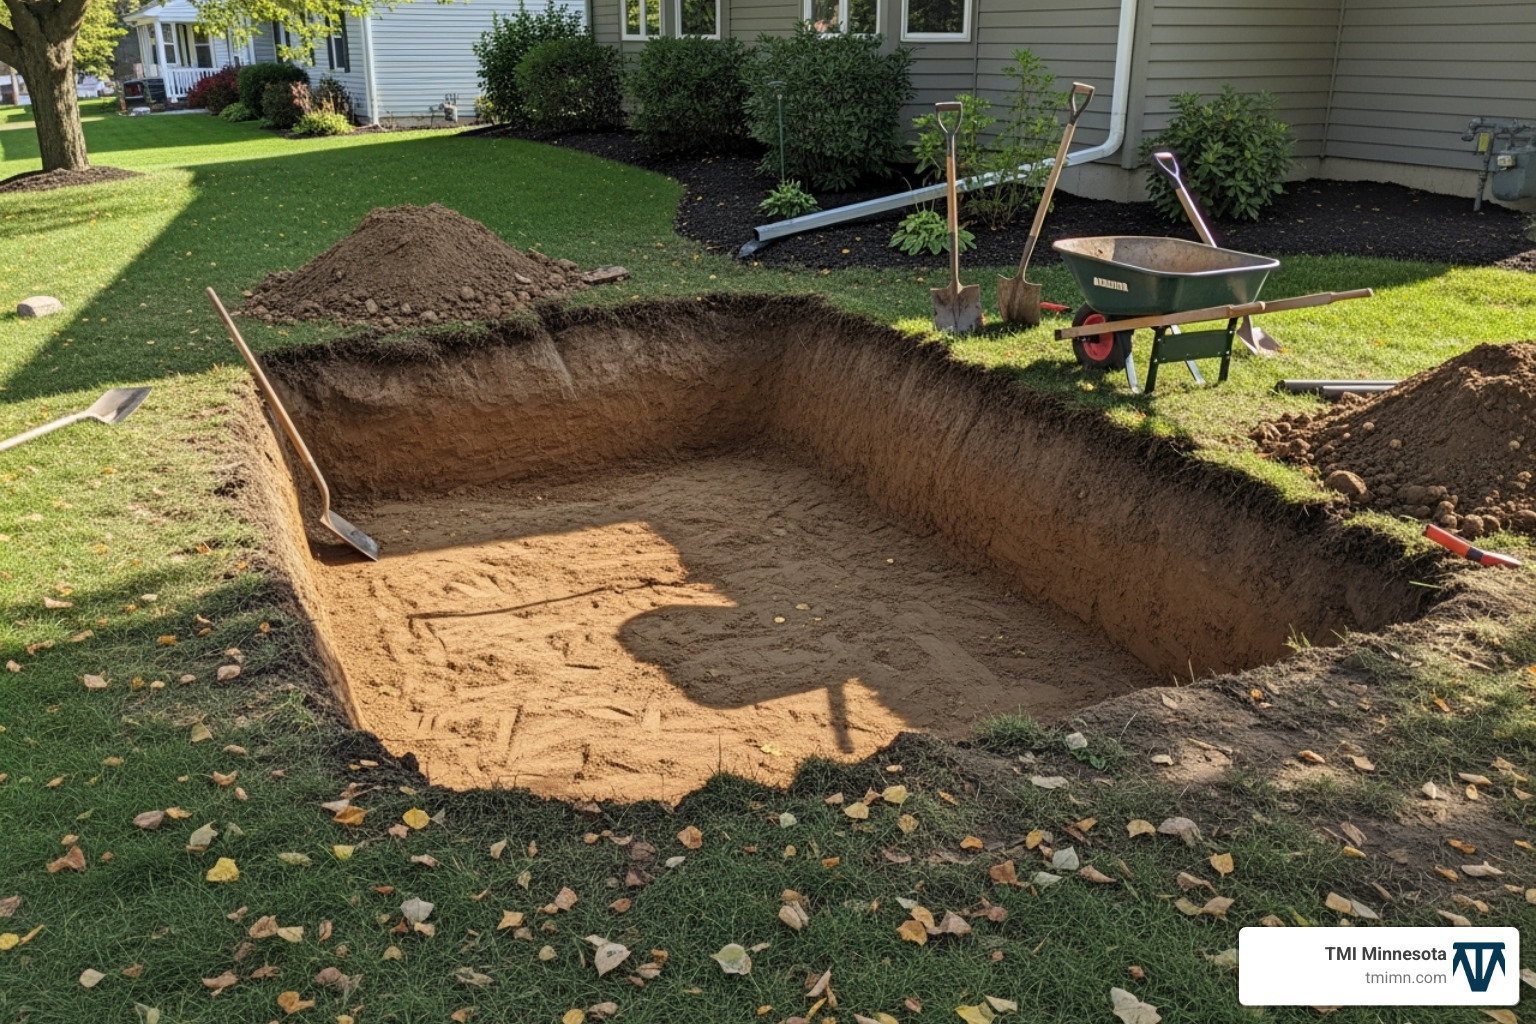
Now for the main event: digging the depression. Begin excavating your rain garden to the depth you planned, typically somewhere between 4 to 9 inches deep. As you dig, remember our golden rule: create a flat bottom. This is super important because it ensures that water will spread evenly across the entire garden, soaking in uniformly. Think of it like a perfectly level swimming pool, but for rainwater!
The sides of your rain garden should have gentle slopes. Aim for a 3:1 ratio – that means for every one foot down, you go three feet out horizontally. This makes the garden safer, more stable, and much easier to plant. It also helps it blend naturally into your yard.
If your earlier percolation test showed that your soil drains slowly, this is the perfect time to give it a boost! We recommend adding a generous amount of weed-free compost. You can simply till or spade it into the top 6 inches of the excavated soil. This “feeds” your soil, making it better at absorbing water and providing valuable nutrients for your future plants. You can also mix in any good topsoil you saved from your excavation.
Finally, if your rain garden is on a slight slope, use some of the excavated soil to create a small berm on the downhill side. Think of this berm as a mini-dam. It helps hold the water within the garden until it can soak into the ground. Make sure to compact the berm well to prevent any erosion.
Once the digging is done, you can give your new garden a “trial run.” Use a sprinkler to fill it with water for about 15-30 minutes. Watch how the water drains. This helps confirm that your flat bottom is truly flat and that water will infiltrate just as you expected.
When to Consider an Underdrain
For most typical home rain garden design MN projects, especially with reasonably draining soil, an underdrain isn’t usually necessary. The whole idea is for all that lovely rainwater to soak directly into the ground! However, there are some specific situations where an underdrain becomes a really smart addition:
- Heavy clay soils: If your soil has a very high clay content, even after adding compost, and it just struggles to drain water within that critical 48-hour window, an underdrain might be needed.
- Poor infiltration rates: Sometimes, the natural soil simply doesn’t allow water to soak in fast enough. In these cases, an underdrain is the best way to ensure your rain garden functions properly and doesn’t end up with standing water for too long.
So, what exactly is an underdrain? It’s basically a backup drainage system. It’s a perforated pipe that we lay at the very bottom of the rain garden, usually surrounded by gravel. If the water in your garden reaches a certain level because the soil can’t absorb it fast enough, the underdrain gently collects that excess water and routes it to the storm sewer system or another appropriate discharge point.
Now, you might be thinking, “But doesn’t that defeat the purpose of soaking water into the ground?” Not at all! Even with an underdrain, your rain garden is still doing amazing work. For water that goes through an underdrain, studies show that about 85 percent of total solids and 45 percent of total phosphorus are removed. This means way fewer pollutants entering our beautiful Minnesota lakes and rivers, even if the water isn’t fully infiltrated on-site. It’s still a huge win for the environment! For really detailed guidance on underdrain design and how they work, we always recommend checking out the Minnesota Stormwater Manual’s page on Rain Gardens (Bioretention) 101_101).
The Fun Part: Planting Your MN Rain Garden
Now comes the most exciting part of your rain garden design MN journey – selecting and planting the beautiful native species that will transform your functional depression into a thriving ecosystem! This is where your rain garden truly comes alive, combining environmental benefits with stunning natural beauty.
Choosing the Right Native Plants for Your Rain Garden Design MN
When it comes to plant selection for your rain garden design MN, we can’t emphasize enough how important it is to choose native species. These plants have spent thousands of years adapting to Minnesota’s unique climate, from our frigid winters to our humid summers and everything in between.
Native plants offer incredible advantages that make them perfect for rain gardens. They’re naturally low maintenance – once established after their first year, most native plants thrive without any fertilizing or regular watering. Their drought tolerance is remarkable too. While they can handle periods of standing water after storms, they’re equally capable of surviving dry spells that would stress non-native plants.
The wildlife value of native plants is truly magical. Your rain garden will become a busy hub of activity, attracting butterflies, bees, hummingbirds, and songbirds throughout the growing season. It’s like having a front-row seat to nature’s daily drama right in your backyard!
Perhaps most importantly for rain garden function, native plants develop deep root systems that work like underground engineers. Prairie grasses and wildflowers can send roots down six feet or more, creating natural channels that improve water infiltration and prevent soil compaction. These roots are the hidden heroes that make your rain garden work effectively year after year.
For sourcing your plants, we recommend checking out local native plant suppliers via Blue Thumb and consulting the comprehensive University of Minnesota Extension plant lists for detailed growing information.
Planting by Moisture Zone
Here’s where rain garden design gets really clever. Your garden isn’t just one uniform environment – it’s actually three distinct moisture zones, each requiring different types of plants. Understanding these zones is key to creating a thriving rain garden.
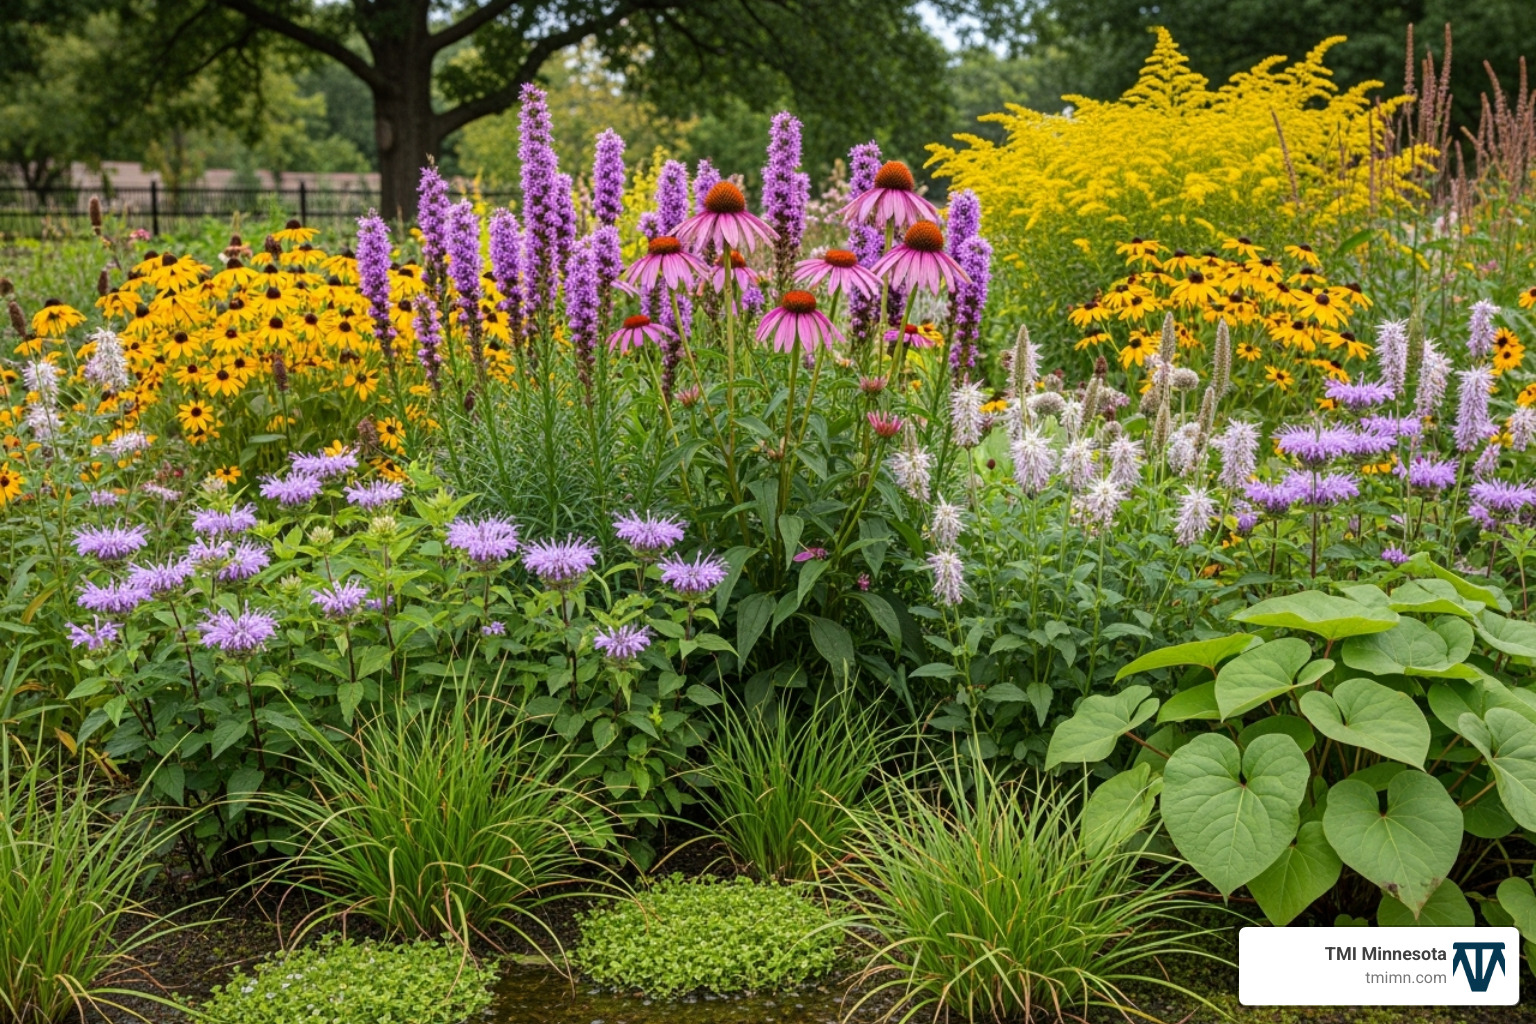
Zone 1 sits at the base of your garden where water will pond after rainfall. This wet zone needs plants that can handle having their feet soaked for days at a time. Swamp Milkweed creates stunning pink flower clusters that butterflies adore, while Joe-Pye Weed towers majestically with its purple blooms. Blue Flag Iris adds neat purple flowers in early summer, and Fox Sedge provides graceful, grass-like texture throughout the season.
Moving up the gentle slopes, Zone 2 experiences moist conditions that dry out more quickly than the base. This is perfect territory for Purple Coneflower, whose cheerful purple petals attract goldfinches who love the seeds. Prairie Blazing Star sends up dramatic purple spikes in late summer, while Switchgrass adds movement and winter interest. Calico Aster provides late-season color when many other plants are fading.
The outermost Zone 3 creates a buffer between your rain garden and existing landscape. These areas stay relatively dry, getting moisture only during heavy rains. Little Bluestem grass turns beautiful copper colors in fall, while Butterflyweed produces brilliant orange flowers that monarch butterflies can’t resist. Wild Bergamot offers lavender blooms that smell wonderful when brushed against, and Prairie Smoke creates unique feathery seed heads that look like puffs of smoke.
Don’t forget about adding some native shrubs for structure and year-round interest! Species like Serviceberry, Gray Dogwood, and Red-Osier Dogwood can anchor your design while providing berries for birds and beautiful fall color.
Planting and Mulching Techniques
With your plant selection complete, it’s time to get them in the ground! The key to successful establishment is proper planting technique and immediate aftercare.
Plant plugs are your best friend for rain garden installation. These young plants, often sold in cell packs, establish quickly and cost much less than larger specimens. While they’ll take about three years to reach maturity, they adapt better to their new home and often outperform larger plants in the long run.
Spacing is crucial for long-term success. Most plants should be placed 12-15 inches apart, though larger species or aggressive spreaders might need 18-24 inches of breathing room. This might seem sparse initially, but trust us – these plants will fill in beautifully within a few seasons.
Once your plants are in the ground, mulching becomes absolutely critical. Apply a 3-inch layer of shredded hardwood mulch around all your new plants. This coarse, fibrous mulch stays put during heavy rains while dramatically reducing weeds and helping retain soil moisture. The difference proper mulching makes is remarkable – it can nearly double plant growth rates!
Here’s an important tip: avoid plastic weed barriers at all costs. They interfere with water infiltration and create unhealthy soil conditions. If you want extra weed protection, use natural options like paper weed-block rolls, cardboard, or even newspaper under your mulch.
Watering your newly planted rain garden requires some attention during the first month or two. With that 3-inch mulch layer in place, you’ll typically only need to water twice weekly for the first 4-6 weeks. Always check soil moisture under the mulch with your finger before watering – overwatering can be just as harmful as underwatering for establishing plants.
The reward for this initial care is a beautiful, functional rain garden that will provide years of enjoyment while protecting Minnesota’s precious water resources. There’s something deeply satisfying about watching your plants grow stronger each season, knowing you’ve created habitat for wildlife while managing stormwater naturally.
Long-Term Care and Maintenance
One of the most appealing aspects of a well-designed rain garden design MN is its reputation for being low-maintenance. And it’s true! Once established, these native plant havens are incredibly resilient. But like any good relationship, they do require a little tender loving care, especially in their first year. Think of it as setting them up for a lifetime of success.
The First Year: Establishment is Key
The first year is all about establishment. You can think of it as your rain garden’s awkward teenage phase – it needs a little extra attention to grow strong and healthy. During this crucial time, your young plants are busy developing robust root systems that will allow them to thrive for years to come.
For this first year, make sure to keep an eye on the watering schedule. Your goal is to provide about one inch of rainfall or supplemental water per week during any dry periods. This consistent moisture helps those roots dig deep and get a good start. You can easily check if your garden needs a drink by feeling the soil a few inches down.
Another big task in the first year is frequent weeding. Weeds are the biggest competition for your new plants, trying to steal their water and nutrients. Make it a habit to check your garden every few weeks and pull even the tiniest weeds before they can establish deep roots. This upfront effort will save you a lot of work later on, as a weed-free start means less weeding down the line!
Finally, especially after heavy rainfalls, take a moment to check for erosion. Look closely at the areas where water enters your rain garden. Is the mulch or soil staying put, or do you see signs of it washing away? If you notice any issues, you might need to add more stones, rearrange existing ones, or adjust the inflow point slightly to help dissipate the water’s energy. This ensures your garden continues to work effectively.
Ongoing Rain Garden Care
Once your rain garden is established – typically after that first year – the maintenance truly becomes minimal. This is where the magic of native plants really shines! They’re perfectly adapted to our Minnesota climate, meaning they’re largely self-sufficient.
After that initial establishment year, most native plant rain gardens in Minnesota will not need watering again, relying solely on our natural rainfall. How great is that for saving time and water?
You’ll also find that cutting back dead stems in spring is one of the main annual tasks. Many native plants provide wonderful winter interest and crucial habitat for overwintering insects and birds if their stems are left standing. Birds will snack on the seeds, and beneficial bees and other insect larvae often find cozy homes in hollow stems. In early spring, just before new growth starts to peek through, you can cut back the old vegetation to make way for the vibrant new season.
It’s a good idea to periodically inspect your inflow points, perhaps once a month. Just make sure no debris like leaves or sediment has clogged them. Keeping these clear ensures water flows smoothly into your garden, where it can do its important work.
Every few years, you might notice that some plants have really taken off and created a very dense planting. If this happens, you can thin out some of the plants to give others more space and keep the garden looking its best.
And here’s a big bonus: no fertilizer is needed! Native plants are adapted to our local soils and don’t need any extra nutrients. In fact, adding fertilizer can actually encourage weed growth and introduce unwanted nutrients into our precious lakes and rivers, which is exactly what your rain garden design MN is trying to prevent.
Minnesota Resources and Support
You know, building a rain garden is a fantastic way to give back to our beautiful Minnesota environment. It helps our lakes and rivers stay clean, and it adds so much charm to your yard! But you don’t have to tackle this project all by yourself. There’s a wonderful network of local support ready to help you every step of the way with your rain garden design MN project.
Think of them as your friendly neighborhood rain garden coaches!
A great place to start is with your local watershed districts and Soil and Water Conservation Districts (SWCDs). These folks are true experts when it comes to keeping our water clean and our land healthy. They often have tons of helpful resources, like educational materials that explain everything in simple terms. They might even host workshops where you can learn hands-on, or offer site visits to your home to help you plan your specific rain garden layout.
These organizations are deeply committed to protecting our local water quality, and they’re genuinely eager to assist homeowners like you. Don’t be shy about reaching out to them!
Here’s another exciting bit: many watershed districts and SWCDs offer grant programs and cost-share opportunities. What does that mean? Well, they might actually help you pay for part of your rain garden installation! They understand that when you build a rain garden, you’re not just helping your own property; you’re helping the entire community by reducing pollution and managing stormwater. It’s a win-win!
It’s definitely worth checking with your local district to see what financial incentives might be available in your area. You can easily Find your local Soil and Water Conservation District through the Minnesota Association of Soil and Water Conservation Districts website. A quick call or email can open up a world of possibilities for your rain garden design MN trip. Don’t hesitate to reach out for guidance and potential funding – they’re there to help!
Conclusion
You’ve started on a journey to create something truly special in your backyard. A rain garden isn’t just a pretty feature; it’s a powerful tool for protecting Minnesota’s precious lakes and rivers. Think of it as your personal contribution to a healthier environment, right from your own home!
We’ve walked through every step together, from picking the perfect spot and understanding your soil, to choosing those beautiful native plants and giving them the best start. Building your own rain garden design MN is incredibly rewarding. It’s a DIY project that adds immense beauty and value to your home, while also changing your yard into a vibrant ecosystem for wildlife and a shield against pollution.
Perhaps you’re ready to dive in, or maybe you’re thinking, “This sounds wonderful, but I could use a helping hand!” That’s perfectly fine. For homeowners who want a rain garden that’s both stunning and perfectly functional, TMI Minnesota is here to help.
Our team specializes in changing outdoor spaces, ensuring your rain garden design MN project blends seamlessly with your landscape. We bring expertise and use leading-edge products to create a beautiful, lasting feature that lifts your yard living. Let us help you ‘catch the rain’ and contribute to a healthier Minnesota, all while enjoying a gorgeous new part of your home.