
Why a Small Concrete Driveway Could Be Your Next Weekend Project
Small concrete driveway projects are gaining popularity among DIY homeowners looking to improve curb appeal without breaking the bank. If you’re considering pouring your own driveway, here’s what you need to know upfront:
Quick Answer: Can You DIY a Small Concrete Driveway?
- Cost: DIY can save 50% on labor (average total cost: $3,460-$6,910 for professional work)
- Time: Expect 2-3 days for prep, 1 day for pouring, 10 days for curing
- Requirements: 4-inch minimum thickness, 2% slope for drainage, proper reinforcement
- Key Challenge: Working quickly before concrete sets (90-minute window)
- Best For: Driveways under 500 sq ft with simple, flat layouts
In these tough economic times, a cracked or weedy driveway can hurt your home’s value and first impression. But pouring concrete yourself isn’t just about saving money—it’s about creating something lasting with your own hands.
The reality? A concrete driveway project requires careful planning, physical labor, and precise timing. You’ll need to excavate, build forms, compact a gravel base, and finish the surface—all while the concrete is workable. Miss a step, and you could end up with cracks, uneven surfaces, or drainage problems.
But for the right homeowner with the right space, it’s absolutely doable.
This guide walks you through every step of pouring a small concrete driveway, from planning and budgeting to the final seal coat. We’ll cover what makes a project DIY-friendly versus when you should call in the pros, and share design ideas to make your compact space look its best.
I’m Christopher Deanovic, Operations Leader at Task Masters Minnesota, where I’ve overseen hundreds of hardscape projects, including countless small concrete driveway installations across the Twin Cities. Whether you decide to tackle this yourself or bring in professionals, understanding the process helps you make the right choice for your home and budget.
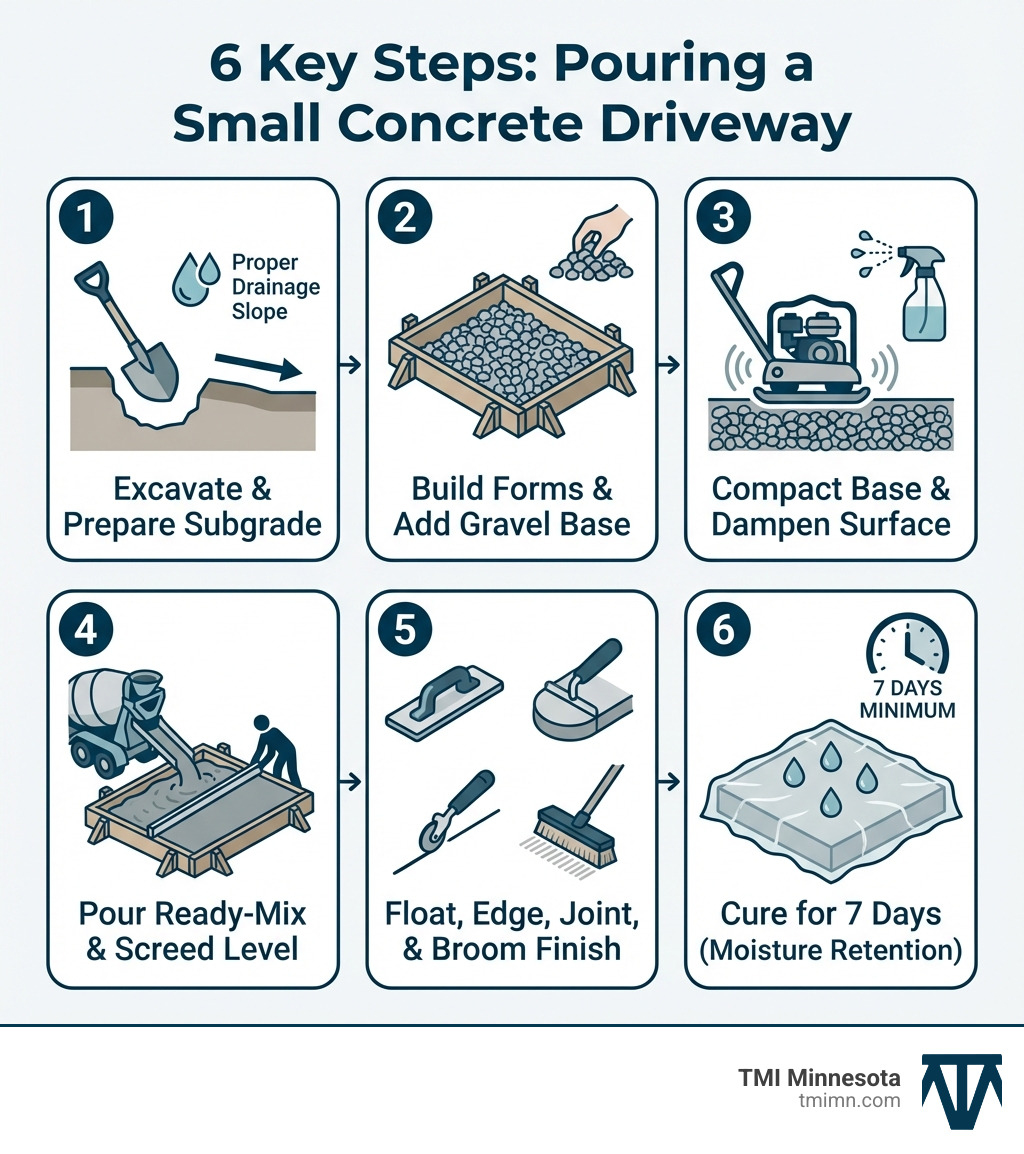
Quick look at Small concrete driveway:
Planning Your Project: Before You Pour
Before you even think about mixing concrete, thorough planning is essential for any successful DIY project, especially for a small concrete driveway. This stage is where we lay the groundwork for success, preventing costly mistakes down the line.
Budgeting for Your Small Concrete Driveway
The average cost to pour a concrete driveway nationally ranges from $3,460 to $6,910 for professional work. However, by taking on the project ourselves, we can significantly reduce this. Labor costs can account for as much as 50% of the total price. This means a DIY approach has the potential to cut our expenses by a substantial margin.
When budgeting, consider these cost factors:
- Materials: This includes the concrete itself (which costs $125 to $170 per cubic yard for all-purpose mix), gravel for the base, lumber for forms, and any reinforcement like rebar.
- Tool Rental: Unless we own all the necessary equipment (like a compacting machine, wheelbarrow, or specialized finishing tools), we’ll need to factor in rental costs.
- Disposal: If removing an old driveway, we’ll need to budget for a construction dumpster or concrete bin. Breaking up old concrete might require renting a jackhammer.
Necessary Tools and Material Estimation
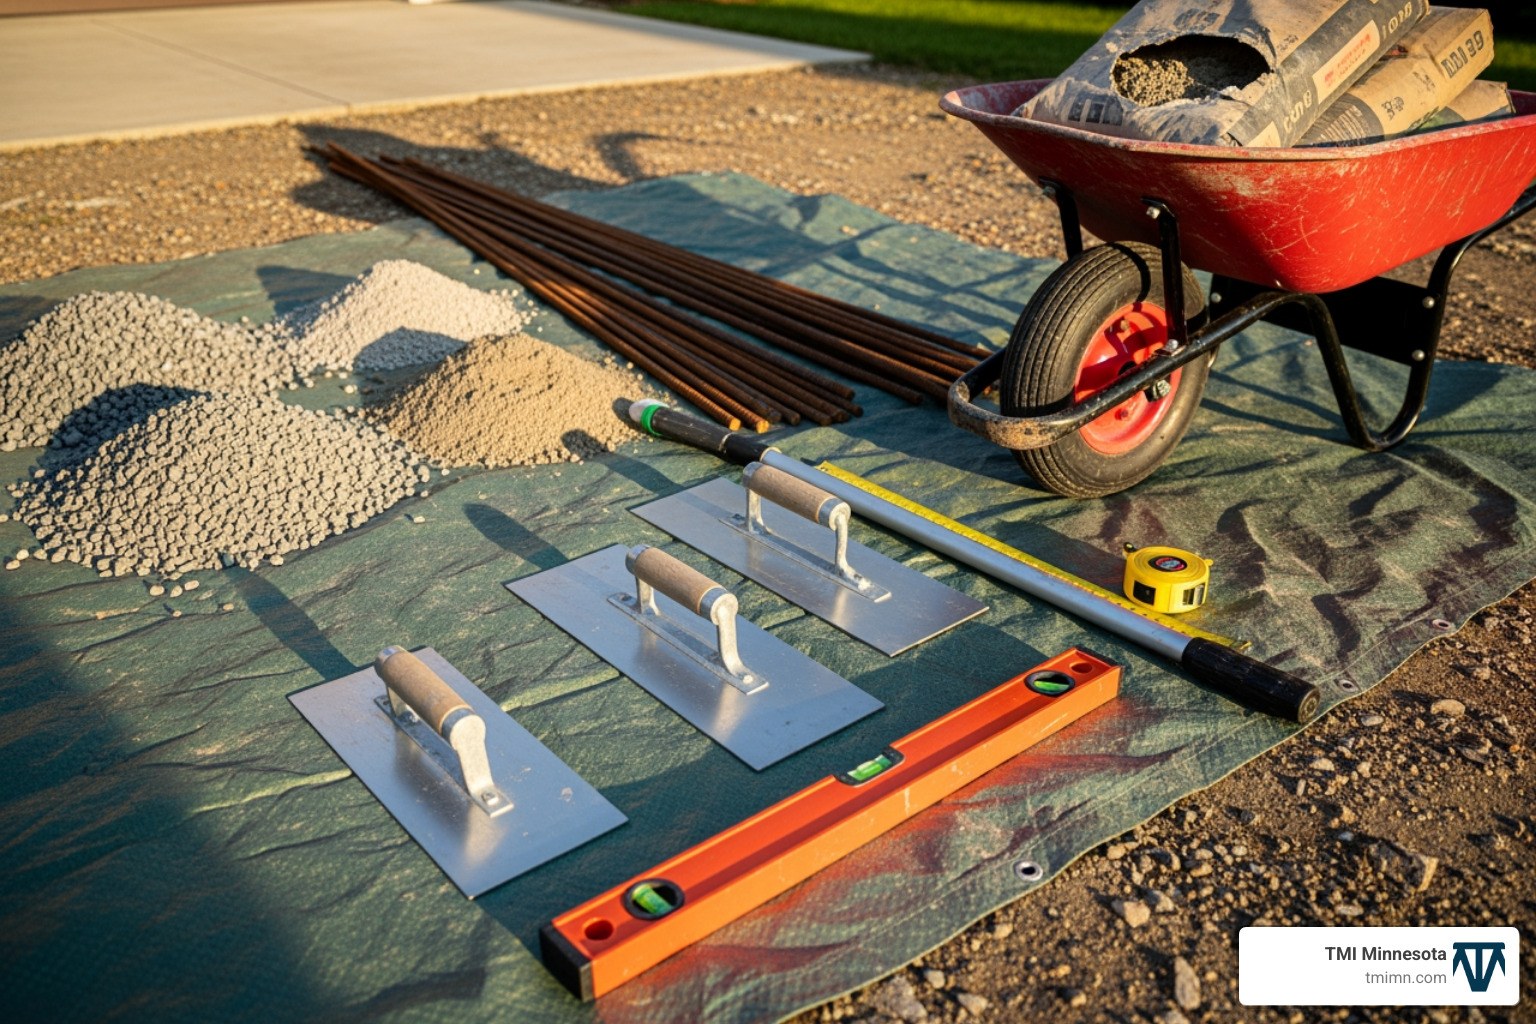
For a small concrete driveway, we’ll need:
- Measuring and Marking: Tape measure, string, stakes, spray paint.
- Excavation: Shovels, pickaxe, wheelbarrow, and potentially a jackhammer for existing concrete removal.
- Base Preparation: Rake, tamper or plate compactor (rentable).
- Formwork: 2x4s, hammer, nails or screws, level, saw.
- Concrete Placement: Wheelbarrow (if hand-pouring small batches), concrete chute (if using ready-mix), square shovel or mortar hoe.
- Finishing: Strikeoff (a straight 2×4), darby or bull float, hand float (wood or magnesium), edger, jointer (for control joints), broom for texture.
- Curing: Plastic sheeting, burlap, or a commercial curing compound.
To estimate concrete volume, a general rule of thumb is that one cubic yard of concrete covers approximately 54 square feet at a 6-inch depth. For a 4-inch slab, one cubic yard covers about 81 square feet. Always order a little more concrete than our calculations suggest to account for any variations or mistakes.
Local Permits and Regulations
Before starting, it’s crucial to check with our local city or county authorities in the Twin Cities. While many smaller projects might not require extensive permits, it’s always best to confirm. Regulations often cover driveway width, setbacks from property lines, and drainage requirements. Adhering to these rules ensures our project is up to code and avoids potential fines or rework.
DIY vs. Professional Installation
Deciding whether to DIY or hire a professional for our small concrete driveway depends on several factors:
| Feature | DIY Installation | Professional Installation |
|---|---|---|
| Cost | Significantly lower (saves on labor, up to 50%) | Higher upfront cost |
| Time | Longer (learning curve, physical labor, scheduling) | Faster (experienced crew, specialized equipment) |
| Finish Quality | Varies (depends on skill, experience, attention to detail) | High (consistent quality, expertise in decorative finishes) |
| Effort | High physical exertion, problem-solving | Minimal effort for homeowner |
| Risk | Higher risk of mistakes, cracks, or drainage issues | Lower risk (warranty, insurance) |
Key Considerations for Your Small Concrete Driveway Project
Even a small concrete driveway needs the same foundational considerations as a larger one to ensure its longevity and performance.
Driveway Thickness
A recommended concrete driveway thickness is over 4 inches for increased strength. For most residential driveways handling standard passenger vehicles, a 4-inch thick slab is generally sufficient. However, if we anticipate parking heavier vehicles like RVs or trucks, it’s wise to consider a 5-inch or even 6-inch thickness to prevent cracking and ensure durability. Our research shows that a 6-inch depth is often recommended for maximum strength, especially if we want it to last for decades.
Proper Drainage: The 2% Slope Requirement
Water management is critical, especially in the Twin Cities where we experience freeze-thaw cycles. For proper drainage, a concrete driveway should have a slope of 2%, meaning a 2.5-inch drop every 10 feet. This slight incline ensures that rainwater and snowmelt flow away from our home’s foundation, preventing pooling and potential water damage. When planning, we’ll want to ensure this slope is consistent across the entire surface.
Subgrade Preparation and Soil Compaction
The concrete slab is only as good as the ground it rests upon. A uniform and well-compacted subgrade is paramount. This involves removing any organic matter, loose soil, or debris, and then firming the ground. In areas with poor drainage or freezing temperatures, placing a 4-6 inch bed of gravel as a sub-base is highly recommended. This gravel layer acts as a capillary break, preventing moisture from rising into the concrete and offering a stable, well-draining foundation. We’ll need to compact this gravel thoroughly using a plate compactor.
Reinforcement Options
To further improve the strength and crack resistance of our small concrete driveway, we have several reinforcement options:
- Wire Mesh: A common and cost-effective choice, wire mesh helps hold the concrete together if cracks do form.
- Rebar: Steel reinforcing bars (rebar) provide superior strength, especially for thicker slabs or areas expecting heavier loads. They are typically placed in a grid pattern and liftd to be in the middle of the concrete slab.
- Fiber Mesh: This synthetic fiber is mixed directly into the concrete, providing microscopic reinforcement throughout the slab, helping to reduce plastic shrinkage cracking.
Choosing the right reinforcement is a small investment that can significantly extend the life of our driveway. For more on the costs involved in these types of foundational elements, check out our guide on Hardscape Installation Cost.
Step-by-Step Guide to Pouring a Small Concrete Driveway
Now that we’ve planned our project, gathered our tools, and understood the key considerations, it’s time to get our hands dirty (literally!). This step-by-step guide will walk us through the physical work of preparing and pouring our small concrete driveway.
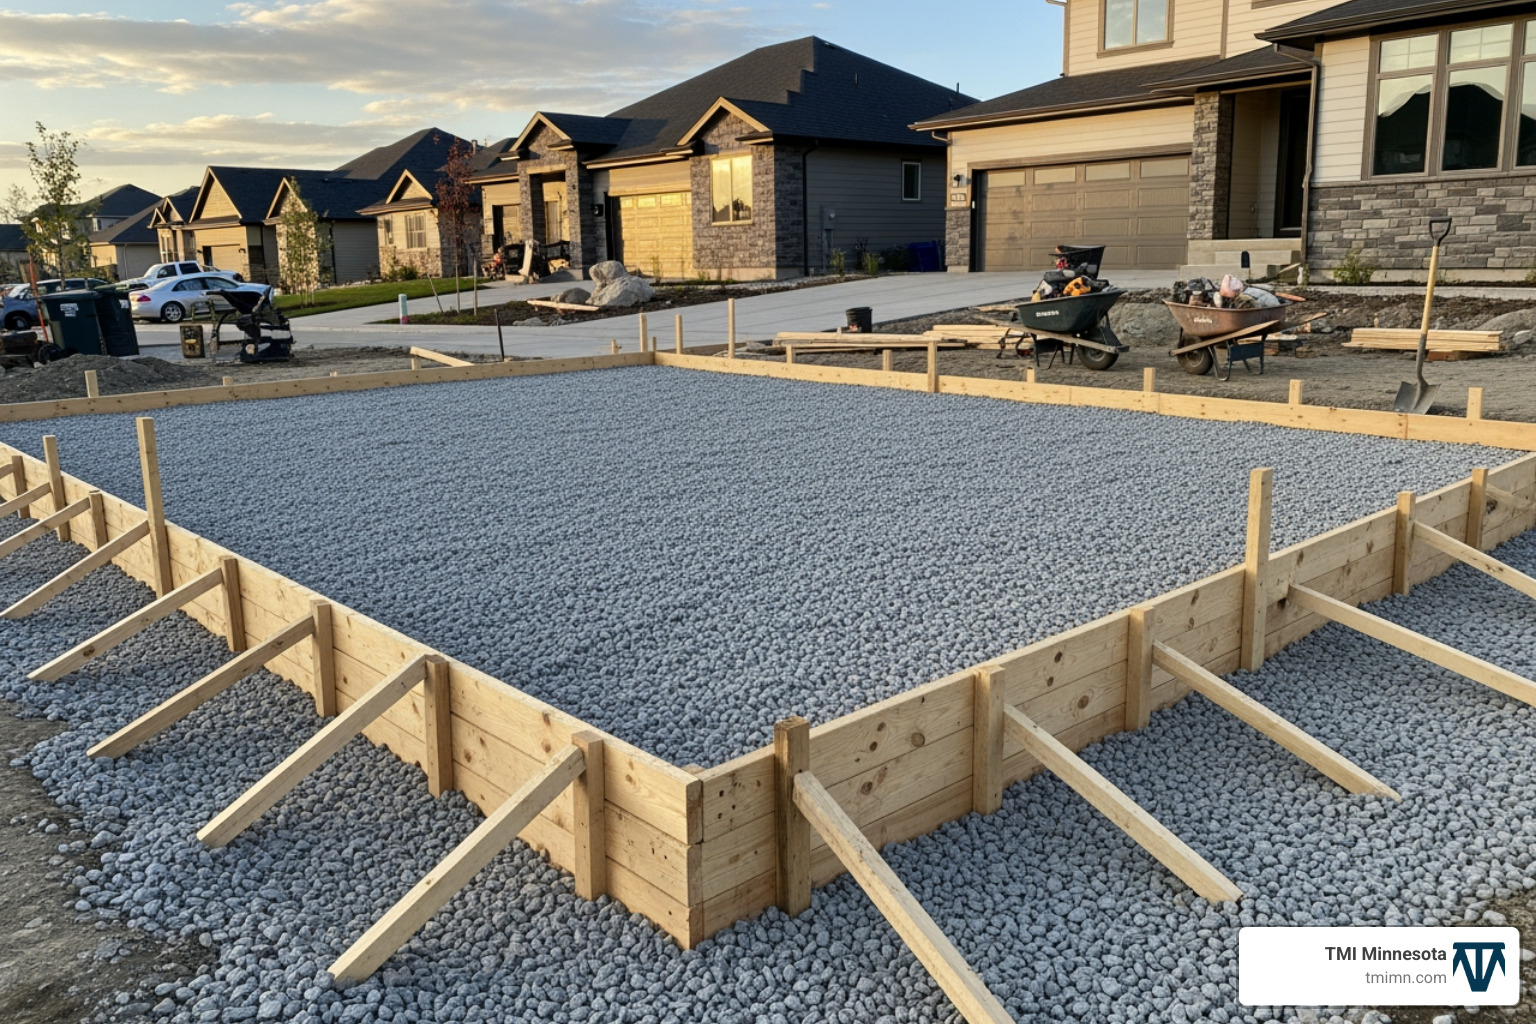
Excavation and Formwork
- Clear the Area: First, we need to clear the driveway area of any existing surfaces, vegetation, or debris. If we’re replacing an old concrete driveway, this is where the jackhammer comes out! Breaking up old cement can be a labor-intensive job, but a construction dumpster or concrete bin is the best solution for debris removal.
- Excavate: Dig down to the required depth, considering the thickness of our gravel base (4-6 inches) and the concrete slab (4-6 inches). For example, a 4-inch concrete slab with a 4-inch gravel base means we’ll need to excavate 8 inches.
- Build Forms: Using 2x4s, we’ll create the perimeter of our driveway. These forms define the shape and height of our concrete slab. It’s crucial that these forms are level and set to the precise 2% slope for drainage we discussed earlier. We can use stakes and screws to secure the forms firmly in place. Any imperfections in the forms will translate directly to our finished driveway. For a more detailed look at this initial phase, refer to Pouring a Concrete Driveway Part 1 .
Laying and Compacting the Gravel Base
- Lay the Gravel: Once our forms are in place, we’ll spread our 4-6 inch layer of gravel. This sub-base is critical for drainage and providing a stable foundation for the concrete.
- Compact Thoroughly: Using a plate compactor, we’ll compact the gravel base until it’s dense and firm. We can even create a homemade template to check for consistent gravel thickness across the entire area. A well-compacted base prevents future settlement and cracking in our concrete slab.
- Dampen: Just before pouring the concrete, we need to thoroughly dampen the gravel base. This prevents the dry gravel from absorbing water from the fresh concrete, which could weaken the slab.
Mixing and Pouring the Concrete
This is where the excitement (and speed) picks up!
Ordering Ready-Mix Concrete and Calculating Volume
For a small concrete driveway, especially if it’s more than just a tiny pad, ordering ready-mix concrete from a local supplier is highly recommended. Our experts advise against attempting to mix concrete ourselves for anything but the smallest repairs, as getting the right consistency and volume can be tricky.
To calculate the volume, we’ll multiply the length, width, and thickness (in feet) to get cubic feet, then divide by 27 to get cubic yards. As mentioned, one cubic yard of concrete covers about 81 square feet at a 4-inch depth, or 54 square feet at a 6-inch depth. Always order slightly more than the calculated amount—it’s better to have a little extra than not enough!
Spreading and Leveling the Concrete
Once the ready-mix truck arrives, the clock starts ticking. We have roughly 90 minutes from batching to discharge the concrete and get it into place before it starts to set.
- Placement: Direct the concrete into one corner of our formed area and begin spreading it with shovels or rakes. Work quickly to fill the forms, pushing each new batch against the previous one to avoid cold joints.
- Spreading and Compacting: As we spread the concrete, we also need to compact it, especially into the corners and along the edges of the forms. This eliminates air pockets and ensures a dense, strong slab.
- Screeding: Using a straight 2×4 (our screed board), we’ll level the surface. With one person on each end, use a sawing motion to pull the excess concrete across the forms, bringing the surface flush with the top of the forms. We’ll make two passes for good measure.
- Avoiding Overworking: It’s tempting to keep playing with the concrete, but overworking it can bring too much water and fine particles to the surface, leading to a weaker, less durable finish. Work efficiently and then let the concrete rest for a bit.
For more in-depth information on concrete installation, our Concrete Driveways Ultimate Guide offers a wealth of knowledge.
Finishing, Curing, and Sealing for Longevity
The finishing stage is where our small concrete driveway truly takes shape, and proper curing is essential for its strength and lifespan.
Floating, Edging, and Jointing
After screeding, we’ll wait for the concrete’s “bleed water” (the water that rises to the surface) to disappear. This is usually when the surface loses its wet sheen but isn’t too stiff.
- Floating: Using a darby or bull float, we’ll smooth the surface. This closes up the surface, pushing down any aggregate and bringing up a creamy “fat.” For air-entrained concrete, a magnesium float is recommended to prevent surface tearing.
- Edging: Once the concrete begins to stiffen slightly, we’ll use an edger tool along the perimeter of the slab. This rounds the edges, preventing chipping and creating a more durable, professional-looking finish that also eliminates tripping hazards.
- Creating Control Joints: This is a critical step for crack prevention. Concrete will crack; our goal is to control where it cracks. We’ll use a jointer with a straight guide board to create control joints that are 1/4 of the slab’s thickness deep. For example, on a 4-inch slab, joints should be 1-inch deep. These should be spaced at intervals not exceeding 30 times the thickness of the driveway (e.g., 10 feet for a 4-inch slab). For a driveway wider than 12 feet, a centerline control joint is required. It’s better to have more joints than less.
- Broom Finish: For a non-slip surface, especially important in the often-icy Twin Cities, we’ll apply a broom finish. Once the concrete is firm enough to hold the texture, gently drag a stiff-bristled broom across the surface. This creates small grooves that provide traction.
The Importance of Control Joints and Curing
Crack Prevention
As we just covered, control joints are our best friend in preventing unsightly, random cracks. Concrete naturally expands and contracts with temperature changes, and without these intentional weakened lines, stress would build up and cause uncontrolled cracking. The joint depth rule of 1/4 of the slab’s thickness is vital to ensure the crack occurs beneath the joint. Correct joint spacing, typically not exceeding 10 feet for a 4-inch slab, ensures that these stresses are relieved effectively.
Moist Curing Benefits and Timeframes
Curing is not just drying; it’s the chemical process that gives concrete its strength and durability. Proper curing prevents the concrete from drying too quickly, which can lead to a weak, crumbly, and cracked surface.
- Moist Curing: This involves keeping the concrete wet for an extended period. We can cover the slab with wet burlap, sand, or straw, keeping these materials saturated with water. Alternatively, plastic sheeting can trap moisture, or a commercial curing compound can be sprayed on to seal the surface.
- Curing Timeframes: For a small concrete driveway, we need patience. While we can typically walk on the slab after 3-4 days, it’s crucial to wait at least 10 days before driving a vehicle on it. This allows the concrete to gain sufficient strength to handle the weight without damage. In colder weather, this curing process can take even longer, so plan accordingly, especially here in Minnesota!
For a deeper dive into the specifics of concrete design and installation, our Concrete Driveway Design Complete Guide is an excellent resource.
Sealing the Concrete
Once our driveway is fully cured (typically about 30 days after placement), applying a high-quality concrete sealer is a wise final step, especially in severe weathering regions like the Twin Cities. Sealing protects the concrete from:
- Moisture penetration (which can lead to freeze-thaw damage)
- Stains from oil, grease, and other spills
- Abrasion and wear
- Deicing chemicals (though we should avoid those with ammonium sulfate or nitrate, which aggressively attack concrete).
We should plan to reapply the sealer approximately every two years to maintain its protective benefits.
Beyond the Basics: Design & Landscaping Ideas
A small concrete driveway doesn’t have to be just a utilitarian slab. With thoughtful design and integration with our landscape, it can become a beautiful and functional part of our home’s curb appeal.
Aesthetic Improvements for Concrete Driveways
Even a plain gray concrete driveway can be transformed. Here are some popular aesthetic options:
- Stamped Concrete Patterns: This technique allows us to mimic the look of more expensive materials like cobblestone, brick, natural stone, or even wood. The patterns are pressed into the wet concrete, creating a high-end look without the higher price tag.
- Exposed Aggregate Finish: For a textured, slip-resistant surface, an exposed aggregate finish reveals the small stones and pebbles in the concrete mix. This offers a natural, earthy look and excellent traction, which is a great benefit in our Minnesota winters.
- Colored Concrete: Integral coloring (where pigment is added to the concrete mix) or acid stains can give our driveway a custom hue that complements our home’s exterior. From subtle earth tones to more vibrant shades, the possibilities are vast.
- Brick Borders: Adding a border of brick or contrasting concrete pavers can define the edges of our driveway, enhancing its visual appeal and creating a polished, finished look.
For more inspiration on how to make our driveway a design statement, explore our Best Concrete Driveway Ideas Designs.
Creative Design Ideas for a Small Concrete Driveway
Designing for small spaces requires creativity to maximize both functionality and visual impact.
- Curved Driveways: Even a small space can benefit from a gentle curve. A curved driveway can create a sense of grandeur, improve traffic flow, and soften the overall aesthetic of our front yard. It can make the approach to our home feel more inviting.
- Concrete Strips with Grass: Instead of a solid slab, consider two narrow concrete strips for the tire paths with grass growing in between. This creates a visually lighter, greener aesthetic that integrates the driveway more seamlessly into the landscape. It also contributes to better drainage.
- Integrating Permeable Pavers: For an environmentally friendly and aesthetically pleasing solution, we can integrate Permeable Paver Driveways. These innovative pavers allow water to pass through to the ground below, preventing pooling and minimizing runoff. They’re an excellent choice for small driveways, offering improved drainage, reduced maintenance, and versatility. Some options even allow grass to grow through them, creating a lush, green surface that can still support vehicles. This is an ideal solution for water management, especially in areas prone to heavy rainfall.
- Landscaping Around Driveways: Thoughtful landscaping can dramatically improve a small concrete driveway. Softening the edges with low-maintenance plantings, creating garden beds, or using decorative stones can make the driveway feel less imposing and more integrated into the overall design. Consider native Minnesota plants for their hardiness and ecological benefits. Our team at TMI Minnesota specializes in Landscaping Around Driveways and can help create a cohesive look.
- Making a Space Feel Larger: We can use several tricks to make a small concrete driveway appear more expansive. Using lighter-colored concrete, incorporating curved lines, or extending the driveway’s material into a small patio area can visually open up the space. Playing with different textures and combining materials, such as concrete with gravel or timber accents, can also add visual interest and depth, making the area feel larger and more dynamic.
Frequently Asked Questions about DIY Driveways
How thick should a small concrete driveway be?
For a small concrete driveway serving standard passenger vehicles, a minimum of 4 inches thickness is generally recommended. This provides adequate strength and durability for typical residential use. However, if we anticipate parking heavier vehicles like RVs or trucks, it’s wise to consider increasing the thickness to 5 or even 6 inches. Our research shows that a thickness over 4 inches offers increased strength, and some experts recommend a minimum of 6 inches for maximum longevity, especially in areas with significant freeze-thaw cycles like the Twin Cities.
How long before I can drive on my new concrete driveway?
Patience is key after pouring new concrete! While we can typically walk on our new small concrete driveway after 3-4 days, it’s crucial to wait at least 10 days before driving a vehicle on it. This allows the concrete to gain sufficient compressive strength (recommended 3000 to 4000 PSI) to handle the weight without causing damage, cracks, or depressions. Always check with our concrete supplier for specific recommendations based on the mix used and local weather conditions.
Is it cheaper to pour a concrete driveway myself?
Yes, pouring a small concrete driveway ourselves can significantly reduce the overall cost. Labor typically accounts for about 50% of the total project price for a professional installation, which can range from $3,460 to $6,910 nationally. By taking on the labor, we can save a substantial amount. However, it’s important to accurately factor in all other costs, including:
- Material costs (concrete, gravel, forms, reinforcement)
- Tool rental fees (compactor, screed, floats, etc.)
- The value of our own time and effort
- Potential costs for unexpected issues or mistakes that might require professional intervention.
While DIY can save money, it requires careful planning, physical exertion, and attention to detail to achieve a professional-looking and durable result.
Conclusion: Your New Driveway Awaits
Tackling a small concrete driveway project ourselves is a rewarding endeavor that can significantly boost our home’s curb appeal and functionality. From the careful planning and preparation of the subgrade to the precise pouring, finishing, and crucial curing process, each step contributes to a durable and attractive result. We’ve learned about the importance of proper drainage, adequate thickness, and the aesthetic possibilities that can transform a simple slab into a design feature.
The sense of accomplishment from seeing our vision realized, knowing we’ve built something lasting with our own hands, is truly unparalleled. However, we also understand the challenges involved—the heavy lifting, the need for precision, and the race against the clock once the concrete arrives.
For those who find the prospect daunting, or for projects that demand a flawless finish or intricate design, knowing when to call a professional is a smart decision. Our team at TMI Minnesota specializes in changing outdoor spaces with unique designs and leading-edge products. We’re experts in hardscape and softscape installations across the Twin Cities, ready to bring our expertise to your driveway project.
Whether we decide to DIY or seek professional assistance, understanding the process ensures we make informed choices for our home.
Explore more driveway ideas and get expert help for your project—we’re here to help you achieve the outdoor space of your dreams.