
Why Tree and Shrub Installation Matters for Your Minnesota Landscape
Tree and shrub installation is a valuable investment in your property. Properly installed plants improve curb appeal, increase property value, and support local wildlife. However, improper planting is the leading cause of tree decline and death, even with healthy plants.
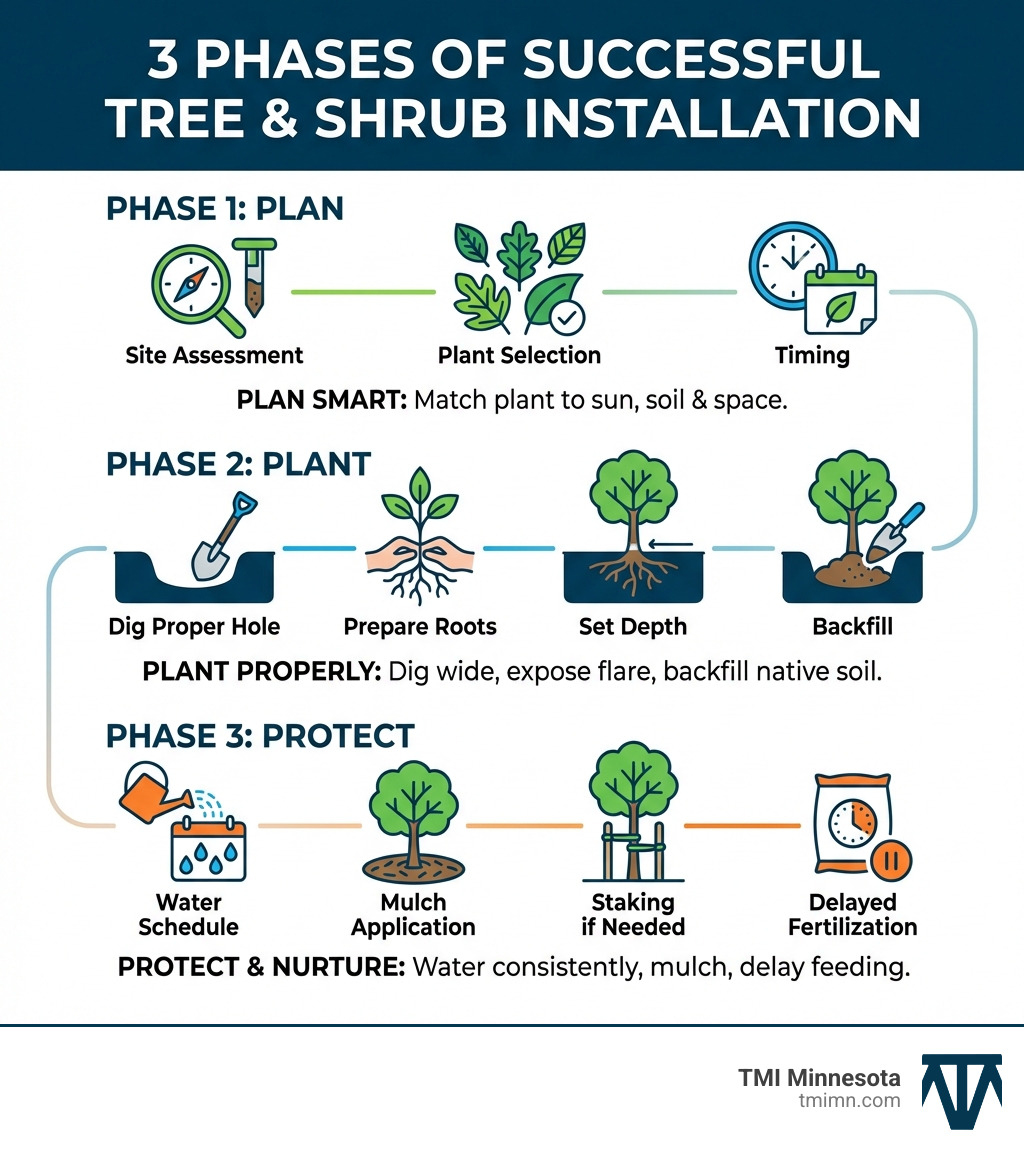
Quick Answer: The 3 Keys to Successful Tree and Shrub Installation
- Plan Smart – Match the right plant to your site conditions (sun, soil, space).
- Plant Properly – Dig wide (not deep), expose the root flare, and backfill with native soil.
- Protect and Nurture – Water consistently, mulch correctly, and delay fertilization.
The stakes are high. As one expert notes, “Proper tree planting and transplanting are often underestimated. If done incorrectly, it can impact the growth and longevity of your trees.” Successful installation is more than just digging a hole; it requires understanding soil, planting depth, root preparation, and aftercare.
This guide walks you through every step, from site assessment to long-term maintenance. You’ll learn professional techniques and common mistakes to avoid, giving your new trees and shrubs the best possible start. The core principles are always: right plant, right place, right technique.
I’m Christopher Deanovic, Operations Leader at Task Masters Minnesota. I’ve overseen countless tree and shrub installation projects, and my experience has shown that the details in this guide make the difference between a thriving landscape and a struggling one.
Key Tree and shrub installation vocabulary:
Phase 1: Planning for Success with the ‘Right Plant, Right Place’ Method
The journey to a thriving landscape in the Twin Cities begins long before we break ground. It starts with careful planning and adhering to the “Right Plant, Right Place” philosophy. This principle ensures your chosen trees and shrubs will flourish, providing beauty and benefits for years to come. Long-term success starts before you even dig!
Assessing Your Planting Site
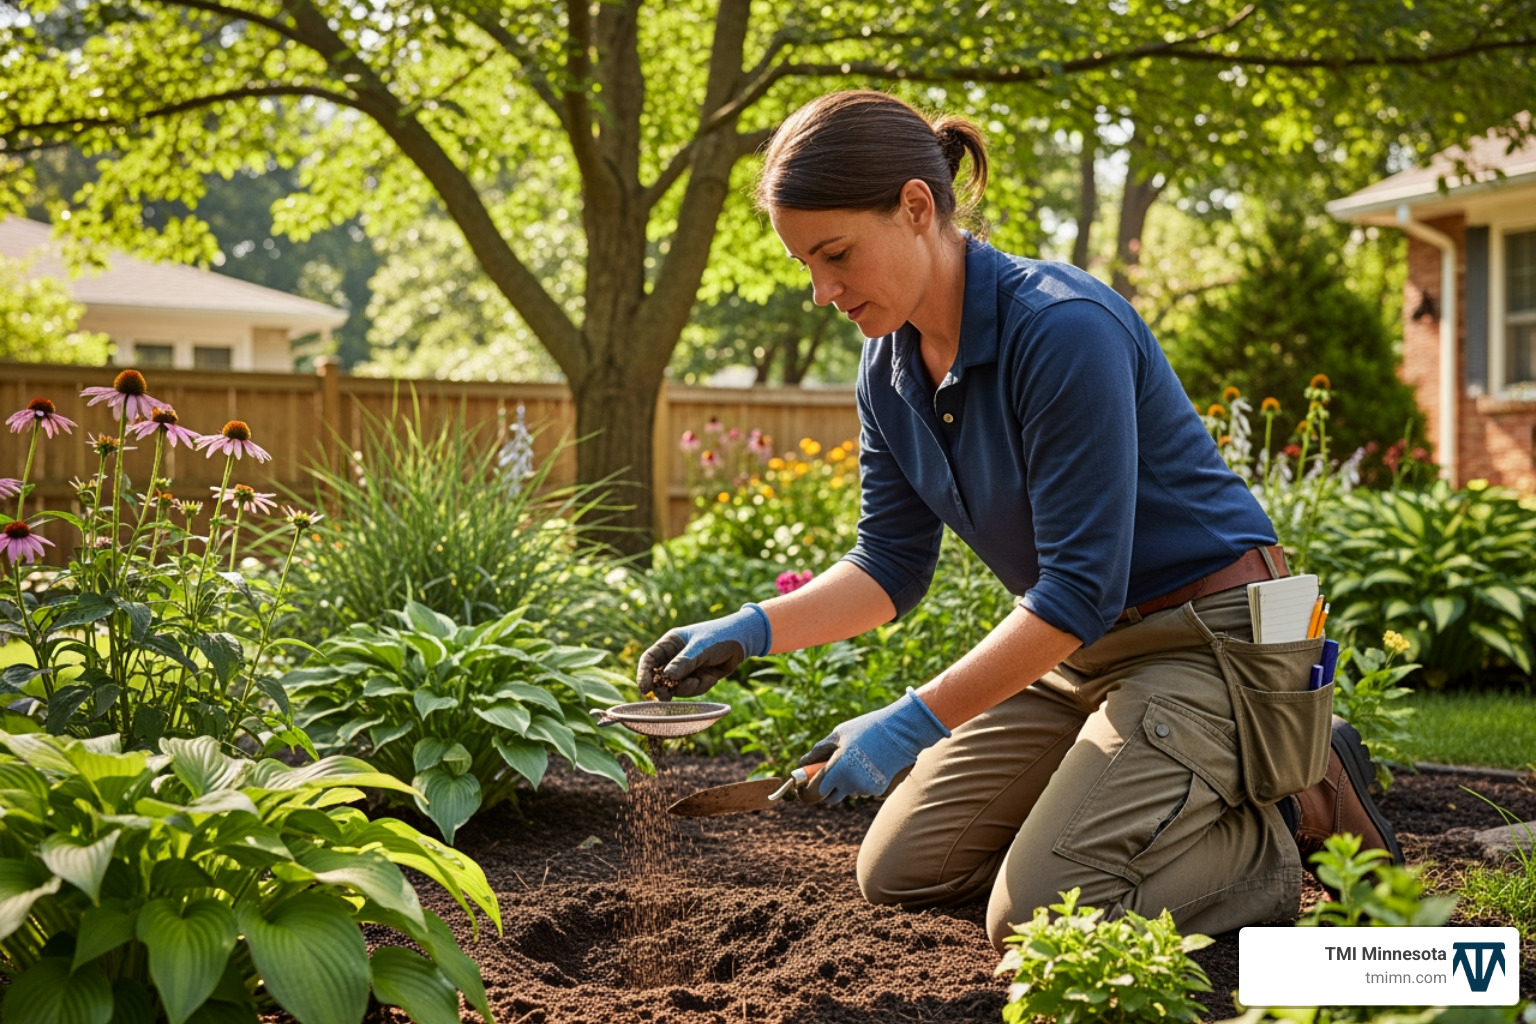
Before selecting a plant, we assess your site to prevent future headaches. Key factors include:
- Sunlight Exposure: We determine if the site gets full sun (6+ hours), partial shade, or full shade to match plant needs.
- Soil Testing: A simple soil test reveals pH and texture (clay, loam, or sand). Most trees need well-drained soil to prevent root rot.
- Drainage Test: We check how quickly water drains to select species tolerant of wet or dry conditions, ensuring the plant material matches the site.
- Space Constraints: We measure available space to account for the plant’s mature size. “If the tree’s mature canopy or roots will touch or damage the building, sidewalk, or foundation, it’s planted too close.” Planning ahead prevents cracked sidewalks and other issues.
- Underground Utilities: A non-negotiable step. We always contact 811 before you dig to locate utilities and prevent accidents.
- Microclimates: We identify unique spots like windy corners or heat sinks to ensure the plant can withstand those specific conditions.
Selecting the Right Tree or Shrub
With site knowledge, we apply the “Right Plant, Right Place” philosophy to select the perfect plant.
- Mature Size and Growth Rate: We plan for the plant’s full-grown size. An improperly sized tree can become a maintenance problem or hazard. “Mature trees and shrubs produce root systems that extend 50 percent of their height beyond their drip line,” so space is crucial.
- Evergreen vs. Deciduous: We help you decide between evergreens for year-round screening or deciduous plants for seasonal interest.
- Maintenance and Pest Resistance: We choose species that fit your desired maintenance level and are resistant to common local pests.
- Native Plant Benefits: We advocate for native plants for tree and shrub installation in Minnesota. “Native trees and plants can perform better with the local soil and climate. They’re typically lower maintenance…and beneficial to the local wildlife.” This helps support wildlife and your local ecosystem.
- Resisting the ‘Instant Landscape’ Trap: It’s tempting to buy large plants, but “Resist the desire for an ‘instant landscape.’ Smaller, younger plants become established and begin to grow faster than their larger counterparts.” They adapt more easily and often outperform larger, more stressed transplants.
Choosing the Best Time to Plant
Optimal timing reduces transplant shock and promotes establishment.
- Best Seasons: In the Twin Cities, “Fall is the absolute very best time to get them in the ground” because of cool air and warm soil, which encourages root development. Early spring is the next best option. We can plant any time during the dormant season (fall, winter, early spring) as long as the ground isn’t frozen.
- Avoiding Summer Heat: “Summer planting, when plants are in full leaf, can be stressful and should be avoided if possible.” The heat increases water demand on a new root system, raising the risk of transplant shock.
Phase 2: The Professional Tree and Shrub Installation Process
With planning complete, the physical tree and shrub installation begins. This phase requires precision to give your new landscape additions the best possible start.
Step 1: Digging the Perfect Planting Hole
Proper hole preparation is key for root growth.
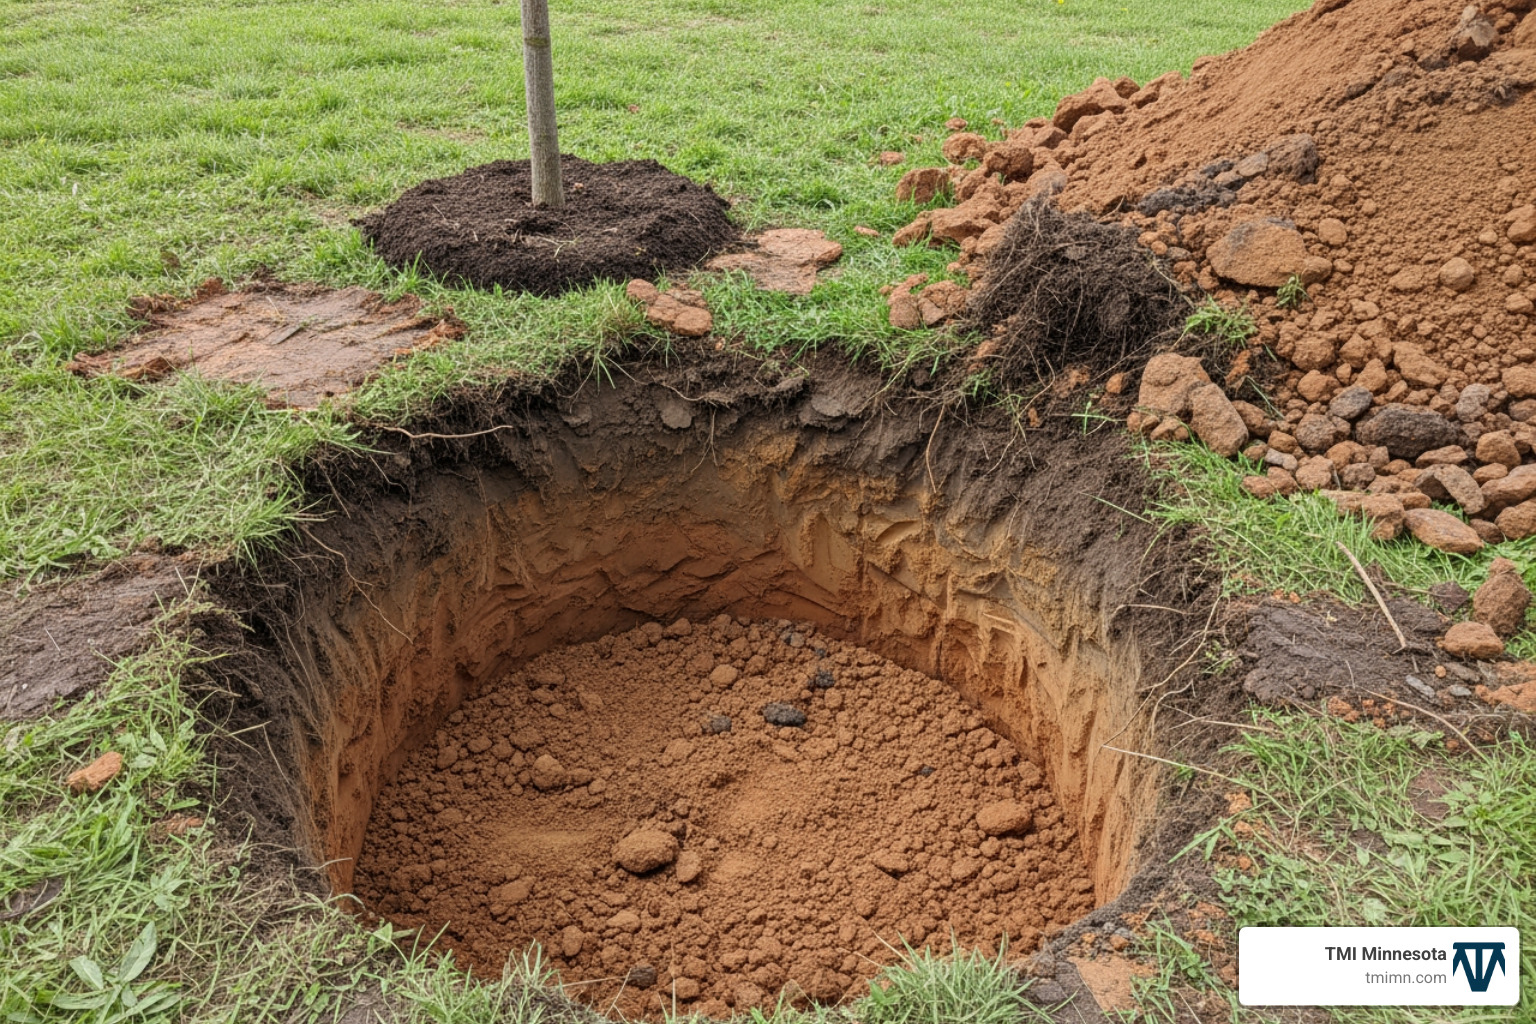
- Width and Depth: “Make it two to three times wider than the current root mass.” The depth is crucial: “never deeper than the plant was growing in its previous environment.” The root flare must sit at or slightly above the soil grade.
- Hole Shape: We leave the soil at the base of the hole undisturbed to prevent settling. The sides should be sloped, not straight, to encourage outward root growth. In heavy clay, we score the sides to break up any “glaze” from the shovel.
Step 2: Preparing the Roots for a Healthy Start
Proper root preparation is critical and varies by how the plant was grown.
| Rootball Type | Description | Preparation Steps |
|---|---|---|
| Bare-Root | Sold dormant without soil. | Keep roots damp and plant ASAP. “Inspect roots and remove any that are dead, diseased, broken, twisted, or excessively long.” Dig a hole large enough for roots to spread out naturally. |
| Balled-and-Burlapped (B&B) | Dug with a soil ball wrapped in burlap and wire. | “Always lift plants by their…rootball, not by their stems or trunk.” After placing in the hole, remove all twine, tags, and as much of the wire basket and burlap as possible. Burlap exposed above ground can wick moisture away from the roots. |
| Container-Grown | Grown in pots; most common type. | Remove the plant and inspect for “firm, healthy roots.” If the plant is “tightly pot-bound,” it’s crucial to correct this. “The biggest mistake you can make…is to place a root-bound plant into the ground as is.” We make vertical cuts or shave the root ball to break up circling roots and encourage outward growth. |
Step 3: Setting the Plant and Proper Tree and Shrub Installation Depth
This is the most critical step. The root flare (or trunk flare) is where the trunk widens at the base before the roots spread out. This flare must always be visible.
- Visible Root Flare is Key: “It is critical to locate the root flare and ensure it is not below the soil line…as planting too deep is a leading cause of mortality for newly planted trees.” A buried flare can “promote the development of girdling roots and deprive roots of oxygen.” We plant so the “root flair to remain slightly above soil grade.” Learn more with Free the Flare: Maintain Visible Root Flare for Tree Health.
- Planting in Clay Soils: In heavy Minnesota clay, we may plant with “up to 25% of the root ball higher than the surrounding soil level” to improve drainage and prevent root rot.
- Dangers of Planting Too Deep: Many plants are sold with the root flare already buried. Planting them too deep in the landscape leads to root suffocation, girdling roots, and eventual decline.
Step 4: Backfilling and Amending the Soil
Once the plant is at the correct depth, we backfill the hole.
- Use Native Soil: “Trees will typically do better in native soil than amended soil.” We backfill with the soil excavated from the hole. Amending only the planting hole creates a “pot” effect, discouraging roots from spreading into the surrounding landscape.
- Eliminate Air Pockets: As we backfill, we gently tamp the soil to ensure good root-to-soil contact. We also water when the hole is halfway full to settle the soil effectively around the roots.
- Create a Water Berm: We build a small soil ring around the edge of the planting hole. This temporary berm helps direct water to the root ball during initial waterings.
Phase 3: Critical Post-Planting Care for Healthy Growth
Your tree is in the ground, but the work isn’t over. The first year is critical for establishment. Proper post-planting care ensures your plant will thrive in your Minnesota landscape.
Watering: The Most Critical First-Year Task
“The most important job you will have after planting is to keep plants and trees well-watered until established.” This is non-negotiable.
- Immediate Watering: “Water immediately after you plant.” This reduces stress and settles the soil.
- Watering Schedule: New plants need more frequent watering. A general guide is:
- Water daily for the first 1-2 weeks.
- Water every 2-3 days for the next 12 weeks.
- After 12 weeks, water weekly until established.
A steady 1-inch rain can replace one watering.
- Water Volume: For trees, apply 1-1.5 gallons per inch of trunk diameter. For shrubs, use about 1/4 to 1/3 of the container volume per watering.
- Check Moisture: Don’t water blindly. Stick your finger 2-3 inches into the soil; if it’s dry, it’s time to water. Be careful, as “More plants die from over-watering (drowning) than under watering.”
Mulching to Protect and Nurture
Mulch is a plant’s best friend, offering numerous benefits like moisture retention, weed suppression, and soil temperature regulation.
- Mulch Application: Apply a 2-4 inch layer of organic mulch (shredded bark, wood chips) over the root zone.
- Donut, Not Volcano: This is crucial. Apply mulch in a “donut” shape, keeping it “pulled back a few inches from the trunk.” Piling mulch against the trunk in a “mulch volcano” traps moisture and encourages rot and pests.
Staking and Supporting Your New Tree
Staking is often overused and should only be done if necessary.
- When to Stake: We only stake if a tree cannot stand on its own, is in a very windy spot, or is at risk of mechanical damage. “Research has shown that natural swaying stimulates faster development of anchoring roots.”
- Proper Technique: If needed, use broad, flexible ties that allow for some movement. “All supports should be removed after one year to prevent serious trunk damage.”
Fertilizing and Pruning Your New Plant
With new plants, less is more.
- Delay Fertilization: “Newly planted trees do not require fertilization for one to three years.” Their energy is focused on root growth, and fertilizer can burn new roots. Once established, fertilize only if a soil test shows a deficiency.
- Minimal Pruning: At planting, only prune “to correct branch structure or removing broken or damaged branches.” Leaves are needed for photosynthesis to power root growth. Avoid harmful “topping” at all costs.
Transplanting and Avoiding Common Mistakes
Moving an existing plant or fixing a poorly placed one requires care. Avoiding common pitfalls is key to success.
Best Practices for Transplanting Existing Trees and Shrubs
“The ideal time to transplant is during the dormant season”—late fall, winter (if ground isn’t frozen), or early spring. This minimizes stress.
- Plant Size: “Small trees or shrubs can be easily transplanted.” However, “Transplanting large trees or shrubs…is more difficult and may require a landscape professional.” Our team can manage large tree plantings up to 20 feet tall.
- Root Pruning: For larger plants, root pruning 6-12 months before moving can “lessen transplant shock.” This encourages a denser root ball closer to the trunk.
- The Move: When transplanting, dig a generous root ball and replant it immediately in its new location to prevent the roots from drying out.
Top Mistakes in Tree and Shrub Installation to Avoid
Steer clear of these common, damaging mistakes:
- Planting Too Deep: The most common error. Always keep the root flare visible at or above the soil line.
- Amending Only the Planting Hole: This creates a “pot” effect. “Trees will typically do better in native soil than amended soil.”
- Leaving Circling Roots: Failing to correct pot-bound roots leads to girdling and stunted growth. “The biggest mistake…is to place a root-bound plant into the ground as is.”
- ‘Mulch Volcanoes’: Piling mulch against the trunk causes rot and invites pests. Always create a mulch “donut.”
- Improper Watering: Both over- and underwatering are detrimental. Water consistently based on soil moisture.
- Forgetting to Remove Materials: “All supports should be removed after one year.” Also remove any twine, wire, or non-biodegradable burlap left on the plant.
Frequently Asked Questions about Tree and Shrub Planting
We get a lot of questions about tree and shrub installation. Here are some of the most common ones we hear in the Twin Cities:
How do I know if a tree is planted too deep?
The most obvious sign is a missing root flare, where the trunk enters the ground straight like a telephone pole. Instead, the trunk should visibly widen as it reaches the soil line. Other signs, which may appear later, include poor growth, yellowing leaves, and dieback in later years, as a buried root flare can lead to girdling roots and oxygen deprivation.
Should I put fertilizer or compost in the planting hole?
No. Research shows it’s best to backfill with the native soil you removed. Amending only the hole can discourage roots from spreading into the surrounding landscape, confining them to the improved soil. You can apply compost as a top dressing over the root zone after planting to gradually enrich the soil from the top down. Newly planted trees typically do not require fertilization for one to three years, as their energy is directed at root growth.
How long does it take for a new tree to get established?
Establishment time varies by species and size, but it typically takes one to three years for a new tree or shrub to become fully established. The first year is the most critical, requiring consistent watering and care to ensure a healthy root system develops. Smaller plants generally establish faster than their larger counterparts.
Conclusion: Cultivating a Thriving Landscape
Tree and shrub installation is far more than just digging a hole; it’s a long-term investment in the beauty, value, and ecological health of your Minnesota property. By understanding and applying the “Right Plant, Right Place” philosophy, ensuring proper planting depth, and committing to diligent post-installation care, you set your landscape up for enduring success.
A properly planted tree is a long-term asset to your property, providing beauty, shade, environmental benefits, and even increased property value for decades. We believe that “the most admired landscapes don’t happen by accident” – they are the result of thoughtful planning, expert execution, and dedicated care.
For complex projects, large-scale installations, or simply to ensure your landscape investment thrives from day one, the expertise of a professional team like TMI Minnesota makes all the difference. We’re passionate about changing outdoor spaces with unique designs and leading-edge products, elevating your yard living experience for years to come.