
Creating Your Backyard Oasis with Water Features
There’s something almost magical about the sound of water in your yard. That gentle splashing or bubbling creates an instant sense of calm—like you’ve stepped away from the world and into your own private retreat.
Water feature installations transform ordinary spaces into extraordinary ones. Whether you’re looking for a simple fountain that fits on your patio or dreaming of a cascading waterfall surrounded by lush plants, the possibilities are endless. Most homeowners are surprised by the range of options available, from serene ponds to pondless features that offer the beauty of moving water without the maintenance of a full pond.
The investment in tranquility varies widely. A simple DIY fountain might cost as little as $200, while elaborate custom installations with multiple waterfalls and koi habitats can reach $10,000 or more. What many of our clients appreciate is that even modest features deliver impressive returns—both in enjoyment and in property value, which typically increases 7-15% with a well-designed water feature.
If you’re considering the DIY route, be prepared to dedicate 1-3 weekends to your project. The difficulty level ranges from moderate to challenging, depending on the size and complexity. For those who prefer to leave it to the pros, professional water feature installations typically take 2-5 days from start to finish.
The benefits extend far beyond simple aesthetics. The sound of moving water naturally masks unwanted neighborhood noise—like that lawn mower that always seems to start at 7 AM on Saturdays. Water features also generate negative ions that actually improve air quality by binding with dust particles in the air. And there’s something deeply satisfying about watching birds, butterflies, and other wildlife find and enjoy your creation.

I’ve seen the change countless times. I’m Christopher Deanovic, Operations Leader at Task Masters, and I’ve helped bring hundreds of water feature installations to life across Minnesota. From intimate courtyard fountains to sprawling backyard paradises with multiple water elements, each project creates not just a beautiful space but a new way of experiencing home.
One of my favorite moments is when clients sit beside their new water feature for the first time. There’s often a moment of quiet, then a smile, and finally: “Why didn’t we do this years ago?”
Ready to explore how water can transform your outdoor space? Consider checking out our backyard oasis designs for inspiration, or explore complementary elements like outdoor living upgrades and outdoor fire feature ideas that pair beautifully with water features.
Planning, Budgeting & Site Preparation for Water Feature Installations
The magic of water feature installations begins long before the first splash. Thoughtful planning ensures your water feature will blend beautifully with your existing landscape, fulfill your personal dreams, and provide years of enjoyment without headaches.
As I tell my clients at TMI Minnesota, “Have you imagined the peaceful sound of water flowing through your own backyard sanctuary? That dream is absolutely within reach!” This excitement is why so many Twin Cities homeowners are changing their outdoor spaces with water features.
Matching Feature to Goals & Space
Before diving into specifics, let’s consider what you’re hoping to achieve with your water feature:
For relaxation and stress relief, there’s nothing quite like the sound of moving water to wash away the day’s tensions. Over 60% of our clients mention this as their primary motivation. A simple fountain or gentle waterfall might be perfect if you’re seeking a calming presence in your garden.
Adding a water feature can boost your property value by 7-15%, depending on design quality and integration with your landscape. I’ve seen well-executed ponds with thoughtful lighting and complementary plantings yield the most impressive returns on investment.
If you have little ones, consider a family-friendly feature like a shallow stream or splash area. These provide interactive fun while being safer than traditional pools since they don’t require standing water.
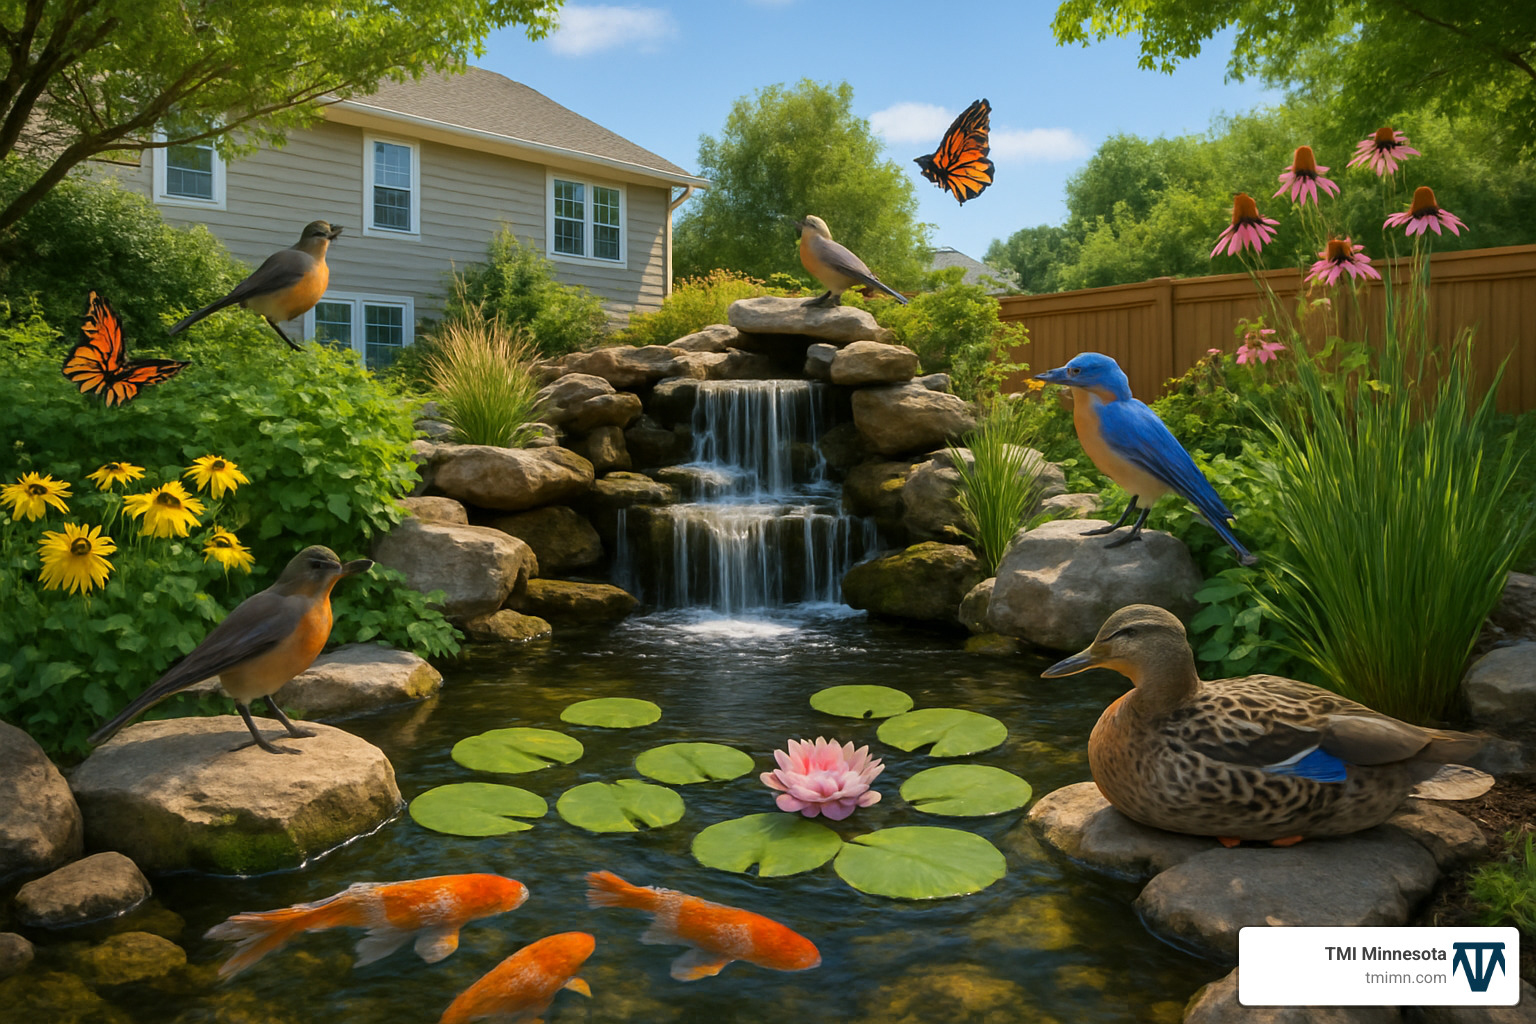
For wildlife enthusiasts, a properly designed water garden with aquatic plants becomes a vibrant ecosystem. One of our clients recently shared, “I can’t believe how many different birds visit now—adding those water lilies and a few colorful koi has brought a slice of nature right to our doorstep.”
Based on your primary goals, here’s how the most popular water features compare:
| Feature Type | Best For | Maintenance Level | Typical Cost Range | Installation Difficulty |
|---|---|---|---|---|
| Fountain | Small spaces, relaxation | Low-Medium | $200-$3,000 | Easy-Moderate |
| Pondless Waterfall | Noise masking, visual impact | Low | $1,500-$5,000 | Moderate |
| Pond | Wildlife, fish keeping | High | $3,000-$10,000+ | Difficult |
| Stream | Natural look, connecting features | Medium | $2,500-$8,000 | Moderate-Difficult |
Location & Layout Checklist
Selecting the right spot for your water feature installation makes all the difference between a showpiece and a maintenance nightmare.
Position your water feature where it can be enjoyed from view corridors inside and outside your home. I always recommend standing at your kitchen window, living room, or deck to imagine where you’ll most appreciate seeing and hearing the water. As one of our designers puts it, “The perfect water feature is one you can enjoy even when you’re indoors.”
Consider sun exposure carefully. If you’re planning a pond with fish and plants, aim for 4-6 hours of sunlight daily—water lilies particularly need about six hours to thrive. Too much sun, however, can encourage algae growth and increase water loss through evaporation.
Pay attention to wind patterns in your yard. Strong breezes can blow water onto seating areas and accelerate evaporation. I’ve learned this lesson the hard way when a client’s fountain regularly misted their patio furniture before we repositioned it!
Tree proximity presents a trade-off. While trees provide welcome shade, they also drop leaves, seeds, and debris that can clog pumps and filters. If your heart is set on a spot near trees, consider a pondless feature or budget for additional maintenance time.
Natural slopes can be perfect for waterfalls but challenging for ponds. Water always seeks its level, so proper grading is essential. We often use existing slopes to create dramatic cascades that would be costly to build from scratch.
Always check for underground utilities before digging—this safety step saves headaches and potential disasters. Call 811 before you dig, even for seemingly minor projects.
Most water features require electrical access for pumps and lighting. Plan for a ground-fault circuit interrupter (GFCI) outlet installed by a licensed electrician within reasonable distance of your feature.
Budgeting & Cost Drivers
When it comes to water feature installations, your investment can range from modest to magnificent depending on several key factors:
Size and complexity dramatically impact cost. A charming tabletop fountain might run just $200-$500 for a DIY installation, while an elaborate koi pond with multiple waterfalls could exceed $10,000 when professionally designed and installed.
Materials quality significantly affects both upfront costs and long-term enjoyment. Professional-grade EPDM rubber liners cost about $1.50 per square foot but can last decades longer than budget alternatives. Natural stone typically costs more than manufactured materials but provides an authentic appearance that improves with age. Pump quality varies widely—standard models for smaller features run about $100-$300, while larger, high-efficiency versions can cost $500-$1,500.
Labor typically accounts for 50-60% of professional installation costs. While DIY approaches save on labor, they increase the risk of costly mistakes. As I often tell hesitant clients, “The most expensive water feature is the one you have to install twice.”
For inspiration and expert guidance on changing your yard into a personal oasis, explore our Backyard Water Features page. And if you’re ready to jump in, consider browsing quality DIY kits that provide professional-grade components with detailed instructions.
At TMI Minnesota, we’ve helped hundreds of homeowners steer these decisions to create water features that bring joy for years to come. The sound of flowing water in your own backyard is an investment in daily tranquility that few other landscape elements can match.
Tools, Safety & Site Preparation Essentials
Getting ready for your water feature installation is a bit like prepping for a camping trip – you need the right gear and know-how before the trip begins. I’ve seen many excited homeowners dive in without proper preparation, only to find themselves making multiple hardware store runs mid-project!
Must-Have Installation Toolkit
When I help clients prepare for their water feature projects, I always recommend gathering everything before that first shovel hits the dirt:
Your basic toolkit should include a sturdy shovel (both standard and trenching types come in handy), a reliable wheelbarrow for hauling materials, and levels in both 2-foot and 4-foot sizes. Don’t forget a good tape measure, garden hose (perfect for marking outlines and filling), utility knife, and heavy-duty scissors. Some marking paint or stakes will save you headaches when laying out your design.
For the water feature itself, you’ll need protective underlayment fabric (think of it as a cushiony barrier for your liner), high-quality EPDM rubber liner (worth the investment for its durability), and a properly sized pump for your specific feature.
“The pump is the heart of your water feature – don’t skimp here,” I often tell homeowners. “A quality pump might cost more upfront but will save you frustration and replacement costs down the road.”
You’ll also need plumbing components like flexible PVC pipe and fittings, an appropriate filter system for ponds, and a skimmer box to collect debris. Don’t forget various sizes of rocks and gravel, plus waterfall foam to direct water flow exactly where you want it.

If you’re installing a pondless feature (which I often recommend for families with small children), you’ll need hollow plastic crates or a reservoir system, plus a spillway or waterfall box. As one of our experienced TMI Minnesota installers explains, “Using hollow plastic crates in the reservoir creates structural support and water storage beneath decorative rock.” This clever technique gives you all the soothing sounds and visual beauty without standing water.
Safety First & Code Compliance
Water and electricity make interesting neighbors – but potentially dangerous ones if not handled properly. Here’s how to stay safe:
Electrical safety should never be an afterthought. Always use GFCI-protected outlets for pumps and lighting – these are designed to prevent electrical shock by quickly shutting off power when they detect a problem. If you need new outdoor outlets, hiring a licensed electrician is money well spent. I’ve seen too many DIYers try to cut corners with extension cords as “temporary” solutions that become permanent hazards. When running electrical lines, bury conduit at the proper depth (typically 18″ in most areas) to meet local codes.
Before digging, make that call to 811 or your local utility marking service. This free service marks underground utilities so you don’t accidentally hit gas or electric lines – a mistake that could be costly or even deadly. One of our installation pros emphasizes, “Check for underground utilities before digging. This crucial safety step is often overlooked in DIY installations.”
Protect yourself with proper personal protective equipment – gloves to prevent blisters and cuts, safety glasses to shield your eyes, and use proper lifting techniques to save your back. Be especially careful around deeper excavations where soil can become unstable.
If you have little ones around, child safety deserves special attention. For features with standing water deeper than 2 inches, consider adding safety barriers. This is why pondless features have become increasingly popular with families – they eliminate drowning risks while still providing all the beauty and tranquility of moving water.
Don’t forget to check your local regulations before starting. Some municipalities require permits for water features, and others have restrictions on pond size or depth. If you belong to a homeowners association, review their requirements too – better to know the rules before you start than face fines or removal orders later.
At TMI Minnesota, we handle all these safety and compliance details for our clients, but if you’re going the DIY route, these precautions will help ensure your project is both beautiful and safe. For more information about changing your landscape, visit our Landscape Renovation Services page.
Step-By-Step Installation Guide
Now that you’ve planned your project and gathered the necessary tools, it’s time to roll up your sleeves and begin your water feature installation. I’ve guided hundreds of homeowners through this process, and I promise—the results are worth every drop of sweat!
Basic Steps for Successful Water Feature Installations
Start by marking your water feature’s outline using a garden hose or marking paint—this flexible approach lets you visualize and adjust the shape before digging begins. For ponds, dig to at least 18″ deep for plants only, or a minimum of 24″ if you’re dreaming of colorful koi fish darting beneath lily pads. Create graduated shelves at different depths—these natural-looking platforms provide perfect spots for various aquatic plants.
For pondless features, you’ll need a basin deep enough (typically 24-36″) to house your reservoir system. Whether you’re creating a level pond or a sloped waterfall, precision at this stage prevents headaches later!
Once excavation is complete, carefully remove any sharp rocks or roots that could puncture your liner. Then lay protective underlayment across the entire excavated area—think of this as insurance for your liner. Next, place the liner over the underlayment, allowing extra material around the edges. Don’t stress about getting every wrinkle out; most will disappear or be hidden later.
Now for the heart of your water feature—the plumbing system. Position your pump in the deepest part of the pond or at the bottom of your reservoir. Run flexible PVC pipe from the pump to your planned waterfall or fountain location. Install skimmer and filter systems according to manufacturer instructions, double-checking that all connections are secure and waterproof.
With the technical components in place, it’s time for the fun part—adding rocks and gravel! Place larger boulders first, especially along the edges and for waterfalls. These anchor your design visually and physically. Follow with medium-sized rocks to cover the liner and create natural contours, then use small gravel to fill gaps. For waterfalls, waterfall foam applied between rocks helps direct water flow exactly where you want it.
Time to add water! As your feature fills, gently pull and adjust the liner to minimize wrinkles. Once filled to the appropriate level, test your pump and adjust flow as needed. Watch carefully for leaks or water flow issues—better to catch them now than later.
Finish with landscaping touches that make your water feature truly shine. Trim excess liner, leaving at least 12″ beyond the water’s edge for security. Conceal any visible liner with rocks, plants, or mulch. Add aquatic plants if desired, and install lighting to create magical evening ambiance.
Installing a Pondless Waterfall
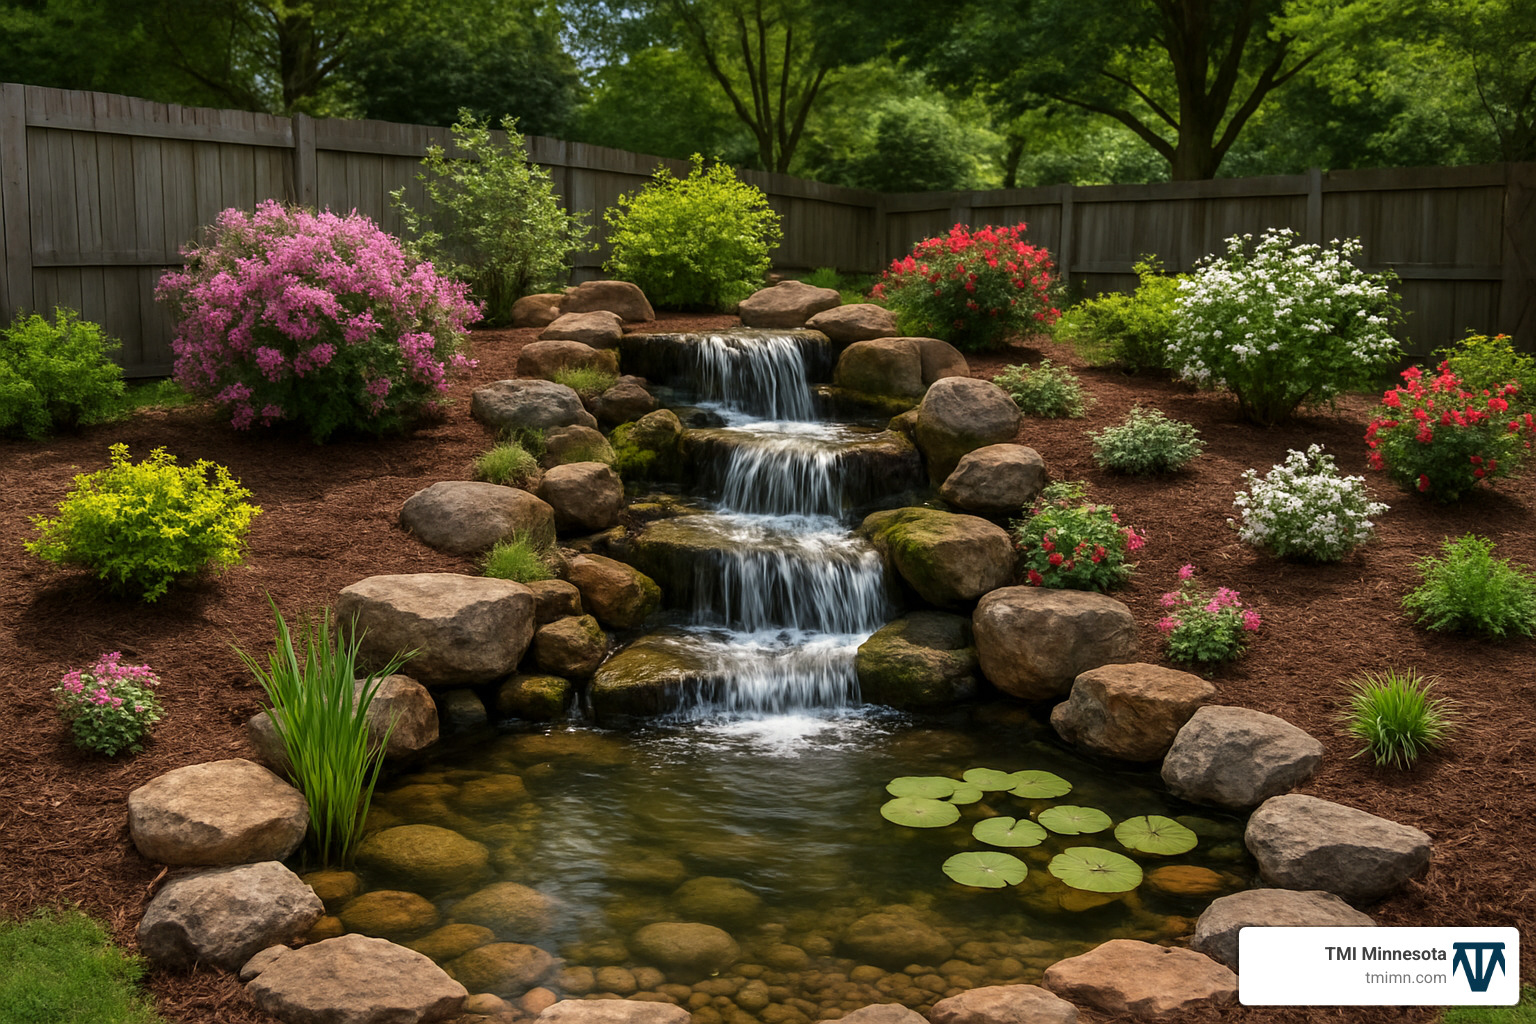
Pondless waterfalls have become Minnesota favorites for their low maintenance and safety benefits—perfect for families with small children or those who want the soothing sounds of water without a full pond commitment.
Begin by digging a basin at the base of your planned waterfall, typically 24-36″ deep. Line this basin with underlayment and liner as described earlier. Place hollow plastic crates wrapped in landscape fabric in the basin—these clever structures create space for water storage while supporting the decorative rock above.
For the waterfall itself, either construct a berm or use the natural slope of your yard. Extend the liner from the reservoir up the waterfall path, making sure there’s plenty of overlap to prevent leaks. Install a spillway box at the top of your waterfall and connect the pump in the reservoir to this spillway using flexible PVC.
When placing stones, I always remind clients that nature rarely puts the largest boulder in the center. Instead, use two large framing boulders on each side of the waterfall with a smaller “weir stone” in the center where water flows over. This mimics natural erosion patterns where water carves a path between rocks. Choose boulders at least 4″ taller than your waterfall drop for the most natural look.
As one of our clients in Maple Grove told me, “The sound of water trickling over rocks has completely transformed our backyard—it masks the highway noise and creates a peaceful retreat we use every evening.”
Installing a Patio Fountain
For smaller spaces or beginners, a patio fountain offers an accessible water feature installation that can be completed in a weekend.
Start with a perfectly level base—this is crucial for even water flow. Use pavers, concrete, or compacted gravel to create a stable foundation. If your chosen spot isn’t naturally level, take the time to make it so—your fountain will thank you with years of trouble-free operation.
For pre-formed fountains, follow the manufacturer’s assembly instructions. If you’re creating a custom fountain, place the basin first, then install the pump. Connect the pump to the fountain head or upper basin, carefully concealing the power cord according to your design. Many homeowners in Minnesota tuck the cord under pavers or disguise it with decorative stones.
Once assembled, fill with water to the recommended level and plug in the pump. This is where the magic happens! Adjust the pump speed if possible to achieve your desired sound and appearance—some prefer a gentle trickle while others love a more dramatic splash. Add water clarifiers or treatments as recommended to keep your fountain looking its best.
Finish by surrounding your fountain with decorative stones, plants, or pavers that complement your existing landscape. Consider adding low-voltage lighting to create a stunning nighttime focal point. For convenience, especially during our hot Minnesota summers, install an auto-fill valve to maintain the proper water level.
Fountains are particularly perfect for townhome patios or smaller yards where space is limited but the desire for tranquility isn’t. As one of our Minneapolis clients shared, “My morning coffee beside my new fountain has become my favorite part of the day—it’s like having a mini vacation in my own backyard.”
Ready to create your own backyard oasis? Our team at TMI Minnesota specializes in water feature installations that transform ordinary yards into extraordinary retreats. Whether you’re ready to dive in with a full pond installation or just dip your toes in with a simple fountain, we’re here to help make your water dreams a reality.
Looking for more inspiration? Check out our Backyard Water Features page or browse DIY kits if you’re feeling adventurous!
Maintenance, Troubleshooting & Seasonal Care
Congratulations on your new water feature installation! Now comes the fun part – keeping it looking gorgeous all year round. While different water features have varying needs, they all benefit from a little TLC to keep the water sparkling and everything running smoothly.
Routine Care Schedule
Taking care of your water feature doesn’t have to be complicated. In fact, many of our Minnesota homeowners tell us they find maintenance to be a relaxing weekend ritual!
A quick weekly check is your best defense against potential problems. Simply remove any floating debris, check that your water level hasn’t dropped too low, and make sure everything is flowing nicely. It’s the perfect excuse to spend a few minutes enjoying your outdoor oasis.
Monthly, you’ll want to give a bit more attention to the mechanics. Clean those pump intake screens (they can clog surprisingly fast), check and clean filters as needed, and take a walk around to spot any exposed liner edges that might need addressing. If you have aquatic plants, this is also a good time to trim away any dead or yellowing leaves.
As the seasons change in Minnesota, so do your water feature’s needs:
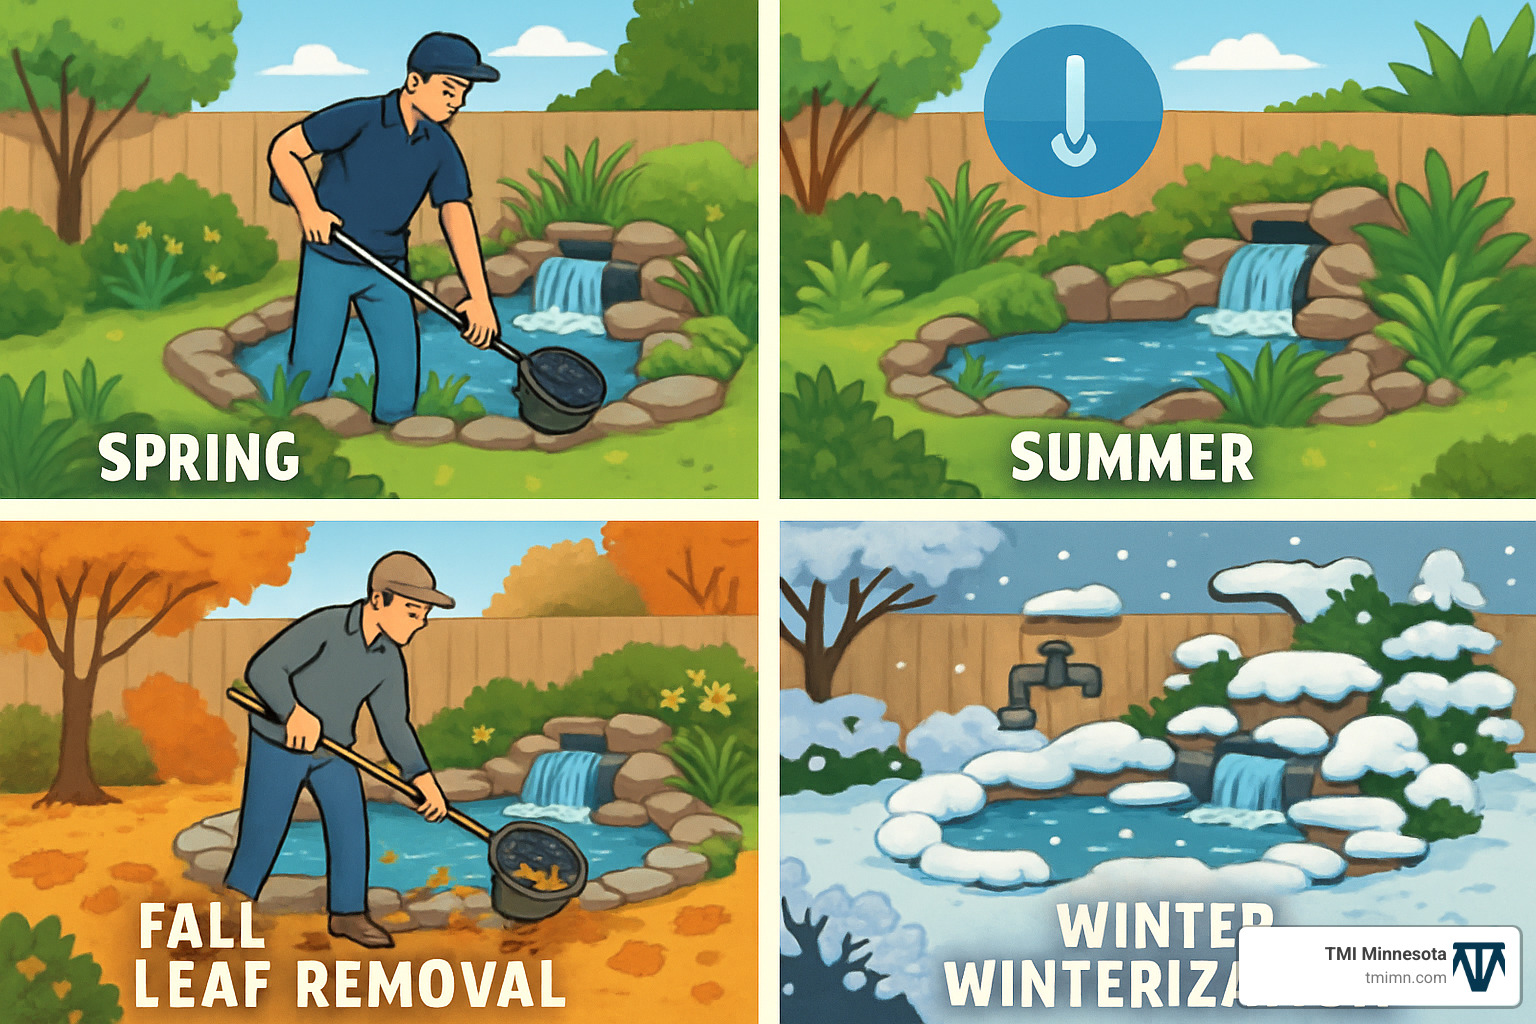
Spring is wake-up time! Clear out winter debris, restart your pumps, and add beneficial bacteria to kickstart your water’s ecosystem. Many of our clients at TMI Minnesota find this is the perfect time for a more thorough cleaning if needed.
Summer means more evaporation, so you’ll check water levels more frequently. The good news? As one client told us, “Average rainfall often compensates for evaporation in outdoor features; manual refill via garden hose is simple.” Just keep an eye on things during those hot July days!
Fall brings falling leaves, which can quickly overwhelm your system. A simple net over your feature can save hours of cleaning. This is also when you’ll want to trim back aquatic plants before winter arrives.
Winter in Minnesota requires special attention. For small fountains, it’s best to drain completely and store the pump indoors. For ponds with fish, keep a hole in the ice using a de-icer (but never break ice as shock waves can harm fish). Pondless features should have pumps removed and stored with all plumbing drained.
If you have fish, water chemistry becomes more important. Ideal pond pH should be between 7.0 and 7.2, and regular testing during warmer months is essential for healthy fish. Test kits are readily available at most garden centers.
Troubleshooting Common Issues
Even perfectly installed water features can develop hiccups. Here’s how to address the most common problems:
When you notice low water flow, first check for pump intake blockages – they’re the usual culprits. Clean or replace filter media, and make sure your pump is properly sized for your feature. Don’t forget to check for kinks or clogs in tubing that might be restricting flow.
Green water is every pond owner’s nemesis at some point! Combat algae by adding beneficial bacteria to compete for nutrients. As one of our installation experts explains, “Beneficial bacteria latch to filters at the top of the stream where they consume nutrients before algae can proliferate.” Increasing shade with floating plants and ensuring proper filtration can also make a huge difference. For persistent problems, a UV clarifier might be your best solution.
Hunting down leaks requires a bit of detective work. For ponds, adding a special dye to the water can help you spot where water is escaping. Check the liner around edges for damage, inspect all plumbing connections, and look for suspiciously damp areas around your feature. Most leaks are easily fixed with patches or sealant once located.
When facing pump failure, first check the basics – electrical connections and GFCI outlets. If power isn’t the issue, remove and clean the pump impeller, which can become clogged with debris. Pumps typically last 3-5 years, so if yours is older, it might simply be time for a replacement. Many of our clients at TMI Minnesota find that proactively replacing pumps every few years saves the headache of unexpected failures.
For more complex issues or if you’d rather leave maintenance to the professionals, our Landscape Renovation Services can help keep your water feature in pristine condition year-round.
Minnesota’s climate presents unique challenges for water feature installations, particularly in winter. But with proper preparation, your water feature can weather our harsh winters and be ready to delight again in spring. The key is proper winterization before the first deep freeze – something our team at TMI Minnesota specializes in for clients who prefer professional assistance.
A well-maintained water feature isn’t just beautiful – it’s also more energy-efficient and will last substantially longer. Think of maintenance as protecting your investment while ensuring your backyard oasis remains the envy of the neighborhood for years to come!
Enhancing Aesthetics & DIY vs Professional Decisions
The beauty of your water feature installation extends beyond the water itself. Thoughtful landscaping and design choices can transform a simple water feature into a breathtaking focal point that makes your entire outdoor space shine.
Landscaping to Lift Water Feature Installations
When it comes to creating a truly magical water feature, the surrounding landscape makes all the difference. As one of our designers often says, “The best water features are the ones that look like they’ve been there forever.” This natural, integrated look doesn’t happen by accident—it requires thoughtful planning.
Natural stone selection is perhaps the most important element. We’ve found that using locally sourced stone not only supports Minnesota businesses but also ensures your water feature looks like it belongs in our landscape. Those weathered, naturally-aged stones with their horizontal bedding planes create that authentic “been there forever” appearance that’s impossible to fake. I always recommend arranging stones in odd-numbered groupings—threes or fives—rather than symmetrical patterns, as nature rarely creates perfect symmetry.
Plants are your best friends when it comes to softening the edges of any water feature. Around pond edges, moisture-loving plants like iris, cardinal flower, and various sedges thrive beautifully. For the drier areas surrounding your feature, drought-tolerant natives prevent the need for constant watering. I’ve seen dramatic changes when homeowners incorporate plants with year-round interest—spring blooms, summer textures, fall colors, and winter structure keep your water feature looking amazing through all of Minnesota’s distinct seasons.
One common mistake I see in DIY water feature installations is relying solely on gravel around a pond’s edge, which can look harsh and obviously man-made. Instead, try blending mulch, interesting driftwood pieces, and boulders of varying sizes around the perimeter. Allow some plants to cascade over the edges, creating those soft transitions that make the feature look established and natural.

Don’t forget the magic of good lighting! A water feature that disappears after sunset is missing half its potential. Strategically placed underwater lights highlight the movement of water and create dancing reflections that can be mesmerizing. Warm white LED lights create that perfect moonlight effect, while path lighting ensures safety and extends the usability of your space well into the evening. As one client told me after we added lighting to their waterfall, “It’s like having two completely different features—one for day and another for night.”
DIY vs Professional: Final Call
The big question: Should you install your water feature yourself or hire professionals? This decision comes down to several important factors.
DIY can be incredibly rewarding if you have the right circumstances. Many of our clients who chose the DIY route tell us there’s nothing quite like the satisfaction of saying “I created this with my own hands.” If you’re considering the DIY approach, you’ll likely succeed if you’re tackling a relatively simple feature like a small fountain or preformed pond, have some experience with similar projects, own (or can rent) the necessary tools, and genuinely enjoy hands-on outdoor projects.
On the other hand, professional installation makes sense for more complex features like large ponds or multi-level waterfalls. As one of our installers likes to say, “Using steel and concrete makes koi ponds as structurally sound as swimming pools”—a level of construction that’s difficult to achieve without specialized equipment and expertise. Professional installation also comes with warranty protection and the confidence that electrical and plumbing connections are properly handled.

Yes, there’s a significant cost difference—professional installation typically runs 2-3 times more than DIY. But that premium buys you expertise, efficiency, and often warranties that protect your investment. We’ve unfortunately seen many failed DIY installations where homeowners tried to save money by using inexpensive plastic liners, only to face leaks and failures within a year or two.
Time is another important consideration. A professional team might complete in days what would take a DIY homeowner several weekends. If you’re hoping to enjoy your water feature sooner rather than later, professional installation might be worth the investment.
Here at TMI Minnesota, we’ve helped many Twin Cities homeowners decide whether their dream water feature is a good DIY candidate or would benefit from professional installation. We’re always happy to provide consultations that help you make this important decision based on your specific situation, skill level, and goals for your backyard oasis designs.
The perfect water feature transforms not just your landscape, but how you experience your outdoor space. Whether you choose DIY or professional installation, the sound of moving water and the beauty of a well-designed feature will bring years of enjoyment to your Minnesota home.
Conclusion
There’s something magical about the sound of flowing water in your own backyard. It’s not just a visual change—it’s a complete shift in how you experience your outdoor space. When your water feature installation is complete, you’ll find yourself drawn outside more often, lingering longer, and feeling more connected to your home environment.
Whether you chose a simple patio fountain that fits neatly on your deck, a dramatic pondless waterfall cascading down a natural slope, or a complete ecosystem pond teeming with colorful fish and water lilies, you’ve created something special. As one of our Minneapolis clients recently told me, “Having a water feature in the yard is like having your own year-round personal ‘staycation.'” I couldn’t agree more.
As you start on your water feature journey, keep these insights in mind:
Planning truly is everything when it comes to successful water feature installations. The time you invest upfront considering location, size, and feature type will pay dividends for years to come. I’ve seen hastily planned projects lead to frustration, while thoughtful ones bring joy for decades.
The quality of your materials matters tremendously. That professional-grade EPDM liner might cost more initially, but it will outlast cheaper alternatives by 15+ years. The same goes for pumps, filters, and other components—investing in quality now prevents headaches later.
Creating natural-looking water features requires intentional design choices. Notice how streams in nature never flow in straight lines? How waterfalls typically form between larger boulders rather than over them? These subtle details make the difference between a feature that looks artificial and one that appears to have always been part of your landscape.
Maintenance becomes second nature once you establish a routine. A few minutes each week and slightly longer sessions monthly will keep your water feature looking and functioning beautifully. Many of our clients tell us they actually enjoy these maintenance moments as peaceful “me time” in their gardens.
DIY installation is absolutely within reach for many homeowners. With proper guidance, determination, and a willingness to learn, you can create a stunning water feature that brings pride every time you see it. The satisfaction of saying “I built that” is immeasurable.
Here at TMI Minnesota, we’re passionate about helping Twin Cities homeowners create tranquil outdoor spaces that improve daily living. Our Minnesota climate presents unique challenges and opportunities for water feature installations, and we’ve developed specialized techniques to ensure your water feature thrives through our distinctive seasons.
Whether you’re tackling installation yourself or seeking professional assistance, we’re here to provide the guidance, materials, and support you need to transform your yard into the peaceful retreat you’ve been dreaming of.
Ready to get started on your water feature journey? Learn more about changing your landscape or visit our backyard water features page for inspiration and guidance specific to Minnesota’s unique climate and conditions.
The gentle splash of water awaits—let’s bring that special tranquility to your outdoor space together.