
You're usually not looking at failed paver joints for the first time when you search this topic. The patio looked fine last season. Now the joints are thinning out, weeds are poking through, a few pavers feel loose, and you're wondering whether this is a simple weekend repair or the start of a much bigger problem.
That's the right question to ask.
A lot of polymeric sand joint repair and sealing guides jump straight to pouring new sand. In practice, that's where many repairs go wrong. Fresh sand can tighten up a healthy patio, but it won't fix a base that's moving, holding water, or letting pavers settle. Before you buy material, figure out why the joints failed. That one step saves the most money, the most labor, and the most frustration.
Diagnosing Your Paver Joint Problems
Weeds, open joints, and loose sand are symptoms. They are not the diagnosis.
If the joint material wore down over time, a full clean-out and re-sand can work well. If the pavers have dropped, tilted, or keep losing joint sand in the same area, the issue may be below the surface. Practical installation guidance says polymeric sand works best only when the joint is fully cleaned out and refilled to a minimum depth, typically about 1 inch to 1.5 inches, and low or sunken pavers should be corrected before re-sanding, as noted in this re-applying polymeric sand guide.
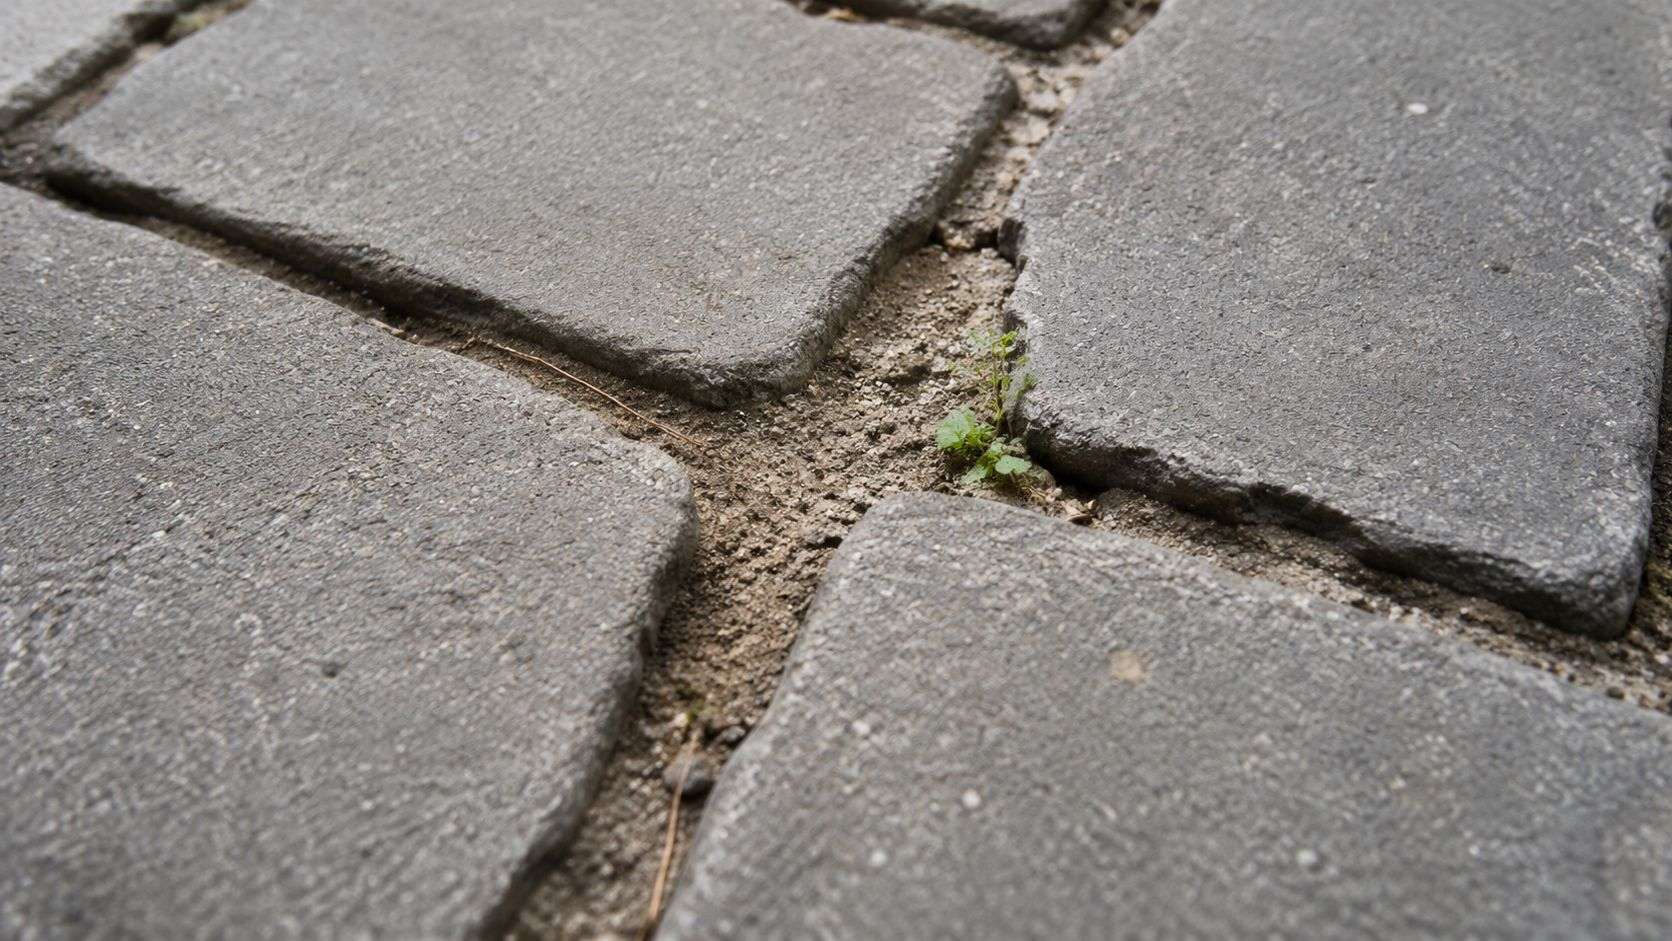
Signs you likely have a joint problem only
Some patios are good candidates for repair because the surface is still structurally sound. Look for these conditions:
- Pavers feel solid underfoot. They don't rock when you step near the edge.
- Joint loss is fairly even. You're seeing general erosion instead of one problem corner failing over and over.
- Surface stays mostly level. You don't notice dips, birdbaths, or obvious settlement.
- Water moves off the patio. It doesn't sit in the same area after rain.
When those boxes are checked, polymeric sand joint repair and sealing is usually a maintenance job, not a reconstruction job.
Signs the base may be the real problem
If the same section keeps opening up, stop thinking like you're replacing filler and start thinking like you're troubleshooting a system.
Use this quick field checklist:
- Check for settlement. Stand back and sight across the surface. Any low pocket, tipped edge, or sunken band usually points to movement below the pavers.
- Watch water after rain. If water hangs in one area, the joint failure may be tied to drainage.
- Press on individual pavers. Movement at the corners often means the bedding or base support isn't holding.
- Look at edges. Spreading, drifting, or looseness near borders can signal restraint problems.
- Note repeat repairs. If you've added joint material before and it keeps disappearing, the sand probably isn't the root issue.
Practical rule: If pavers are moving, adding new polymeric sand is a finish repair on top of a structural problem.
Drainage is a common hidden cause. Water that runs across the surface or sits beneath it will keep stressing the joints. If your patio has recurring washout, review how grade and runoff affect hardscapes. This overview of hardscape installation for drainage and erosion control gives a useful framework for what healthy water movement should look like.
When to repair and when to reset
A capable homeowner can usually handle re-sanding when the pavers are level, the joints can be cleaned to proper depth, and the surface dries well.
You should pause the DIY plan if you find settled areas, chronic moisture, or pavers that won't stay locked. In that case, repair the structure first. Otherwise, the new joint material may look good for a short time and fail for the exact same reason the old material failed.
Preparing for a Flawless Repair
Most failed polymeric sand jobs don't fail because of the bag. They fail because of the prep.
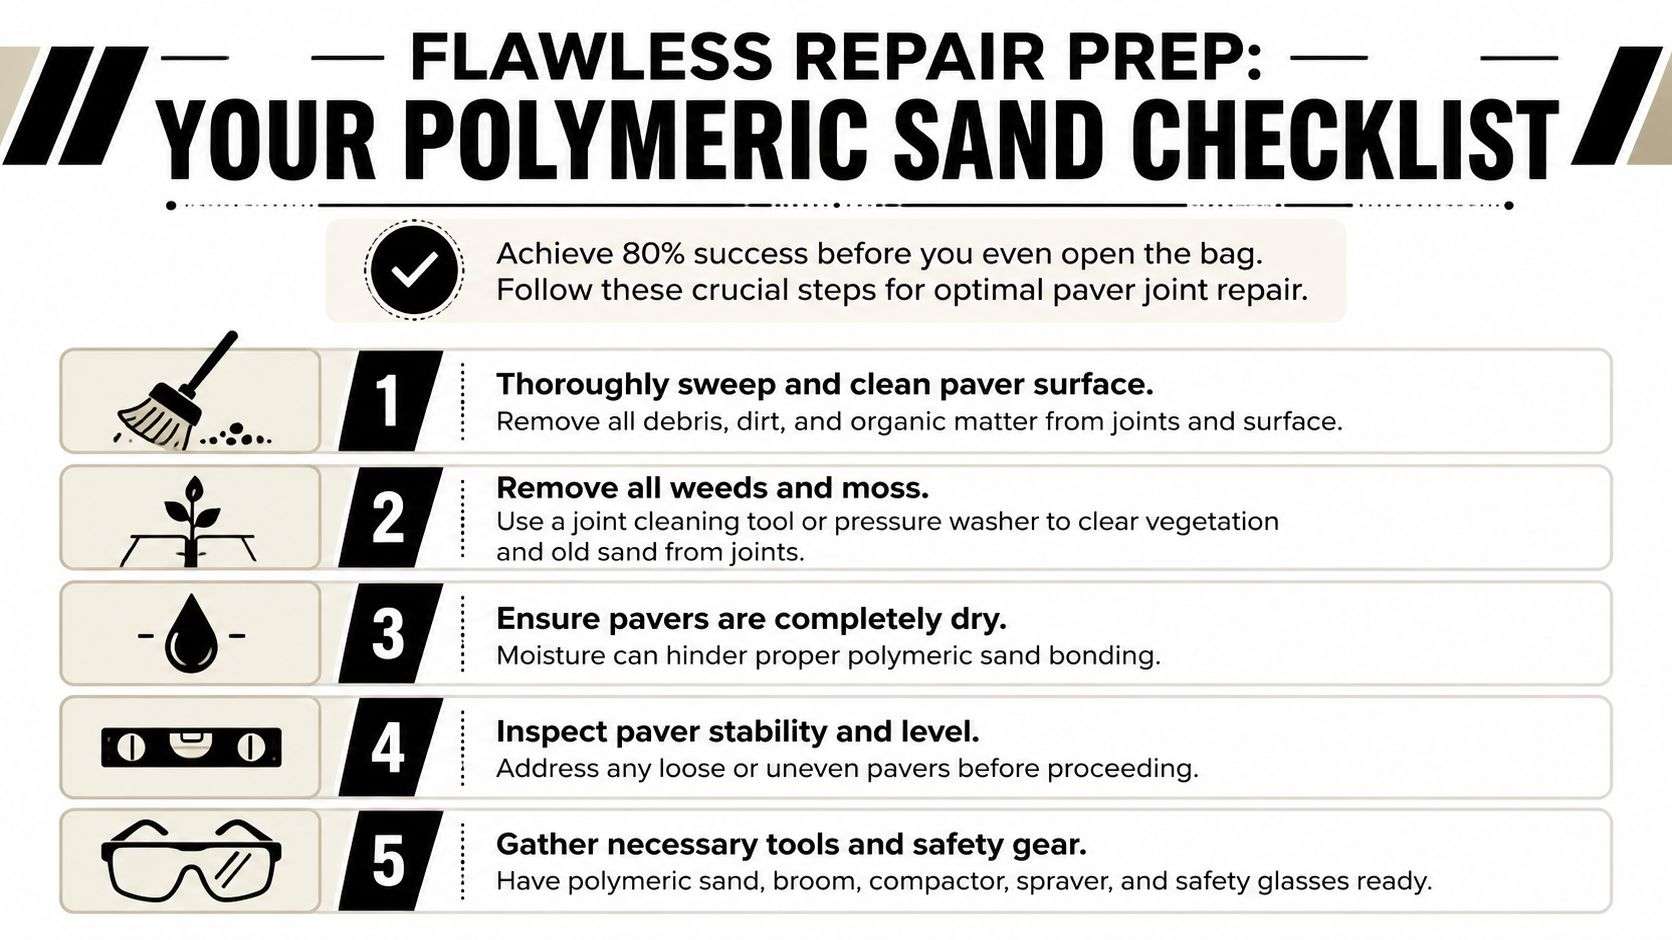
New polymeric sand needs clean joint walls, real joint depth, and dry conditions. If old material stays packed in the bottom, if roots are left in place, or if the joints are still damp, the new sand won't bond the way it should. You'll get weak spots, surface crusting, haze, or early washout.
Clean deeper than the surface
A light scraping pass isn't enough. This is a full clean-out.
Your goal is to remove loose joint material, weeds, moss, dirt, and organic debris down to a depth that can hold fresh sand properly. On many patios, that means using more than one method. A pressure washer can open the joints fast, but it also creates slurry you'll need to clear out. A joint scraper or hook tool helps in tight areas. A shop vacuum is useful once debris is loosened.
Focus on these areas first:
- Weed-heavy joints. Pull roots, not just tops.
- Shaded sections. Moss and damp debris often stay packed there.
- Low spots. These usually hide mud or soft material at the top of the joint.
- Textured pavers. Dust and old polymer can cling to the surface and edges.
Old sand left in the bottom of the joint is one of the quietest ways to ruin a repair. The top may harden, but the bond won't be right where it matters.
Dry conditions are not optional
Polymeric sand and moisture don't mix until you're ready to activate the product. Before that point, the pavers and joints need to be completely dry.
That means more than “looks dry.” Damp joint walls can trigger premature activation, cause clumping during sweeping, and leave residue on the paver face. If you pressure washed, give the surface time. If there was overnight dew, wait until the joints are fully dry. If a shaded area stays cool and dark, check it by hand before you start.
A lot of homeowners rush this step because the patio surface looks ready. The joint interior often isn't.
Gather tools before opening the bag
You'll work better if everything is on site and staged before the first pour. A typical setup includes:
- Joint cleaning tools for stubborn material and roots
- Push broom and soft broom for sweeping joints and clearing residue
- Leaf blower for removing dust from the surface
- Plate compactor if the paver surface is large enough to justify it
- Hose with shower-style nozzle for activation
- Safety glasses and basic protective gear for cleaning and blowing debris
If your pavers also need a thorough surface wash before you start, it helps to look at how exterior cleaning pros approach buildup, runoff, and surface prep. This guide to Cultivate House Detailing driveway care is useful for understanding safe cleaning habits before joint work begins.
Fix instability before sand
Don't bury a movement problem under fresh material. If a paver rocks, sits low, or has an edge that's clearly out of line, pull it and correct that area first. Polymeric sand supports interlock. It does not replace proper support beneath the paver.
That one decision separates a durable repair from a cosmetic patch.
The Polymeric Sand Application Process
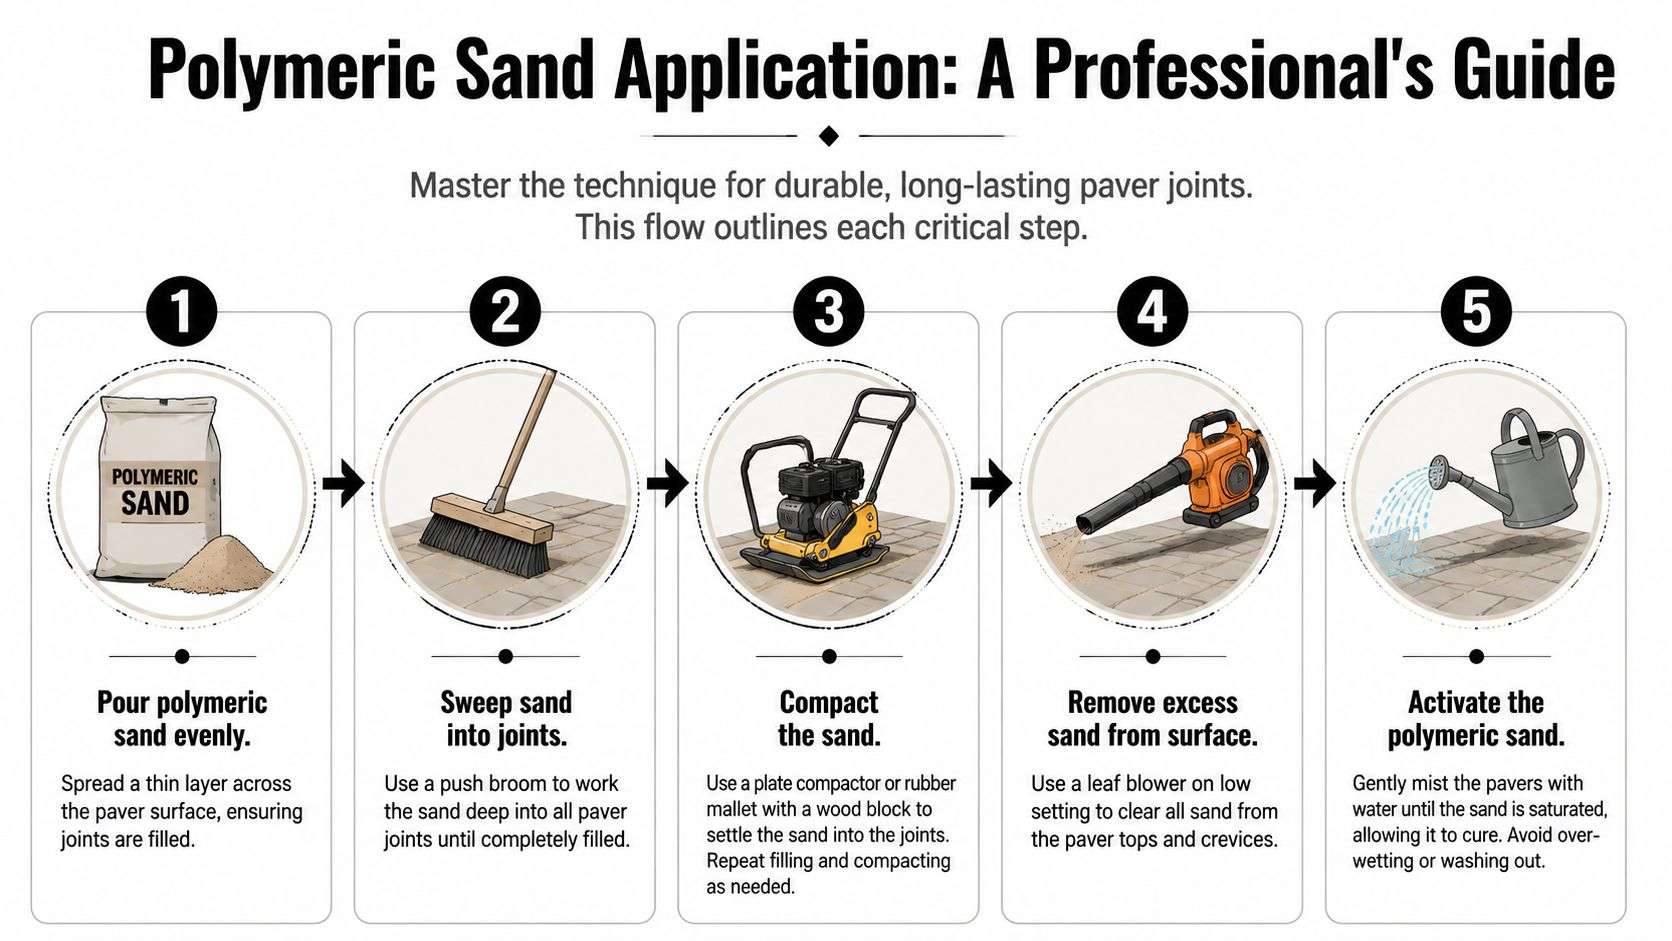
Once the joints are cleaned to full depth and the surface is dry, the work becomes technical. This is where careful sequence matters. Polymeric sand joint repair and sealing is not just sweeping material into cracks. It's a fill, compact, clean, and activate process.
Manufacturers specify that joints should generally be filled to about 1/8 inch below the paver surface with a minimum depth of 1 to 1.5 inches, and Techniseal's guidance includes activating a 200 sq. ft. section for 30 seconds, letting it absorb, then wetting again for 30 seconds until saturated in controlled passes, as shown in Techniseal's product data sheet.
Fill the joints completely
Pour out a manageable amount of sand and sweep it across the surface with a push broom. Change directions as you sweep so the sand works into the full joint, not just the top opening.
Don't stop when the joints look full from above. Keep working material in until the sand stops dropping. On many patios, the first pass only bridges the top. The primary fill happens after more sweeping and compaction.
A few things matter here:
- Keep the surface dry while filling. Any moisture will make the sand drag and clump.
- Leave the sand slightly low. Stop at about 1/8 inch below the paver face.
- Watch joint consistency. If one section takes much more sand than the rest, re-check for a void, washout pocket, or low paver.
If you want a reference for how paver systems are built to work as a whole, this overview of how to install hardscape pavers helps explain why the joints, bedding, and base all depend on each other.
Compact before you activate
This is the step many DIY repairs skip, and it shows later.
Compaction settles the sand deeper into the joint so you don't leave hidden voids under a hard top layer. Practical guidance commonly recommends using a vibrating plate compactor with at least 5,000 lb of force, working in sections no larger than about 10 ft x 10 ft, and waiting up to about 30 days before sealing so the sand can fully cure, according to this installation video guidance.
If you have a broad paver area, use a plate compactor with a protective pad suited to the paver surface. After compacting, sweep in more sand where the joints dropped, then compact again if needed. That repeat cycle is normal.
The joint should be full because the sand is packed deep, not because it's mounded at the surface.
For small repairs where a compactor isn't practical, you can improve the fill with repeated brooming and careful tapping, but that's still a compromise. Full-depth repair performs better when the sand is consolidated mechanically.
Remove every trace from the surface
Before water touches the patio, the paver faces need to be clean.
Use a broom first, then a leaf blower on a controlled setting to clear off loose dust and grains from the tops, edges, and texture of the pavers. Pay extra attention to rough or tumbled surfaces. Those textures trap polymer dust, which can cure into haze if you rush.
This part feels slow. It's supposed to.
Activate with control, not force
Water is what locks the joint. It's also what ruins the job when applied carelessly.
Use a shower setting, not a hard stream. Work small areas so you can watch how the joints respond. Controlled wetting guidance commonly says to stop when the joints stop accepting water and a light foam appears. Too much water can float polymer onto the paver face and erode the joint. Too little water can leave the top hardened and the bottom uncured. For larger jobs, practical guidance often keeps work areas to no more than 10 ft x 10 ft at a time, based on field instruction from installers.
A good activation rhythm looks like this:
- Mist the section evenly with a shower nozzle.
- Let the water absorb instead of flooding the whole patio at once.
- Repeat the pass until the joint is saturated.
- Watch the surface for runoff carrying polymer dust.
- Stop when the joints have taken the water and don't keep forcing more in.
Let the cure happen
After activation, protect the area from traffic, irrigation, and any unnecessary disturbance. The material needs time to harden through the joint column. This is why a rushed same-day sealer application is a mistake. Let the sand do its job first.
Choosing and Applying a Joint Sealer
Sealer is a separate decision from the sand itself. It doesn't replace proper joint installation, but it can help protect the finished surface and keep maintenance more predictable.
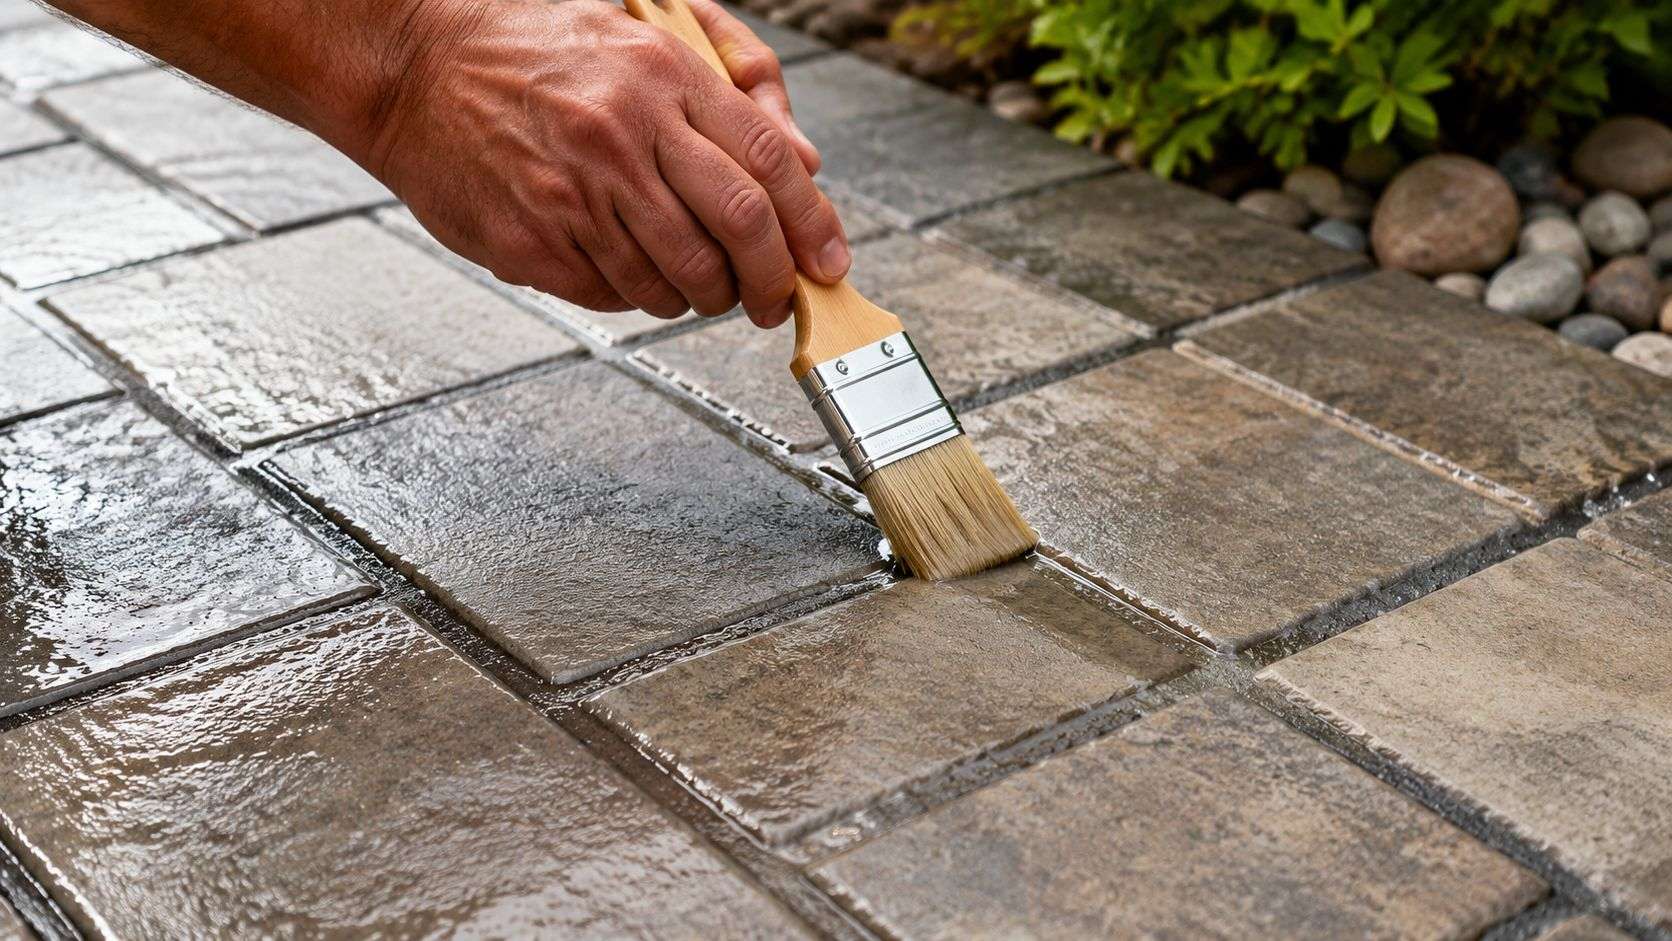
The main reason homeowners seal after polymeric sand joint repair and sealing is simple. They want to reduce water intrusion, slow surface weathering, and make cleanup easier. A sealer can also change the appearance of the pavers, which matters just as much to some homeowners as the protection.
Penetrating sealer versus film-forming sealer
These two categories behave differently, and the right choice depends on your pavers and your expectations.
| Sealer type | What it does | Where it works well | Trade-off |
|---|---|---|---|
| Penetrating sealer | Soaks into the surface and leaves a more natural look | Homeowners who want protection without changing the paver appearance much | Less visual enhancement |
| Film-forming sealer | Creates a protective layer on top and can deepen color | Patios where you want richer color or a wet-look finish | Can show lap marks, buildup, or uneven wear if applied poorly |
A natural-look patio usually points toward a penetrating product. If the pavers look faded and you want more color pop, a film-forming sealer may make more sense.
How to choose the right one
Start with the paver surface itself. Smooth concrete pavers, textured concrete pavers, clay brick, and natural stone don't all react the same way. Some surfaces absorb sealer quickly. Others show sheen or residue more readily.
Use this selection approach:
- Choose for appearance first if the patio's look is your priority.
- Choose for ease of maintenance if you want simpler cleanup and less concern about staining.
- Test a small area before committing to the whole surface.
- Read compatibility notes for your paver type and any prior treatment on the surface.
A sealer should solve a problem you actually have. It shouldn't create a finish you never wanted.
Applying sealer without streaks
Wait until the polymeric sand has fully cured based on the product guidance you're following. Then clean the surface again so you're not locking in dust, residue, or organic film.
For most homeowners, the key habits are straightforward:
- Apply to a clean, dry surface
- Use the manufacturer's recommended tool, often a sprayer, roller, or pad applicator
- Keep a wet edge so sections blend together
- Avoid over-application, especially with film-forming products
- Stay off the surface while it dries
The most common sealing mistakes are rushing cure time, applying too much, and working in conditions that dry the product unevenly. The pavers usually tell the story right away. If it looks blotchy while wet, don't assume it will magically level out later.
Troubleshooting Common Repair Mistakes
Even careful work can go sideways. The good news is that most polymeric sand problems have a clear cause. The bad news is that a few of them require rework, not just touch-up.
Use the table below to match what you're seeing with the likely issue behind it.
Common Polymeric Sand Issues and Fixes
| Problem | Likely Cause | Solution |
|---|---|---|
| White haze on paver surface | Excess polymer dust or sand was left on the paver face before activation | Clean the surface as directed by the product manufacturer. If the haze is cured in place, you may need a product-specific remover and more detailed surface cleaning before any sealing |
| Joints cracked after curing | Sand wasn't fully activated through the joint depth, or the joint wasn't filled and compacted properly | Remove failed material in affected joints, clean to proper depth, refill, compact, and reactivate carefully |
| Joint sand washed out | Too much water during activation, poor drainage, or repeated water concentration in one area | Rework the joints after the area is dry. If runoff or pooling caused the failure, correct that condition first |
| Top looks hard but sand below is loose | Underwatering created a crust on the surface without curing the lower joint | Remove the weak material and repeat the repair with slower, controlled activation |
| New weeds returning quickly | Organic material or old root matter stayed in the joints, or the joint failed and opened again | Clean out the joints fully and remove the source material before re-sanding |
| Sand won't stay in one section | That area may have paver movement, settlement, or a compromised base | Lift and correct the affected area instead of repeating surface repairs |
| Sealer looks blotchy | Uneven application, dirty surface, or sealer type not suited to the paver finish | Let it cure as directed, then evaluate whether the surface needs evening out, stripping, or a maintenance coat |
| Edges keep loosening | Border movement or weak edge restraint | Repair the restraint condition before repeating joint work |
A few problem patterns matter more than others
If you see haze, think cleanup before water.
If you see cracks and hollow joints, think poor saturation or poor consolidation.
If the same section keeps failing, stop blaming the sand. At that point, you're diagnosing structure, drainage, or contamination in the joint.
For paver surfaces that also carry vehicle traffic, stains can complicate repairs because oil and residue interfere with cleanup and sealing. If that applies to your project, this guide on how to remove oil from block paving driveway is a useful companion before you reseal.
When a repair fails in the exact same location twice, the location is telling you something. Listen to it.
When to redo instead of patch
Patch repairs work best for isolated damage on an otherwise healthy field. They don't work well when the surface has broad contamination, recurring moisture, or widespread joint loss.
In those cases, the cleaner and cheaper move is often to reopen the area properly and do the process again from prep through activation. Patching over a bad bond usually just delays the redo.
Your Long-Term Plan and When to Call Task Masters Inc
A patio can look fine from ten feet away and still be heading toward another joint failure. The pattern usually shows up after a hard rain, a freeze-thaw cycle, or a season of traffic. Sand starts disappearing in the same lanes, one border gets loose, and a few pavers begin to rock underfoot. At that point, the question is no longer whether to add more polymeric sand. Instead, the question becomes why that section keeps opening up.
Long-term care starts with that distinction. Some patios only need periodic joint maintenance. Others are showing early signs of base movement, edge failure, or drainage problems that keep breaking the bond no matter how carefully the sand is installed.
What long-term care actually looks like
A healthy paver surface still needs attention. Check the joints a few times a year, especially after winter and after heavy storms. Sweep off debris before it packs into the joints, pull weeds before roots spread, and pay attention to how water moves across the surface. Small changes matter.
Watch for these early warning signs:
- Joint sand sitting lower than surrounding areas
- Borders or soldier courses starting to separate
- Water pooling in places that used to drain
- Individual pavers shifting under foot traffic
- Sealer wearing unevenly or losing water resistance
Those signs help you catch the cause before a minor repair turns into a reset of a larger area.
When DIY stops making sense
Homeowners can handle isolated joint loss on a stable patio. The job changes once the problem involves movement, moisture, or repeated failure in the same spot.
Bring in a pro if you notice:
- Pavers settling, tipping, or rocking
- The same joints washing out after each storm
- Joint lines that cannot be cleaned to proper depth
- A large area where timing, weather, and activation become hard to control
- A repair that also needs sealer, with no room for haze or finish mistakes
That call can save money. Re-sanding over a structural problem usually buys a little time, then fails again. A proper diagnosis tells you whether the fix belongs at the joint surface or below the pavers.
For homeowners comparing hardscape surfaces more broadly, A Homeowner's Guide to Concrete Driveways is a helpful outside resource for thinking through durability, maintenance expectations, and surface performance in high-use areas.
How Task Masters Inc fits into the decision
For Twin Cities homeowners dealing with more than simple joint erosion, Task Masters Inc. handles diagnosis, paver correction, re-sanding, and sealing as part of hardscape repair work. That matters when the failed joints are only the visible symptom.
If your pavers are flat, locked in place, and draining properly, a careful DIY repair can hold up well. If the patio is moving, staying wet, or breaking down in the same locations, treat it like a construction issue first. That is usually the difference between a repair that lasts and one you end up repeating next season.
If your patio, walkway, or driveway is losing joint sand and you're not sure whether it needs re-sanding or deeper repair, Task Masters Inc. can help you sort that out and map the next step. A proper diagnosis saves time, avoids repeat failures, and gives you a hardscape that stays locked together for the right reasons.