
Transform Your Outdoor Space with Hardscape Pavers
If you’re looking to how to install hardscape pavers, here’s a quick overview of the process:
- Plan and mark your project area (call 811 first!)
- Excavate 7-9 inches below finished grade
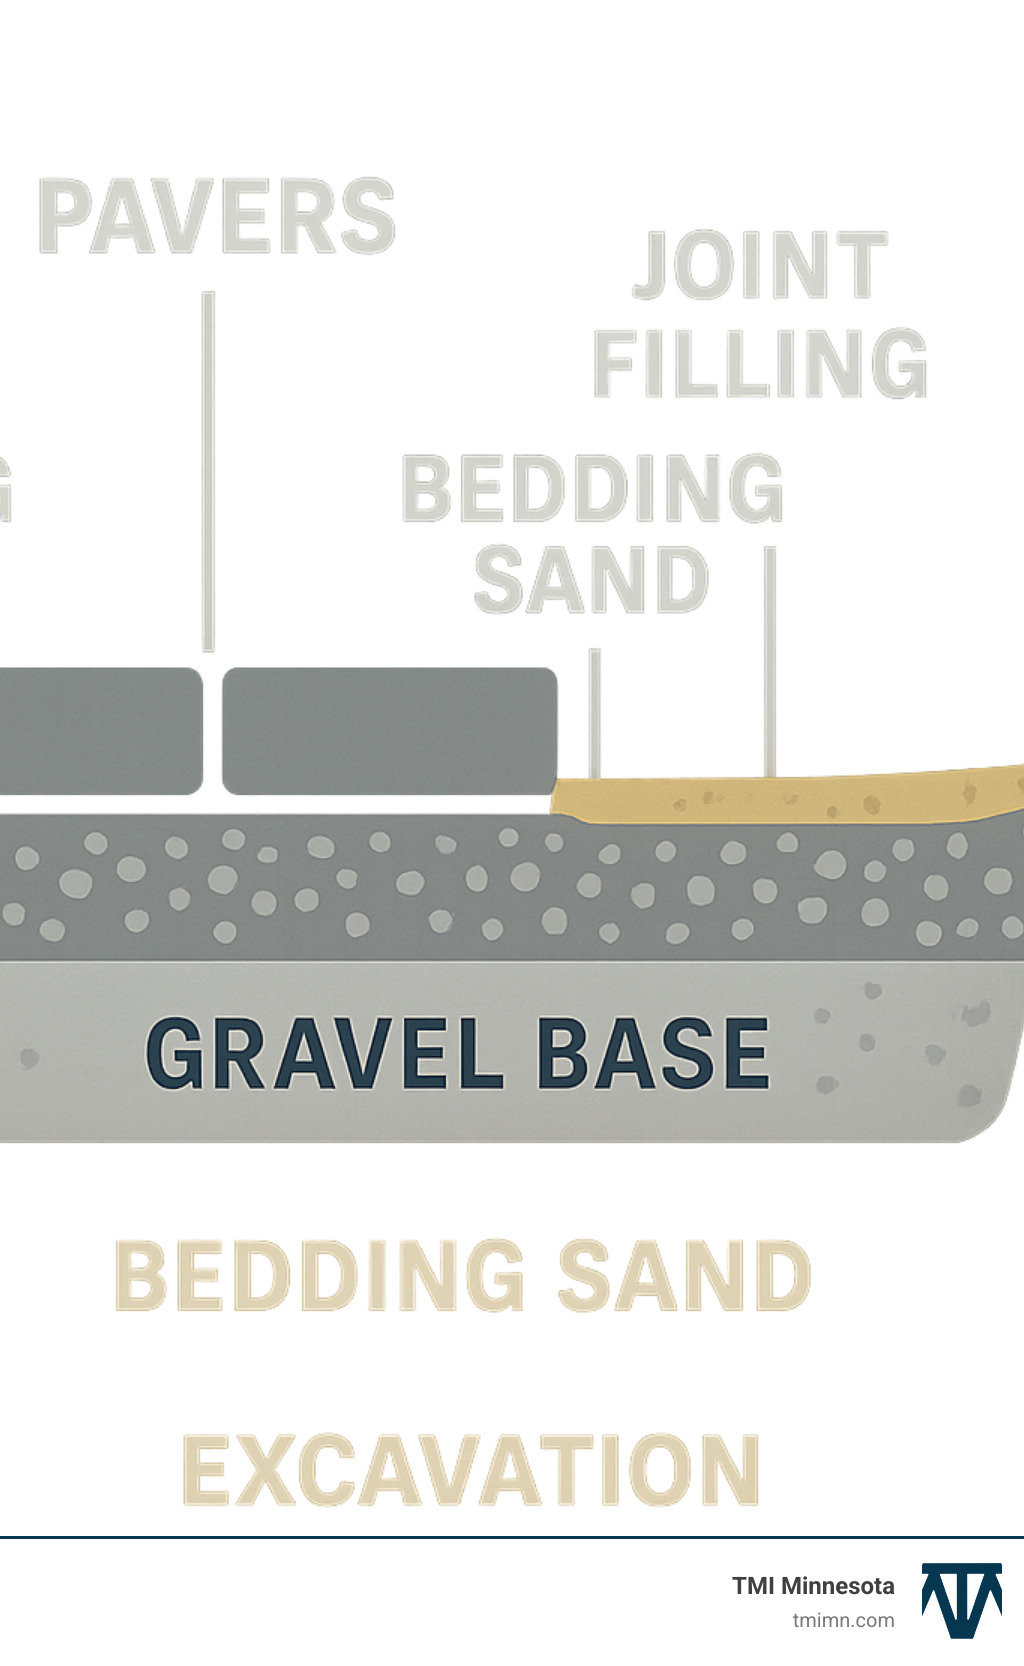
- Add and compact 4-6 inches of gravel base (12-14 inches for driveways)
- Install edge restraints
- Spread 1 inch of bedding sand and screed level
- Lay pavers in your chosen pattern, leaving 2-5mm gaps
- Cut edge pieces to fit
- Sweep in polymeric sand and compact
- Mist with water to activate the sand
How to install hardscape pavers is a project that can transform your outdoor living space from bland to beautiful in a single weekend. Whether you’re dreaming of a new patio for entertaining, a walkway through your garden, or a driveway that boosts curb appeal, paver installation follows the same core principles: proper planning, thorough base preparation, and careful installation.
“The primary reason for paver failure is a weak base,” says industry expert Darrel Silverthorn, highlighting why proper installation matters. A well-installed paver surface can last decades with minimal maintenance, while cutting corners often leads to shifting, settling, and weed growth within months.
I’m Christopher Deanovic, Operations Leader at Task Masters, and I’ve overseen countless hardscape projects where how to install hardscape pavers properly made the difference between stunning, long-lasting results and disappointing outcomes that required costly repairs. My experience with Minnesota’s challenging freeze-thaw cycles has taught me that following the correct installation process is non-negotiable for creating outdoor spaces that stand the test of time.
Explore more about how to install hardscape pavers:
Plan Your Project Like a Pro
Success with how to install hardscape pavers starts long before the first stone is laid. Good planning prevents headaches and saves both time and money—something I’ve learned from helping countless homeowners transform their outdoor spaces.
First and most important: call 811 before you dig. This free service marks underground utilities so you don’t accidentally hit gas, water, or electrical lines while excavating. In the Twin Cities area, expect a 2-3 business day wait for marking, so build this into your timeline.
When designing your layout, think about how you’ll actually use the space. Are you creating an intimate patio for morning coffee or a spacious area for entertaining? Furniture needs breathing room—dining sets typically need 10-12 feet of clearance, while conversation areas require at least 6-8 feet to feel comfortable.
Proper drainage is non-negotiable for paver installation. Industry standards call for a 2% slope (which translates to a ¼-inch drop per foot) away from your home or any structures. This gentle grade prevents water pooling that can damage foundations and cause paver settling over time. You can learn more about proper drainage slope to ensure your project lasts.
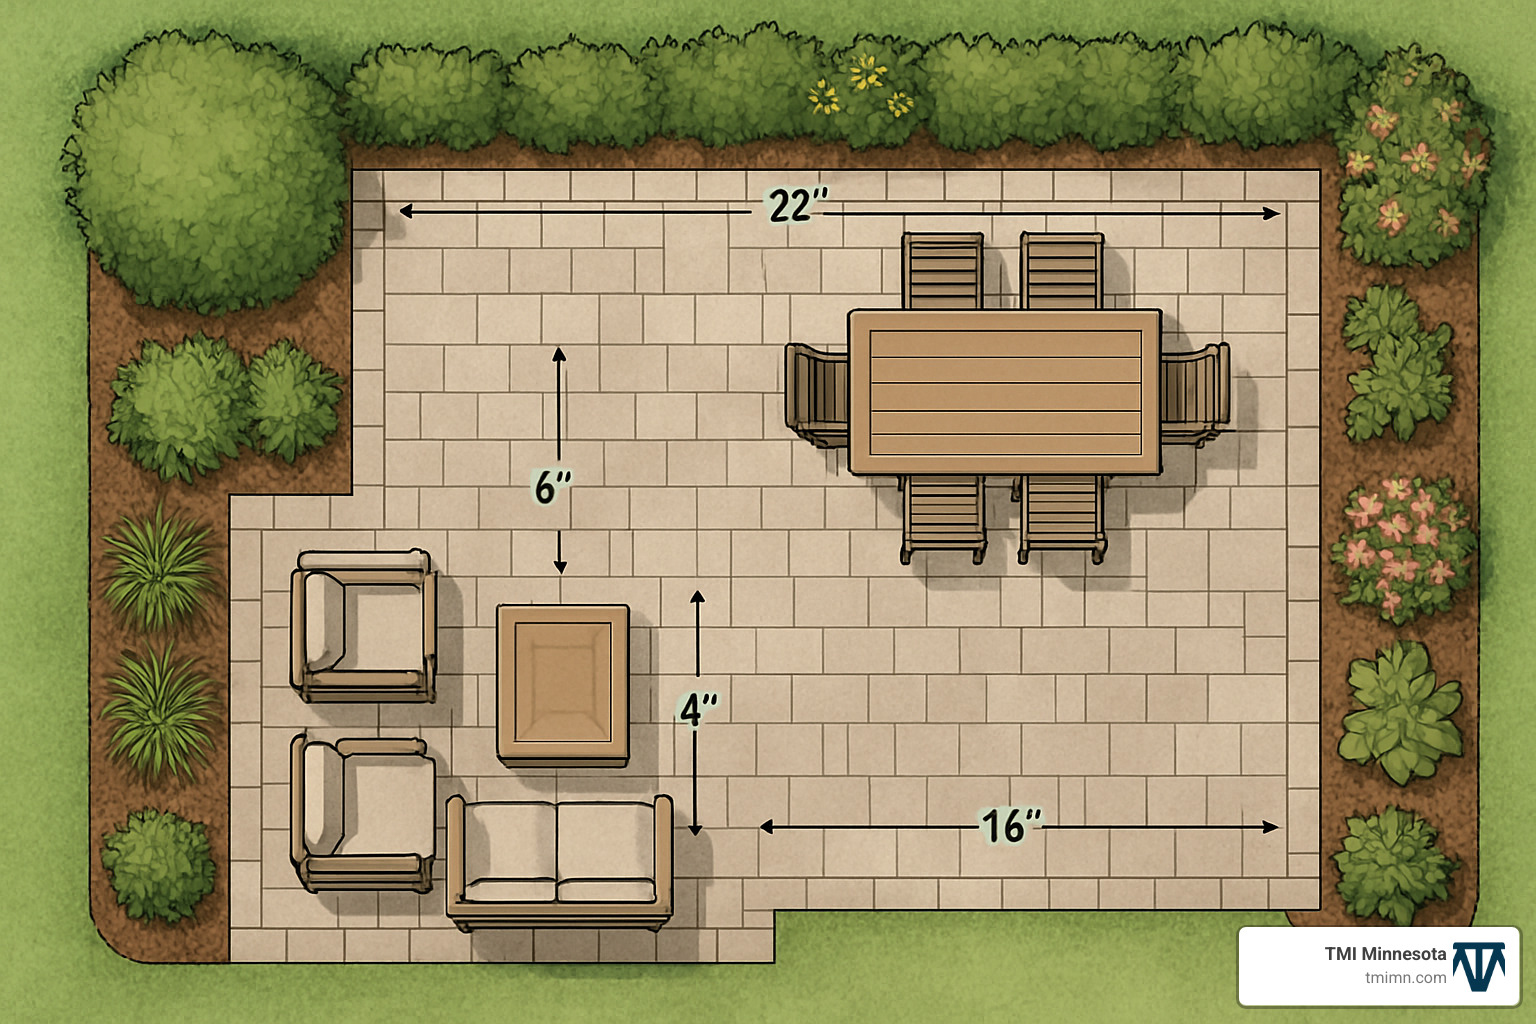
Minnesota’s freeze-thaw cycles demand special attention during planning. Our harsh winters can shift improperly installed pavers, so proper base preparation becomes even more critical in our climate (we’ll cover specific depth requirements later).
Before grabbing your shovel, check if you need permits. While many residential paver projects don’t require official paperwork, larger installations or those affecting drainage patterns might need approval. A quick call to your local building department can save you from potential fines down the road.
Need help figuring out the perfect design for your space? Check out our Hardscape Design Services for professional guidance.
Choosing a Layout & Pattern
The pattern you select dramatically influences both aesthetics and function. Here are some popular options that work beautifully in Minnesota landscapes:
Running bond creates a classic brick wall appearance with each paver offset by half its length. It’s straightforward to install and works well for walkways and patios. Herringbone arranges pavers at 45° or 90° angles in a V-shaped pattern, providing excellent interlocking strength—perfect for driveways that need to handle vehicle weight. Basket weave patterns place pavers in pairs for a woven look that’s charming for garden paths and lighter-traffic areas. For something special, circle kits offer pre-designed components to create round features like fire pits or decorative focal points.
When selecting your pattern, consider your paver shapes and sizes. Rectangular pavers work beautifully in herringbone patterns, while square pavers might be better suited for basket weave designs. Most manufacturers provide pattern guides that help you visualize the finished project.
Budgeting Time & Labor
Let’s be honest—installing how to install hardscape pavers is physically demanding work. For a typical 400 square foot patio (20′ x 20′), you’ll move and place over 10 tons of material. Yes, you read that right—ten tons!
Most DIY patio projects require a full weekend with at least one helper. Here’s a realistic timeline:
Day 1: Mark your area, excavate, install geotextile fabric, add and compact base material
Day 2: Screed sand, lay pavers, install edge restraints, sweep in joint sand, compact
Consider logistics for material delivery. Pavers arrive on pallets, while base material and sand typically come in bulk. Make sure delivery trucks can access your drop site, and you have adequate space to store materials until you’re ready to use them.
While professional installation typically costs $30-$35 per square foot, DIY projects often save 30-50% of that expense. These savings come at the cost of your time and sweat equity, but many homeowners find the satisfaction of creating their own outdoor space well worth the effort.
Calculate Materials & Gather Tools
Getting your materials right is like planning for a camping trip—you don’t want to run out of food miles from civilization! When installing hardscape pavers, accurate calculations prevent those mid-project panic moments when you realize you’re short on materials.
I’ve seen homeowners scramble when they run out of pavers halfway through, only to find the replacement batch has slight color variations. Trust me, you’ll want to avoid this headache!
For your paver project, you’ll need these essential materials:
Gravel base material forms your foundation—typically 3/4″ crushed stone that locks together for stability. Bedding sand creates that smooth, level surface for your pavers to rest on (remember to use coarse concrete sand, not playground sand). The pavers themselves come in countless styles and colors to match your vision. Edge restraints keep everything from shifting over time, while geotextile fabric acts like a barrier between your soil and base material, preventing them from mixing. Finally, polymeric sand sweeps between your pavers and hardens when wet, locking everything in place.
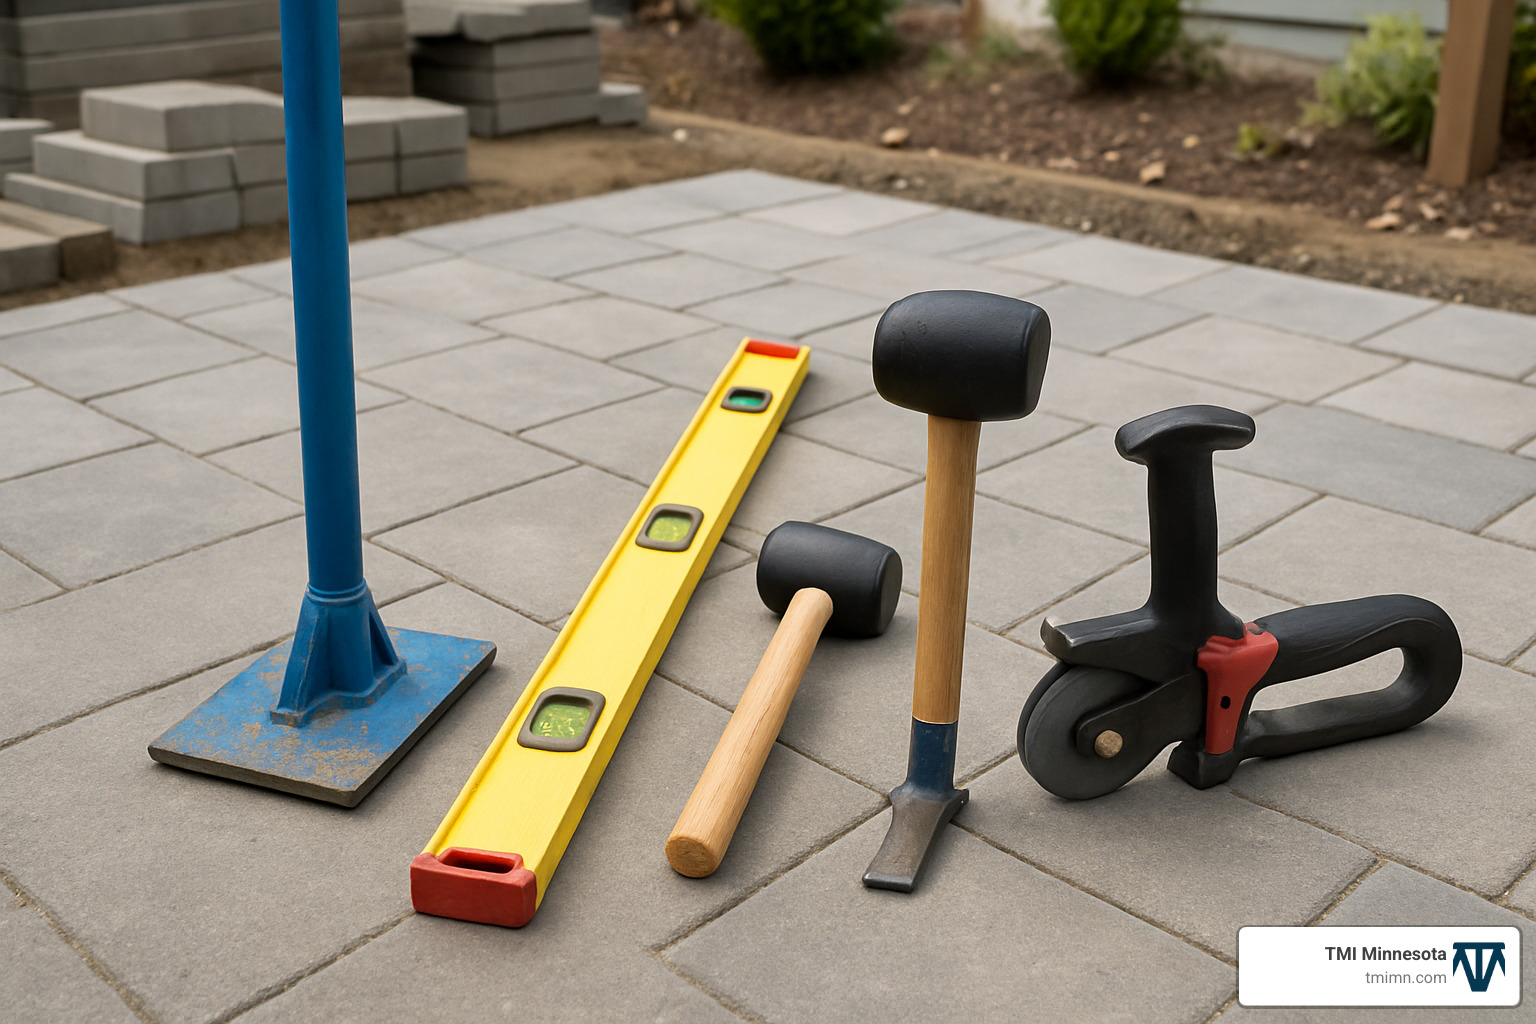
When calculating quantities, always add that safety buffer. For pavers, measure your square footage and add 5-10% extra for cuts and waste. For a 4″ thick base, multiply your square footage by 0.33 to determine cubic yards needed. Your 1″ sand layer requires about 0.083 cubic yards per square foot of patio. For polymeric sand, check the bag—most cover 50-75 square feet per 50-pound bag.
Your tool collection should include excavation tools (shovels, picks, wheelbarrow), marking tools (stakes, string, paint), leveling tools, compaction equipment, cutting tools, installation tools, and safety gear. Never skip the safety equipment—your eyes, ears, lungs, and knees will thank you!
Using Online Calculators
Online calculators take the math anxiety out of material planning. Most paver suppliers offer these handy tools on their websites, where you simply enter your project dimensions, paver style, and base depth to get precise quantities.
How to install hardscape pavers properly means accounting for compaction. Your base material will shrink by 10-20% when compacted, so factor this into your calculations. As the old builder’s saying goes: “Measure twice, order once…plus a little extra.”
When using these calculators, having your exact measurements ready saves time. Measure the length and width of your project area, and know the depth of base you’ll need for your climate (more on that in the next section).
Tool Rental vs Purchase
For weekend warriors tackling a one-time paver project, renting specialized equipment makes perfect financial sense. Why spend $1,000+ on a plate compactor you’ll use once when you can rent one for about $150 a day? The same goes for masonry saws, which rent for $75-$100 daily versus purchasing for $500-$1,000.
However, some tools deserve a permanent spot in your garage. Quality hand tools like shovels, levels, and rubber mallets will serve you well across countless home projects. If you’re planning multiple hardscape projects or enjoy DIY home improvement, investing in these basics pays off.
Budget-conscious homeowners can find decent tools at discount retailers. Just remember that with tools, as with most things in life, you often get what you pay for. That $10 trowel might bend on its first encounter with Minnesota’s clay soil!
At TMI Minnesota, we’ve helped countless homeowners calculate their materials accurately, and we’re happy to provide guidance if you’re unsure about quantities for your specific project. After all, successful how to install hardscape pavers projects start with proper planning and the right materials on hand.
Prepare the Site: Dig, Grade, and Build the Base
The magic of a lasting paver installation happens below the surface. Think of your base as the foundation of a house—cut corners here, and you’ll pay for it later!
Start by excavating your project area to the proper depth. Here in Minnesota, you’ll want to dig 7-9 inches below your desired finished height to make room for:
- 4-6 inches of compacted base material
- 1 inch of bedding sand
- Your pavers (usually 2-3 inches thick)
For driveways that’ll handle the weight of vehicles, you’ll need to go deeper—about 12-14 inches total. This extra depth isn’t just a suggestion; it’s what stands between you and a driveway that sinks under your car’s weight!
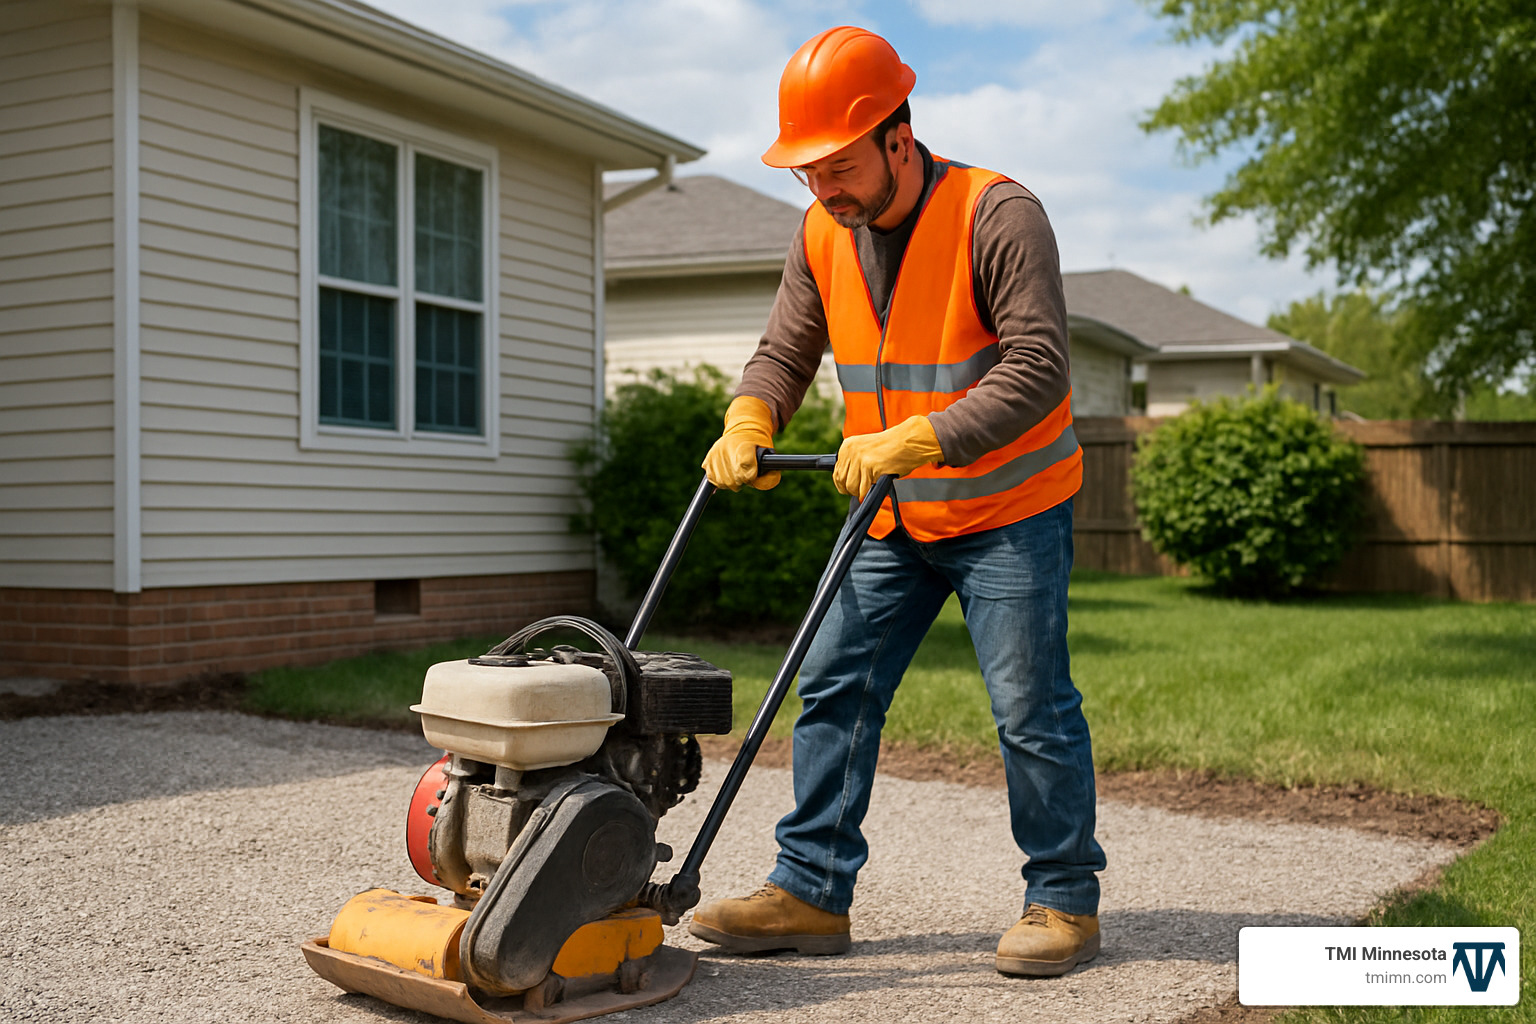
Once you’ve dug out your area, don’t skip the crucial step of compacting the exposed soil. I’ve seen too many DIYers jump straight to adding gravel, only to watch their beautiful patio develop dips and waves a year later. After compaction, roll out geotextile fabric across the entire area, overlapping seams by 12 inches and running it up the sides. This fabric is like the peacekeeper between your base material and native soil—it keeps them from mixing and compromising your base.
Now comes the workout portion of how to install hardscape pavers—adding your base material. Rather than dumping it all at once, add it in 2-3 inch “lifts,” compacting thoroughly between each layer. Yes, it’s more work, but this approach ensures even compaction throughout. Each inch of base material needs about 1,000 pounds of compaction force to properly lock together.
Before moving on to sand, install your edge restraints directly on the compacted base. These unsung heroes prevent your pavers from spreading and shifting over time. They’re especially important for walkways and patios that don’t have structures (like a house wall) on all sides to hold everything in place.
Climate Matters: Base Depth by Region
Living in Minnesota means we can’t ignore the freeze-thaw tango that happens every year. When moisture in the ground freezes, it expands and can push pavers upward, creating what we call “frost heave”—that annoying unevenness that can trip you up in spring.
For Twin Cities projects, we at TMI Minnesota recommend:
- Minimum 6-inch base for patios and walkways (not the 4-inch minimum you might see in milder climates)
- 12-14 inch base for driveways (because vehicles plus freeze-thaw equals potential disaster)
- Proper drainage throughout the base layer (water trapped = problems)
- Angular, crushed stone that allows water to drain rather than pool
If your yard has that sticky Minnesota clay soil, consider adding another 2 inches to your base depth and maybe incorporating a layer of biaxial geogrid for extra stability. It’s a bit more work and expense now, but it beats redoing the whole project in a couple of years!
For smaller projects or areas with tight access, synthetic base panels are worth considering. These interlocking panels reduce digging depth and heavy lifting while providing excellent drainage. They cost more up front than traditional gravel, but might save your back—and time!
Checking Slope & Drainage
Water is the enemy of flat surfaces in Minnesota. Between melting snow and spring downpours, proper drainage isn’t optional when learning how to install hardscape pavers. The industry standard for patio slope is 1/4 inch per foot (a 2% grade) away from any structures.
Here’s a simple way to check your slope during installation:
- Set up a string line from your starting point (usually your house)
- Measure how far your patio extends (the run)
- Calculate your needed drop (1/4″ × number of feet)
- Adjust your string line to show this slope
- Use the string as your guide when leveling your base
For example, if your patio extends 8 feet from your house, you need a 2-inch drop from house to edge (8 feet × 1/4 inch = 2 inches). It doesn’t sound like much, but it’s the difference between water flowing away from or toward your foundation.
For larger installations, you might want to incorporate channel drains or dry wells to manage water effectively. Water that pools on or under your pavers is particularly troublesome in our freeze-thaw climate—it can turn your beautiful patio into a frost-heaved mess by spring.
Remember what we always tell our TMI Minnesota clients: “You can’t see a good base when the project is done, but you’ll definitely notice a bad one!” Taking time to properly prepare your site is the single most important factor in creating a paver installation that will look beautiful for decades to come.
How to Install Hardscape Pavers: Step-by-Step
With your base properly prepared and compacted, it’s time for the most exciting part – actually laying those pavers! This is where your outdoor space really starts to take shape, so let’s make sure it looks professional.
Start by spreading a 1-inch layer of bedding sand over your compacted base. Think of this sand as your paver’s cushion – it allows for tiny height adjustments and creates that perfectly smooth surface you’re after. For an even sand depth (which is crucial), set up screed pipes – typically 1-inch PVC pipes – on your base as guides. Place these pipes parallel to each other, then drag a straight 2×4 across them to level the sand between.
One important tip: avoid walking on or compacting your freshly screeded sand before laying pavers. Those footprints will cause problems later!
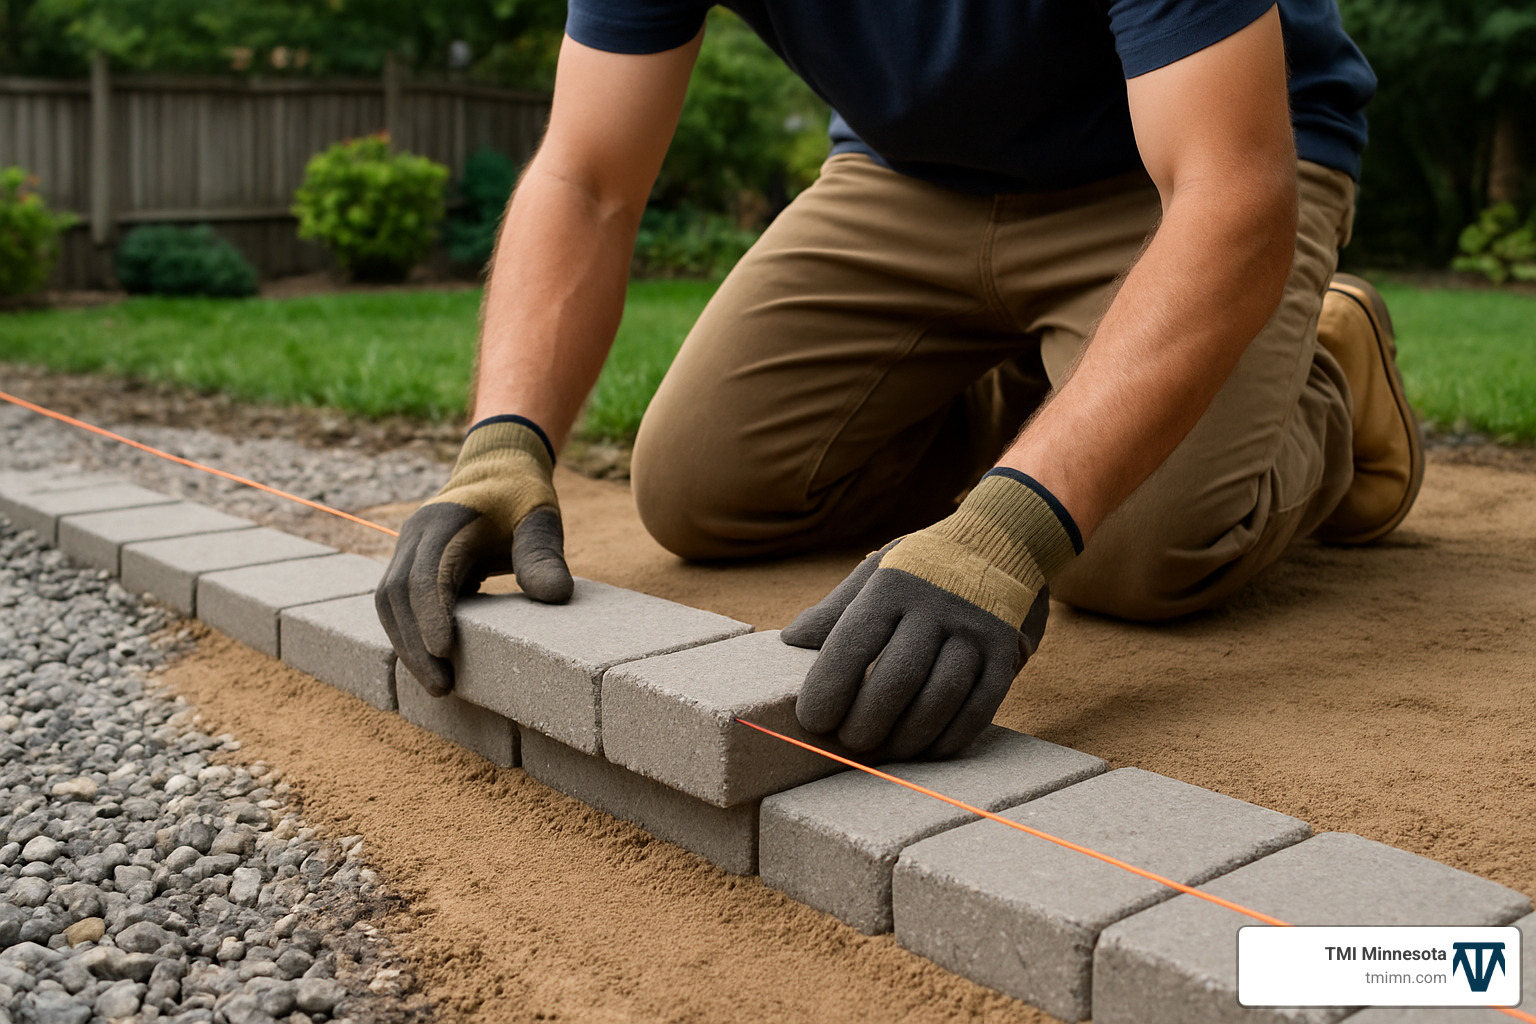
Always begin laying pavers at a 90-degree corner, preferably starting from the lowest point and working upward. Use what pros call the “click-and-drop” method – set each paver straight down rather than sliding it into position, which disturbs your sand bed. Leave consistent 2-5mm gaps between pavers for your joint sand later.
“I always tell my DIY friends to use a string line,” says our lead installer at TMI Minnesota. “It’s the simplest way to keep your rows straight.” Check your work periodically with a level, and if a paver sits too high, give it a gentle tap with your rubber mallet. Too low? Just add a pinch of sand underneath.
After placing all your full pavers, it’s time for the slightly trickier part – cutting pieces to fit the edges. Once those edge pieces are in place, install your edge restraints if you haven’t already done so.
The final step is sweeping polymeric sand into the joints between pavers. Make sure this sand fills the entire depth of each joint! Then run your plate compactor (with a rubber pad attachment) over everything to vibrate the sand deeper into joints and level any slightly uneven pavers. Sweep in more sand as needed, then lightly mist with water to activate the polymeric sand’s binding agents. The water activates the polymeric sand’s “glue,” locking your pavers in place.
How to Install Hardscape Pavers on a Slope
Installing pavers on a slope follows the same basic principles but requires a few extra considerations to prevent your beautiful new pavers from sliding downhill.
When tackling a slope, always start at the bottom and work your way upward. Use the “stepping” method, where each course of pavers sits slightly higher than the previous one. It’s also smart to install edge restraints as you go rather than waiting until the end.
Larger, heavier pavers tend to be more stable on slopes, and you’ll want to pay extra attention to your joint sand application and compaction. For steeper slopes (greater than 6% grade), consider breaking up the area with retaining walls to create terraced levels that are not only easier to pave but also more functional for outdoor living.
Cutting & Fitting Edges
Those perfect edges and curves are what separate amateur jobs from professional-looking installations. While cutting pavers might seem intimidating, with the right approach, you can achieve clean, precise cuts.
For straight cuts, mark your cutting line clearly, then use a masonry saw with a diamond blade. Safety first! Always wear eye protection, ear protection, and a dust mask. Make your cut in a single pass if possible, applying steady pressure.
Curved cuts or notches might require multiple straight cuts, cleaning up the edge afterward with a hammer and chisel. A paver splitter is another option for straight breaks without the dust and noise of a saw.
Many of our TMI Minnesota clients love the look of a border course – a row of pavers in a contrasting color or different orientation around the perimeter. This not only creates a finished look but can also reduce the need for tiny cut pieces that might be less stable.
Joint Filling & Final Compaction
How to install hardscape pavers properly means paying special attention to the joints. Those small spaces between pavers play a huge role in the stability of your installation. Polymeric sand is our go-to material because it hardens when wet to lock pavers in place, prevents weeds, resists erosion, and even deters insects from making homes between your pavers.
To apply polymeric sand effectively:
- Ensure pavers are completely dry
- Sweep sand diagonally across joints for complete filling
- Use your plate compactor to vibrate sand deeper
- Add more sand until joints are completely filled
- Remove all excess sand from paver surfaces
- Mist with water according to manufacturer instructions
- Respect the drying time – typically 24 hours for foot traffic and 72 hours for vehicles
How to Install Hardscape Pavers in Cold Climates
Here in Minnesota, we know a thing or two about harsh winters and their effects on outdoor spaces. To ensure your paver installation stands up to our cold climate:
Use an “open-graded” base material that allows water to drain freely rather than trapping it where it can freeze and expand. Consider adding 2-3 extra inches to your base depth beyond standard recommendations – that extra cushion makes a difference during freeze-thaw cycles.
Install geotextile fabric not just on the bottom but also on the sides of your excavation. Choose pavers specifically rated for freeze-thaw conditions, and consider using a stronger polymeric sand designed for harsh climates.
Be cautious with de-icing salts, as they can damage certain types of pavers. Many of our Minnesota customers opt for permeable paver systems that allow water to drain through the joints and base rather than running off the surface – particularly effective for managing snowmelt and reducing ice formation.
With proper installation techniques and these climate-specific adjustments, your paver project will not only look beautiful but will stand up to our Minnesota winters for years to come. For more guidance on how to install hardscape pavers specifically for our climate, check out our Hardscape Design Services.
Finishing Touches, Maintenance & Upgrades
Your beautiful new paver patio is installed—congratulations! Now let’s talk about those finishing touches that transform it from merely functional to truly spectacular. Many homeowners wonder if sealing is necessary, and while it’s not mandatory, applying a quality sealer does improve colors, block stains, and provide additional protection against Minnesota’s harsh elements. Think of it as sunscreen for your pavers!
Maintaining your paver installation is refreshingly simple. A regular sweep keeps debris at bay, while an occasional rinse with your garden hose washes away dirt before it becomes embedded. For those inevitable spills (we’re looking at you, barbecue sauce), a gentle scrub with mild detergent usually does the trick. Just remember to avoid high-pressure washing above 2000 PSI—it might seem satisfying to blast away dirt, but excessive pressure can damage your pavers and dislodge that carefully applied polymeric sand.
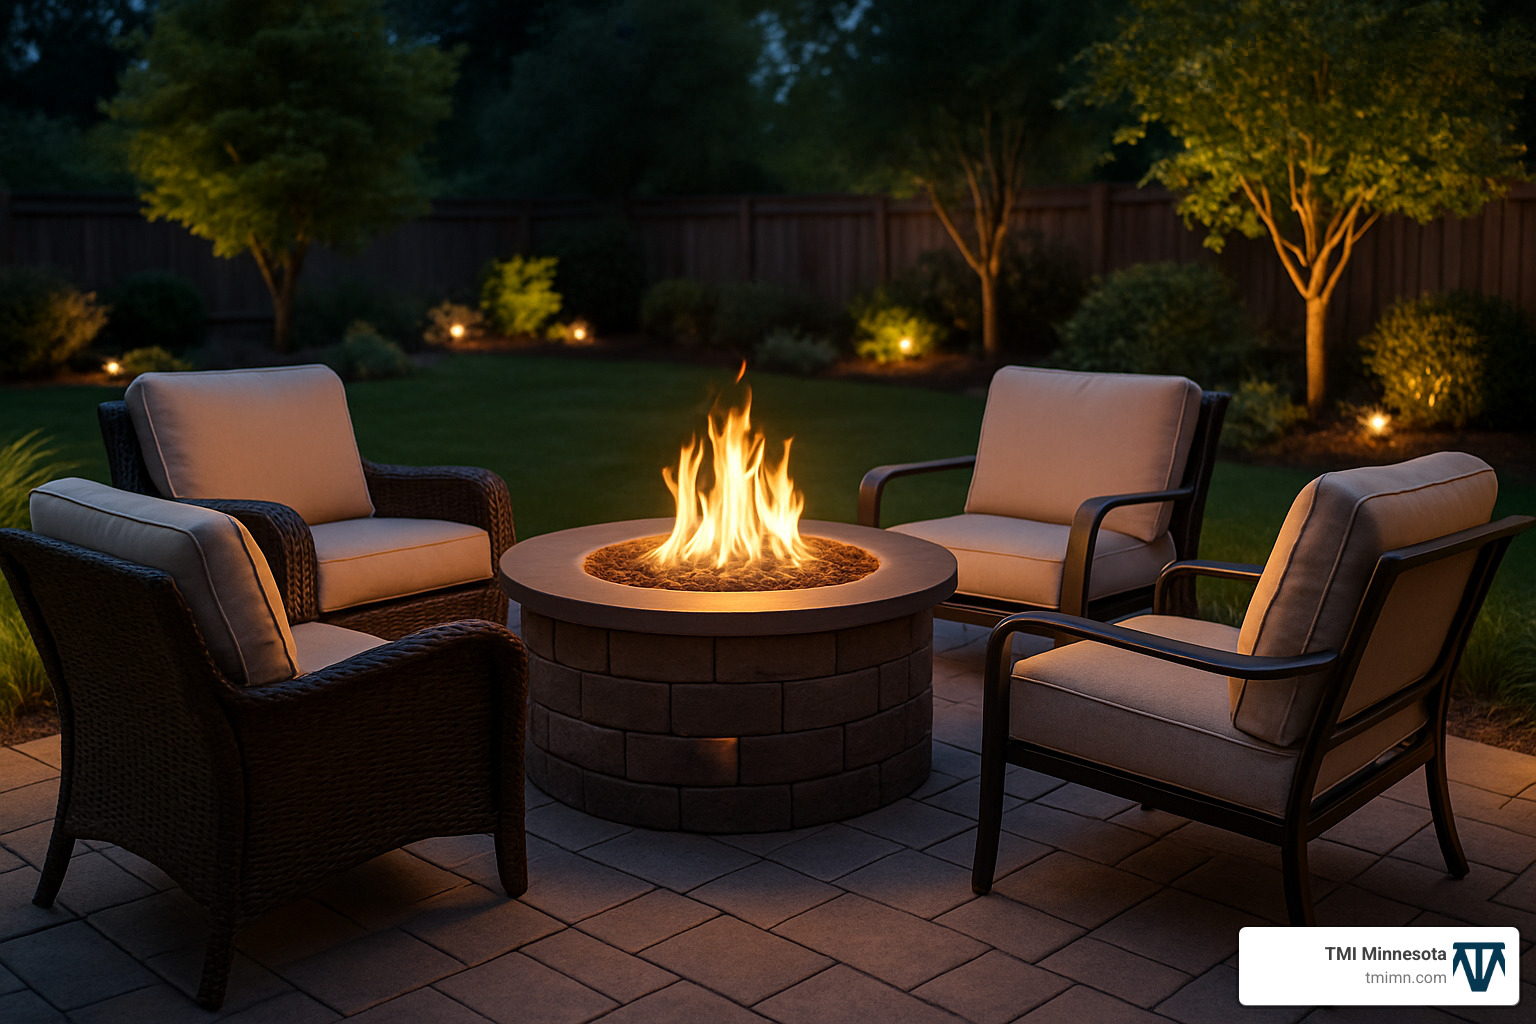
Now that you’ve mastered how to install hardscape pavers, why not take your outdoor living space to the next level? A fire pit creates an instant gathering spot where memories are made on cool Minnesota evenings. Pre-designed kits make installation surprisingly straightforward—just be sure to use fire-rated materials and maintain proper clearances for safety.
Retaining walls offer both practical benefits and aesthetic appeal. Low walls (18-24 inches) provide casual seating and define your space, while taller structures can transform a sloped yard into usable terraced areas. These walls complement your pavers beautifully and can be built using the same base preparation techniques you’ve already learned.
Outdoor lighting isn’t just pretty—it extends your enjoyment of your paver patio well into the evening hours while improving safety. Low-voltage systems are energy-efficient and relatively simple to install, even for DIY enthusiasts.
For the ultimate upgrade, consider an outdoor kitchen built directly on your paver foundation. Just remember that heavier elements like grills and countertops may require additional base reinforcement—something our team at TMI Minnesota can help you plan.
When your project wraps up, you’ll likely have some materials left over. Rather than viewing this as waste, consider it an opportunity! Many suppliers accept unused pavers for refunds, often without restocking fees. You might also want to keep a small cache of matching pavers for potential future repairs—trust me, your future self will thank you. For excavated soil and debris, renting a roll-off dumpster is often the most convenient disposal option, though posting free ads for leftover materials can sometimes find them a happy new home.
Looking for more ways to improve your new paver installation? Check out our Backyard Patio Ideas for inspiration that builds on your newly acquired hardscaping skills!
Frequently Asked Questions about Installing Hardscape Pavers
How much material should I order?
One of the most common questions I hear from homeowners is about material quantities. Nothing’s worse than running out of pavers mid-project when you’re on a roll!
For your pavers, simply measure your area in square feet, then add that 5-10% buffer for cuts and waste. Trust me on this—that extra buffer has saved many weekend warriors from Monday morning supply runs.
When it comes to base material, a standard 4-inch base needs about 0.33 cubic yards per 100 square feet. Your bedding sand layer (that critical 1-inch cushion) requires approximately 0.083 cubic yards per 100 square feet.
Here’s something many first-timers miss: base material compacts by 10-20% once you run that plate compactor over it. I’ve seen plenty of DIYers come up short because they didn’t account for this shrinkage. When in doubt, order a bit extra—you’ll thank yourself later when you’re not waiting for a delivery truck while your project sits half-finished.
Do I really need a plate compactor?
I get this question all the time, usually from folks hoping to save on rental costs. The short answer? Yes, you absolutely need a plate compactor.
Hand tampers might seem like a budget-friendly alternative, but they simply can’t deliver the 3,000-5,000 pounds of force needed to properly compact your base materials or seat your pavers. It’s like comparing a hammer to a jackhammer—they’re just not in the same league.
The $150 daily rental fee might feel steep when you’re tallying up project costs, but consider it insurance against future headaches. Without proper compaction, those beautiful pavers will start shifting and settling unevenly within a season or two, especially in Minnesota’s freeze-thaw cycles. I’ve seen too many DIYers try to save here only to spend much more fixing their patios a year later.
Can I build a fire pit or wall on top of my new patio?
Absolutely! Adding features like fire pits, seating walls, or outdoor kitchens can transform your basic patio into an outdoor living room. But there are some important things to keep in mind before you start stacking stones.
First, always use fire-rated materials for any fire feature. Regular landscape pavers can crack or even explode when exposed to high heat—not exactly the evening ambiance you’re going for! Maintain at least 3 feet of clearance from anything that could catch fire, including wooden furniture or structures.
For heavier elements like walls or outdoor kitchens, you’ll need to beef up the base beneath these features. This means deeper excavation and additional compaction in those specific areas. Your standard patio base might support your patio furniture just fine, but that outdoor kitchen island needs extra support.
Whenever possible, I recommend planning these features alongside your initial patio installation rather than adding them later. It’s much easier to prepare the proper foundation from the start than to retrofit it.
Before building any fire feature, take a quick moment to check your local building codes and HOA regulations. Some neighborhoods have specific requirements or restrictions for outdoor fires.
If you’re adding these elements after your patio is complete, you’ll need to carefully remove the necessary pavers, reinforce the base underneath, and then reinstall everything around your new feature. It’s doable, but requires some patience and precision.
For more inspiration on creating the perfect backyard gathering space, check out our Backyard Patio Ideas gallery.
Conclusion
Installing hardscape pavers is a substantial DIY project that requires proper planning, preparation, and execution. While the process involves significant physical labor and attention to detail, the results can transform your outdoor living space and add considerable value to your property.
By following the steps outlined in this guide—from thorough base preparation to proper paver placement and joint filling—you can create a beautiful, durable hardscape that will serve you well for decades to come. The most important aspects of paver installation happen below the surface, where a properly prepared base provides the foundation for long-term success.
Here at TMI Minnesota, we’ve helped countless Twin Cities homeowners create stunning outdoor spaces using leading-edge hardscape products and installation techniques. Whether you decide to tackle your paver project yourself or enlist professional help, we hope this guide has provided valuable insights into the process.
Ready to see what’s possible for your outdoor space? Visit our Hardscape Gallery for inspiration, or contact us to discuss how we can help transform your yard into the outdoor living area you’ve always wanted.